


Ah! Engine mounts. This fixes vibration, rocking engine, and lost power from the engine torquing around in the engine bay. Really broken mounts can even cause axle failure!
You need to find a way to get the new mounts pressed into the brackets. You can use a huge press – or you can go to a shop with the bracket and the mount and have them do it. In my case, I had a local NAPA store that has a strange machine shop right inside (must be a big Napa store only thing). They charged me $20.00 to do the work.
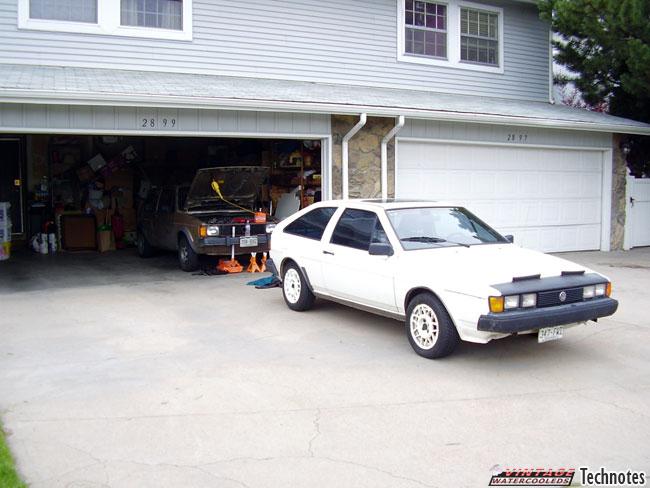
Special thanks to forum member Southcross for helping me on this technote. We are doing this to his car (81 Rabbit S) and my car (84 Scirocco 8v) this weekend. My car has a 1.8 8v (JH) and Southcross’s car has a 1.7 8v (EN). My car is stock non-A/C, and Southcross’s has been converted to non-A/C.
Yay! Biggest. Technote. Ever. – yep – almost 100 pictures. Hopefully these will explain everything!
The Mounts
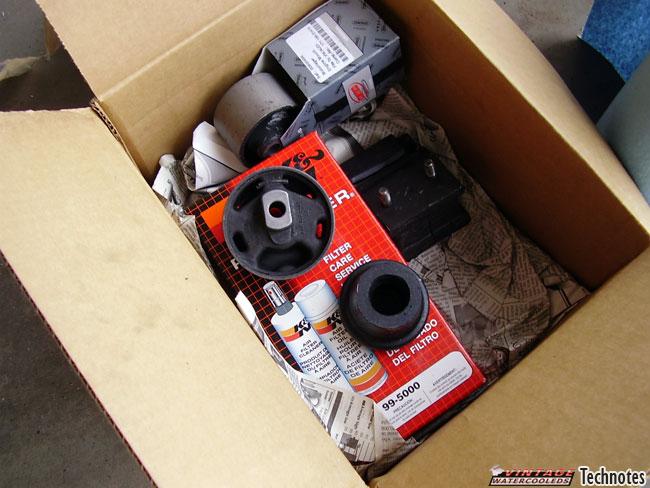
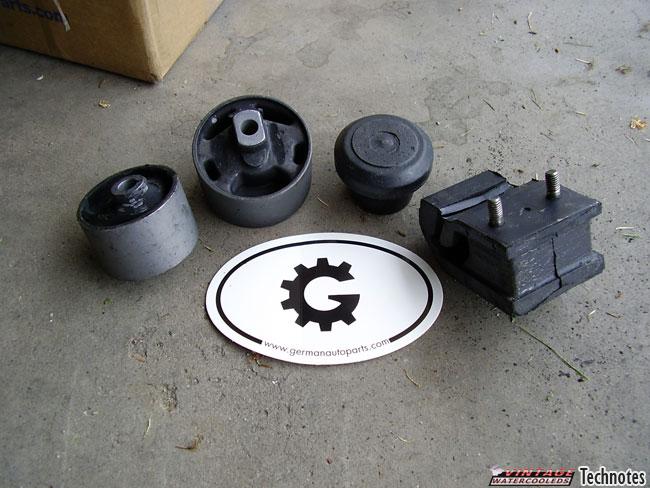
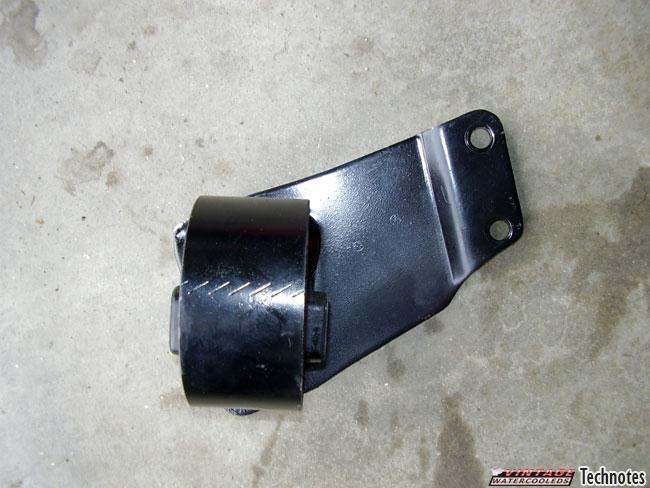
I got heavy-duty front and side mounts, and a regular Transmission mount. These guys shipped quick, I also ordered the K&N filter recharge kit – I use it in the Filter Cleaning Technote. The large one is used on the passenger side mount, while the smaller one is used for the transmission mount on the other side.My car is going to stay a daily driver – so I didn’t get any polyurethane mounts. I will tell you when to install them if you are using them later in this technote.

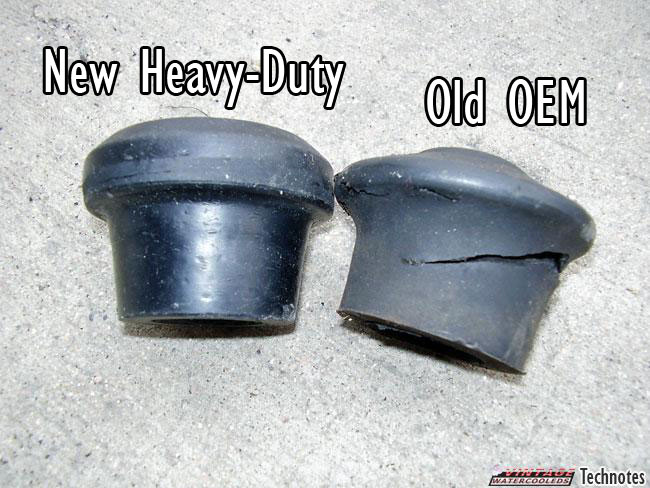
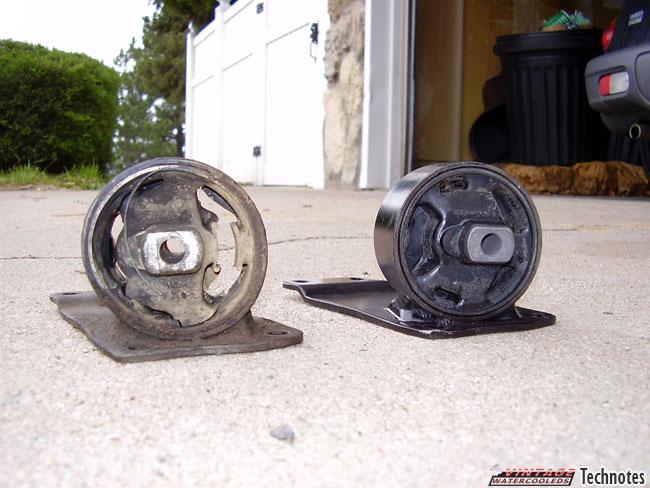
Here’s a few pictures showing the differences between the OEM and HD mounts. You can tell – especially with the front mount that they are thicker and will last longer under higher power.
Cleaning up the brackets, prepping the mounts
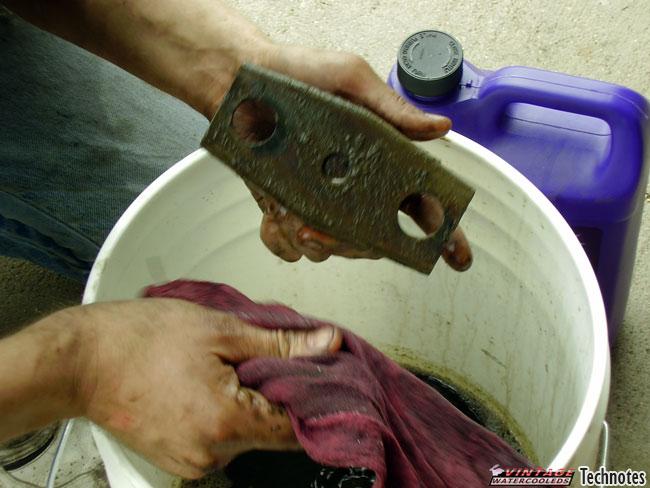
By far, the easiest way to do this is to get the engine mounts from a junkyard car, or in my case, a parts car. My parts car (my old rocco) was very VERY greasy – So I just got a jug of engine degreaser and threw all of the mounts in, let them soak for a while.
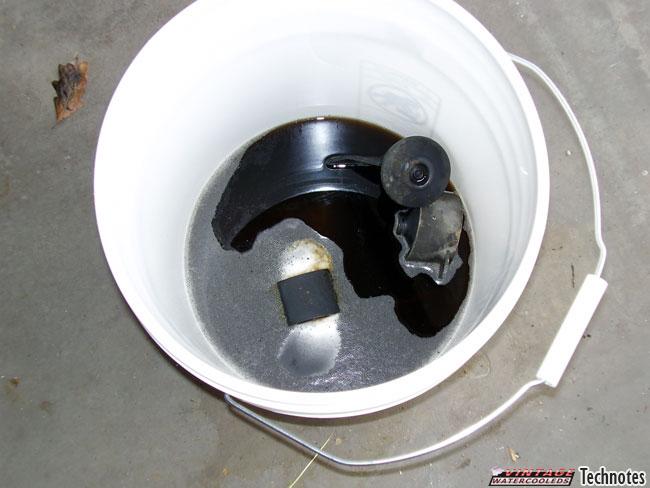
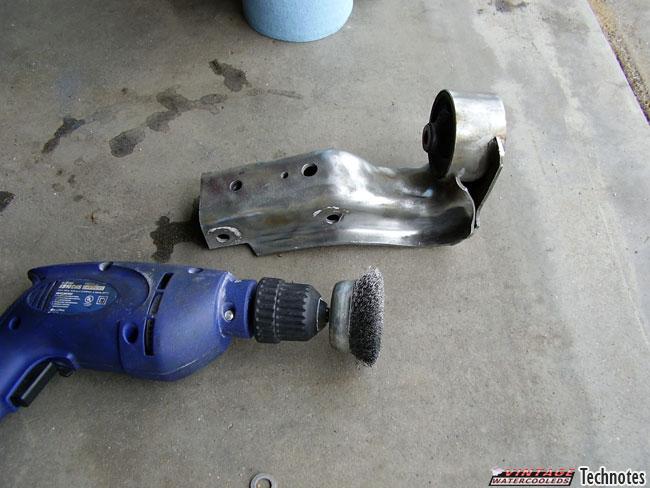
After they soaked for about two hours, I got them out of the bucket, and wiped them off with a shop rag. Even the paint came off of them – which scares me just a bit – but I was going to repaint them anyway – so that was actually good. I went over the mounts with a wire brush on a drill to prepare them for the paint.I would suggest getting the mounts pressed in before painting them – the press scratches the paint right off the brackets. The paint will just chip off the new mounts after a few months – so you can just paint everything.
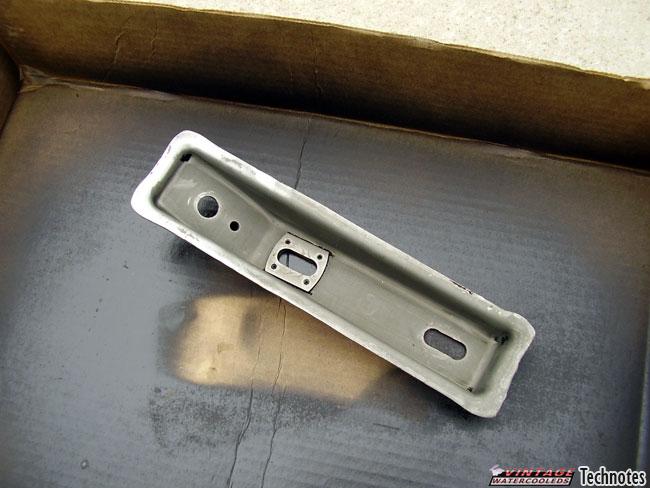
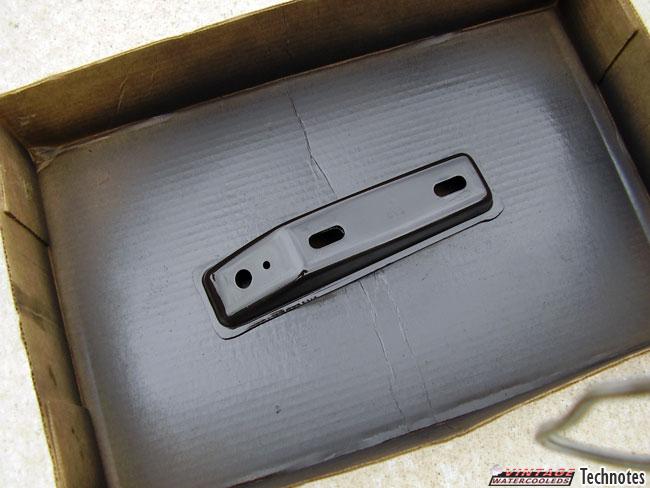
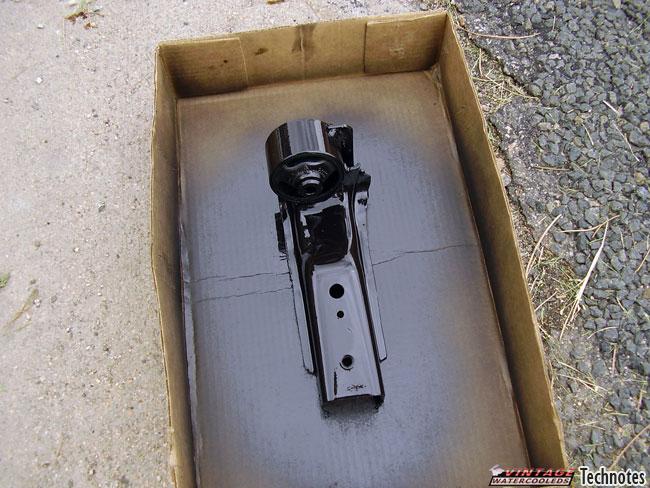
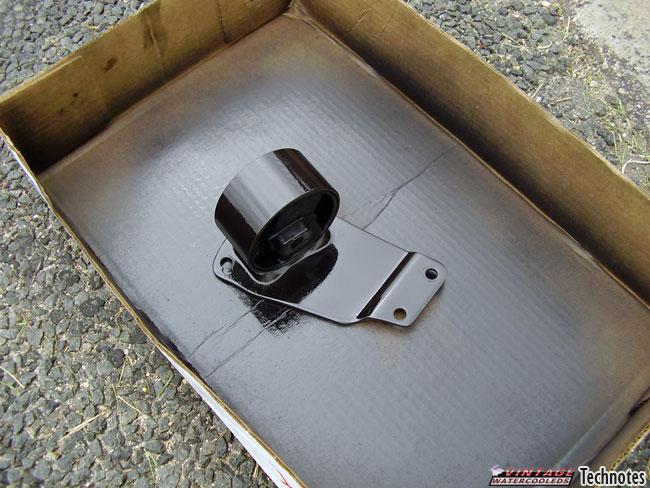
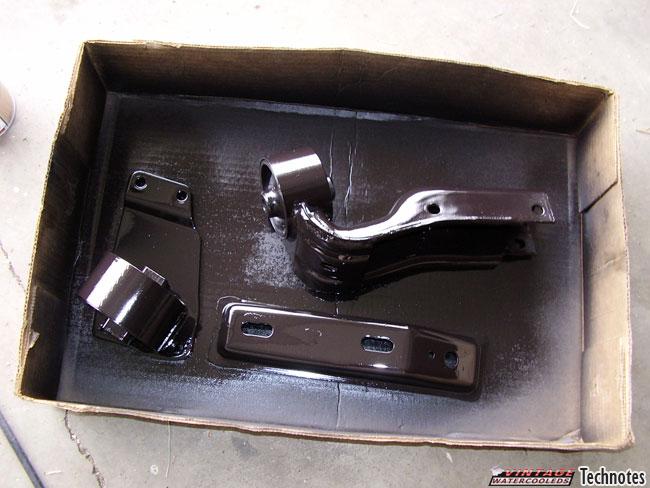
I used some black exhaust manifold paint – which is not as good an idea – it takes forever to dry! Engine paint will do as well.Give them a few coats – the first one a very light coat. Let them dry before handling them.
After you get the mounts painted you are ready to go.
The Rear Transmission Mount
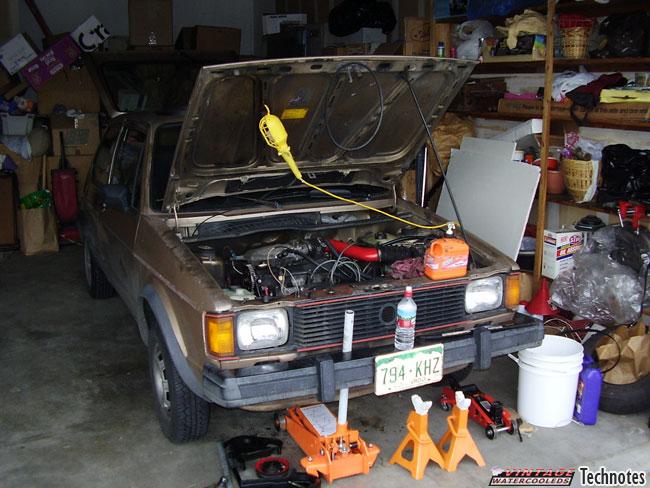
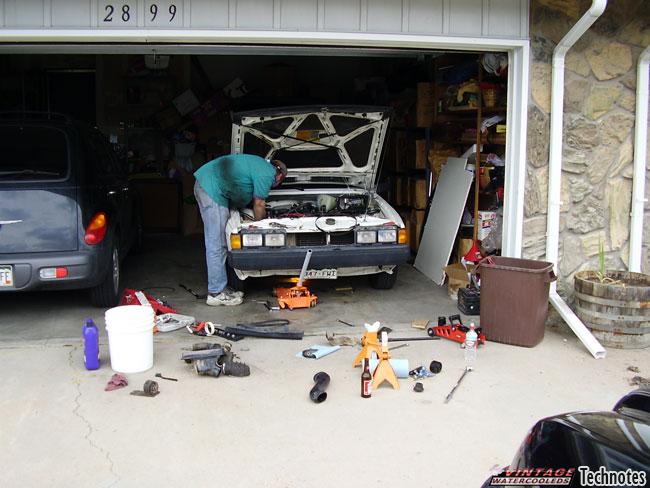
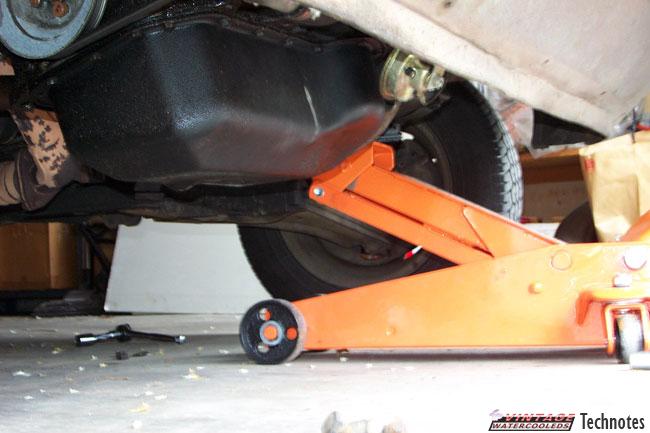
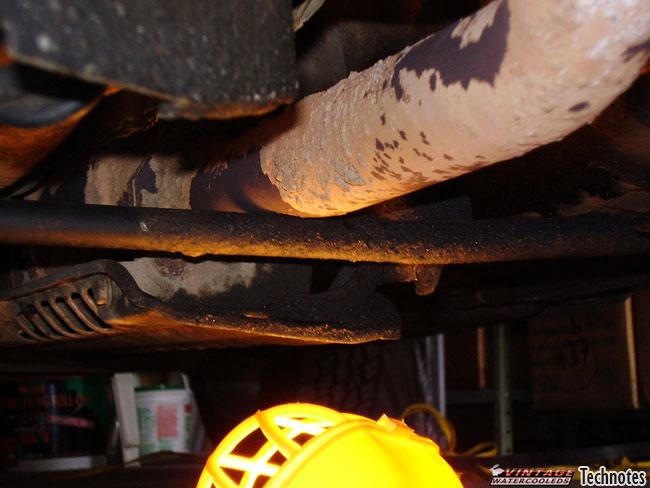
Easiest way to go is to jack up the car, and put it on two jack stands. Then you can work under the car. Here’s some Pics…
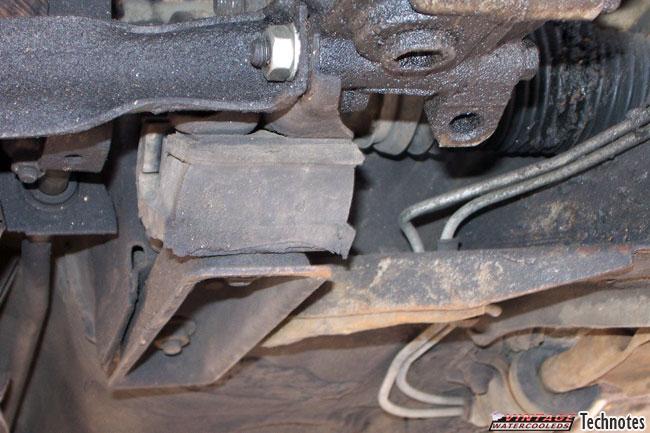
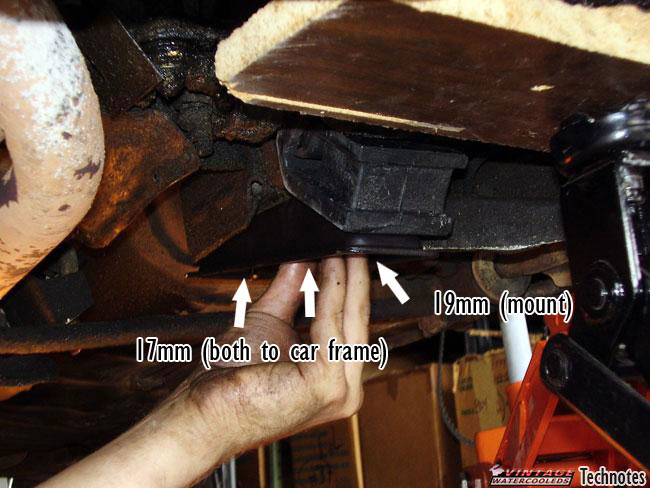
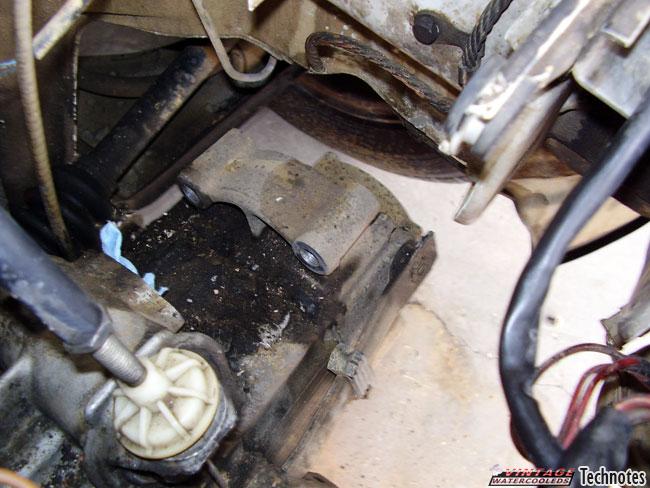
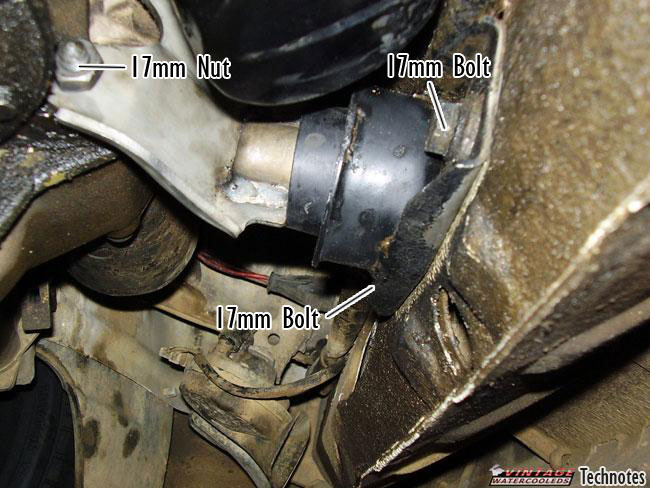
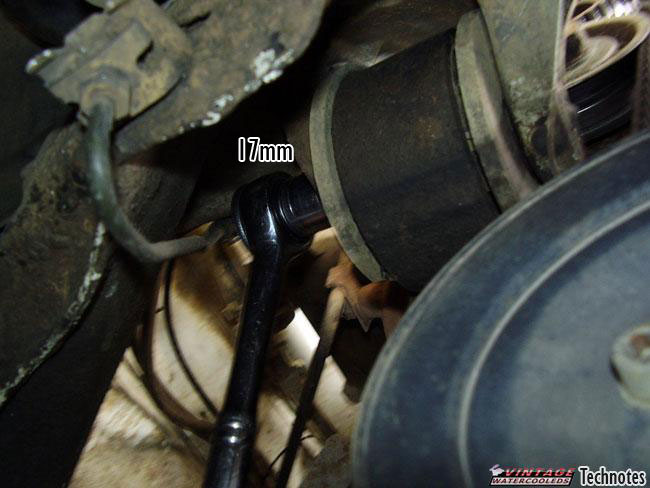
One would think that this is a hard mount to do – but it is actually extremely easy. You can tell you need a new mount here when your old one is twisted and doesn’t line up right. One large 19mm bolt holds the mount to the bottom bracket. Two 17mm bolts hold the bottom bracket to the car. Two 13mm nuts hold the mount to the transmission’s bracket. All you have to do is remove the two top nuts, remove the bottom nut, and loosen the two 17mm nuts so you can get the mount out. You don’t even need to jack the transmission up for this!
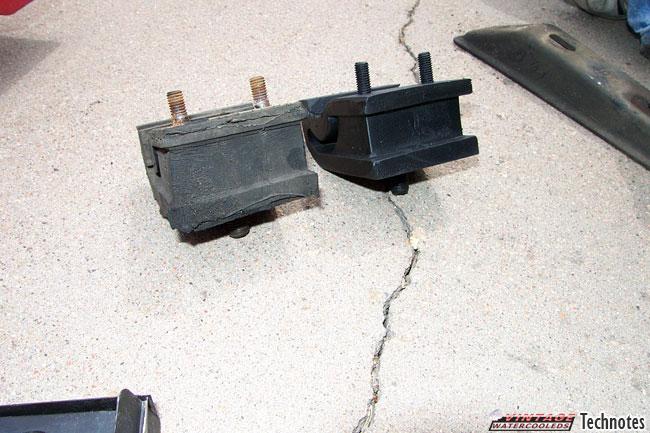
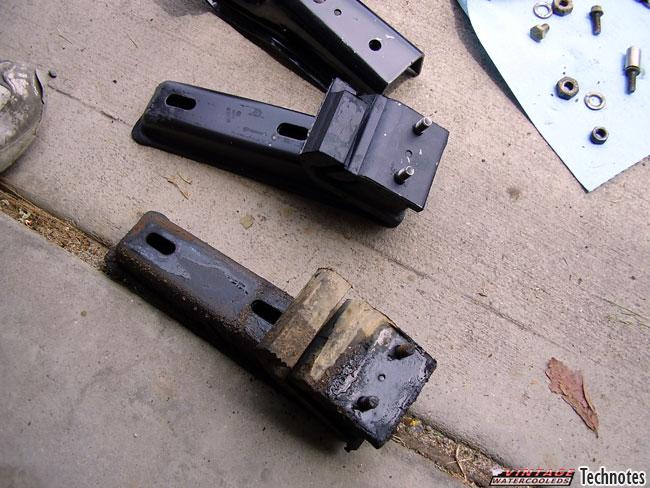
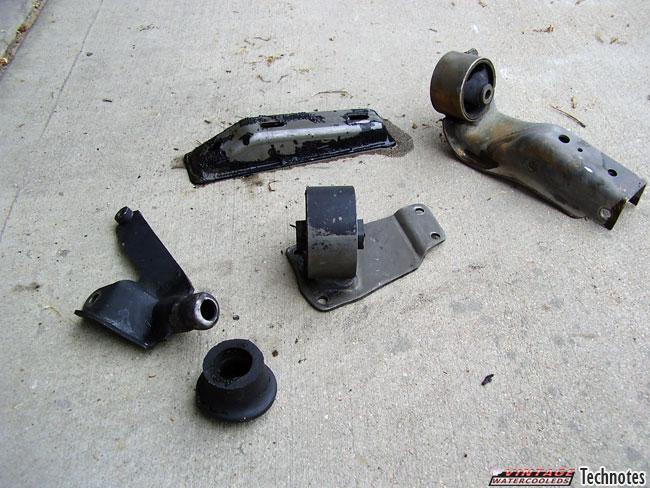
Comparing the mounts – the old mounts on both of our cars actually weren’t that bad – but they felt soft and mushy – and therefore useless. Here is a comparison shot.
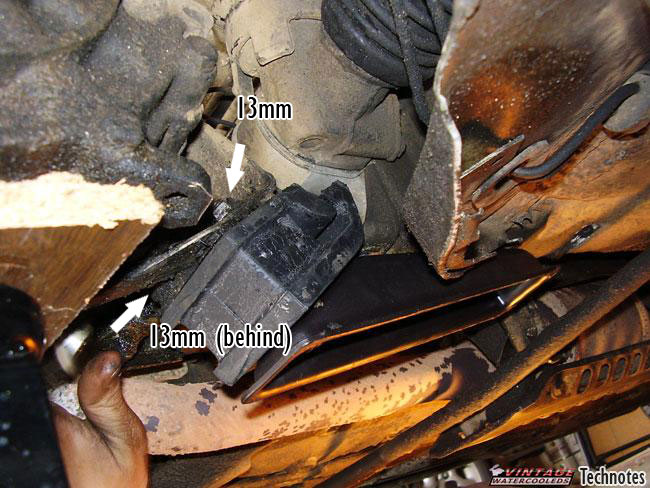
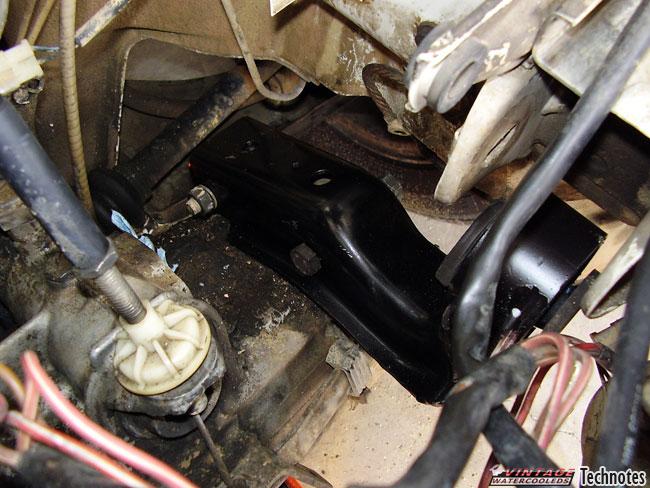
So all you have to do now is throw the new mount in, bolt it up, and call it done! Remember the two 13mm nuts on top. You can’t use a ratchet here – so you just have to suffer with a wrench. We were able to screw the passenger side 13mm nut from above the engine with two 10 inch extensions on the ratchet. It was weird, but it works.
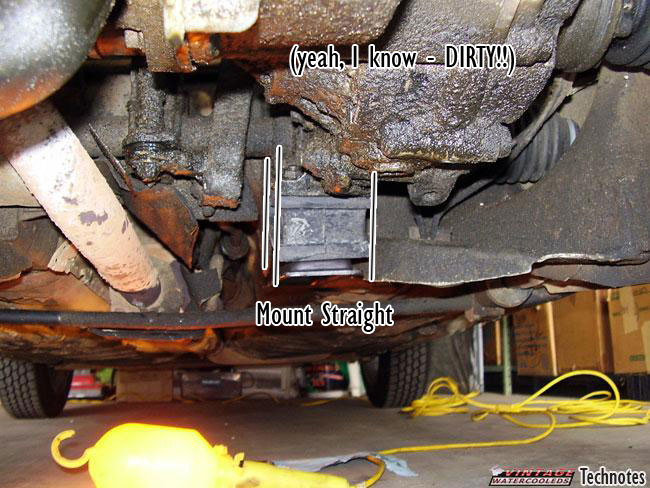
If you are just doing this mount only – you just need to make sure it aligns straight. If it does not – you may have to loosen and re-align your other engine mounts as well. This mount can transmit a lot of vibration to the car (it’s right below the driver’s feet) so it is important that it is mounted correctly.
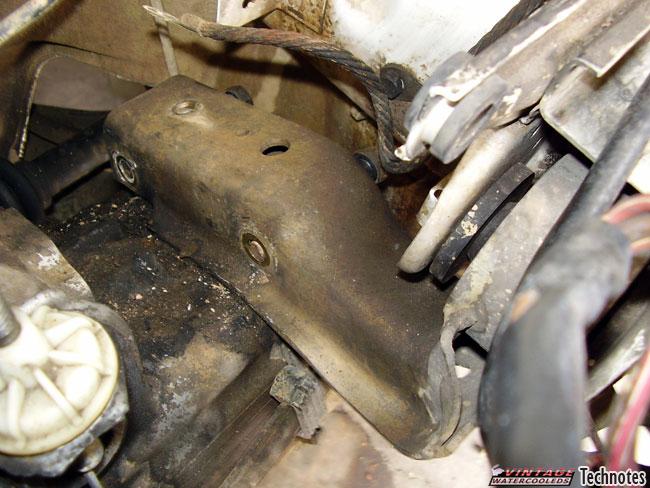
Driver Side: Transmission Side Mount
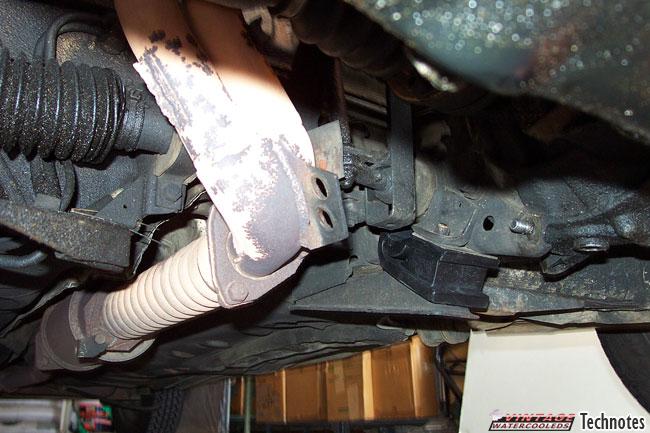
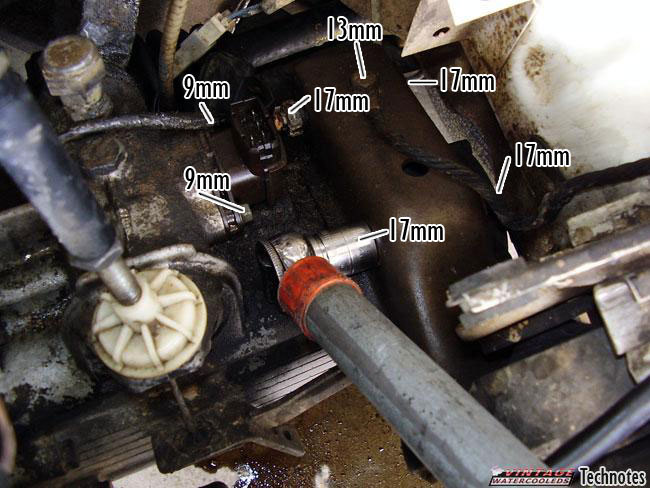
This mount is a lot more evil – but still nothing compared to the passenger mount. You will have to loosen both the transmission and the front mounts to make getting this thing out easier. There is the one bolt holding the mount in – that is 17mm. There are also two bolts holding the bracket to the transmission. These are a little hard to get to.
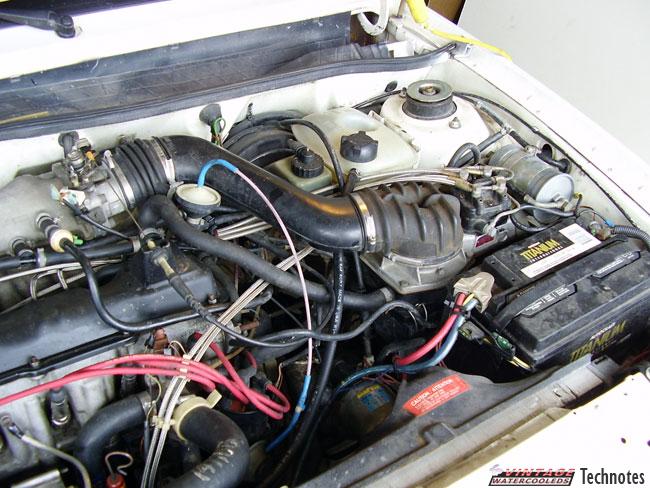
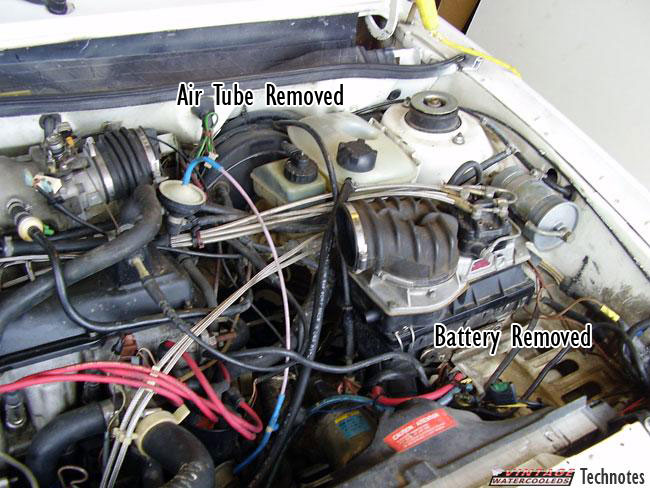
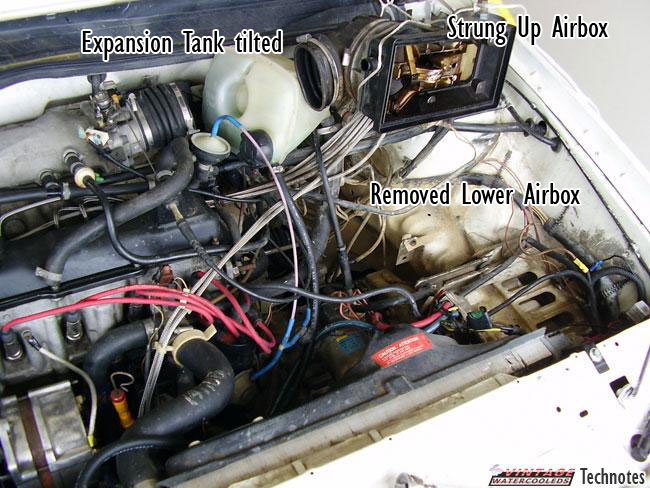
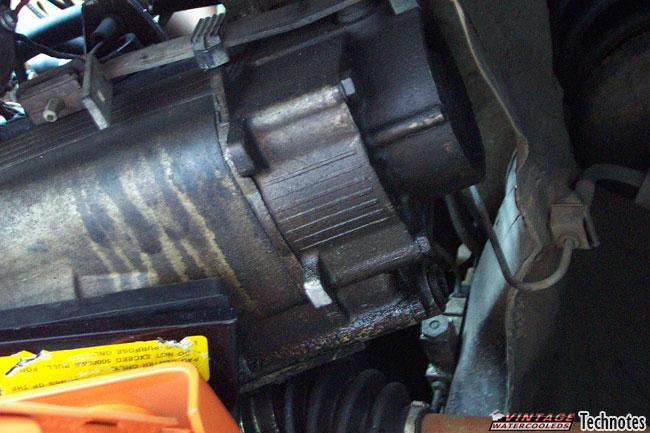
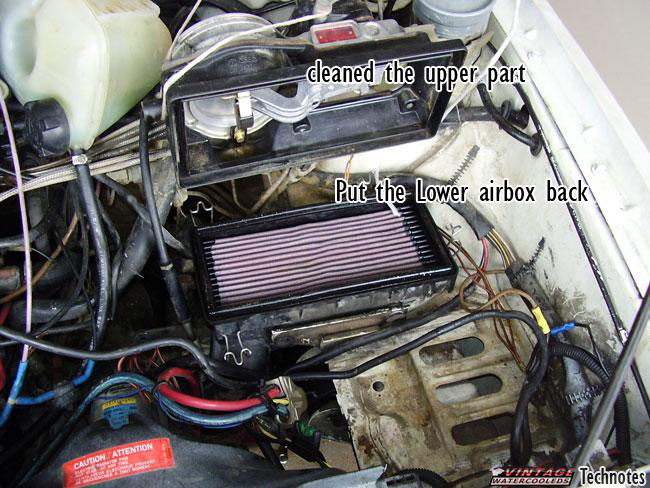
We removed the air hose, and lifted the air box up to access the mount easier.
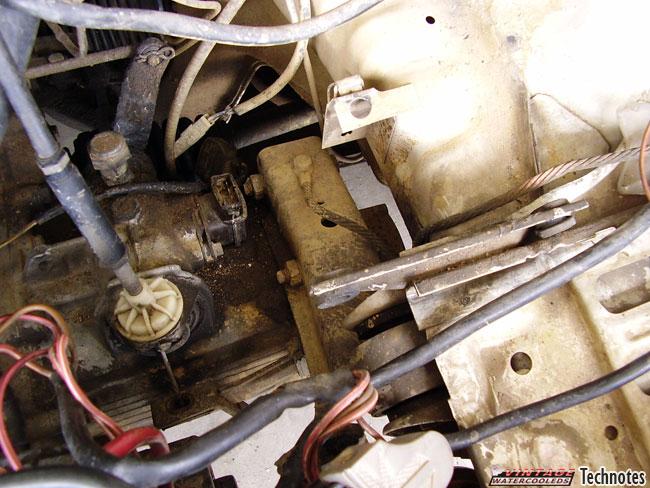
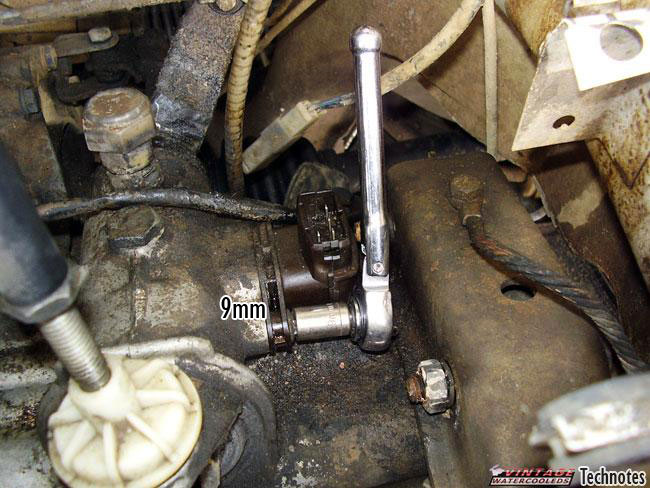
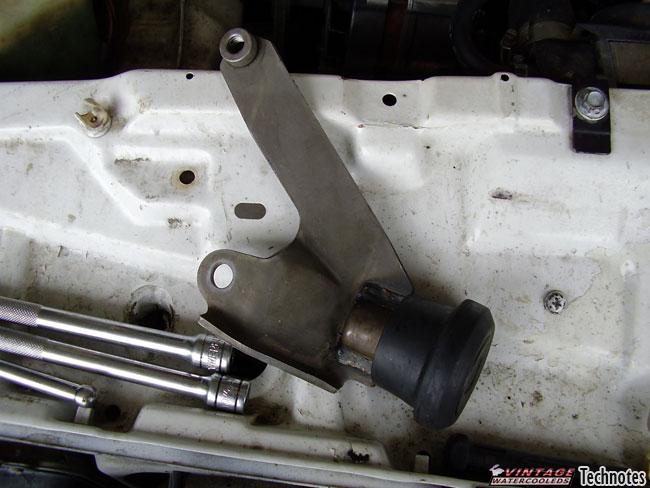
If you have a car with an up shift light – your car has the huge transmission switch. It’s held on with two 9mm nuts. Remove it and put a rag in the hole, so as not to drop anything into the transmission. Put the switch aside and clean it out – so it keeps on working nicely.
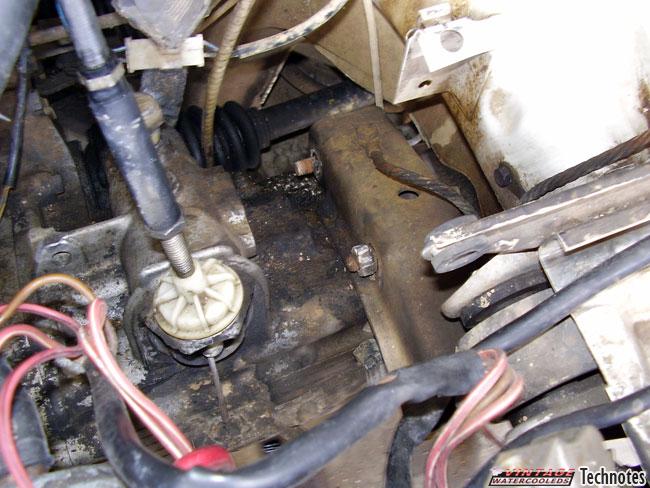
Put the jack under the transmission, and lift it up just a bit. Loosen the main bolt in the mount and remove it. Crack the two bracket screws with a breaker bar.Now – remove the front and transmission mounts, and lower the engine/transmission assembly a bit. The mount will come out of the bracket on the body. Finish removing the bracket from the transmission.

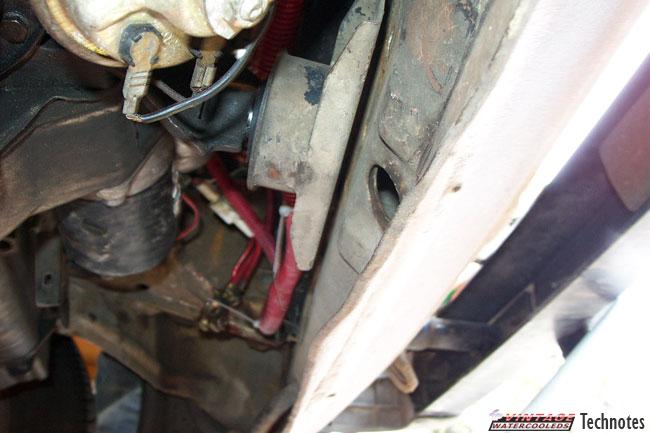
On my car (the Scirocco) one of the bolts could come almost all the way out, but it hit the body. We wrestled with this thing for a while. We couldn’t lower the engine much more because we feared we would break the clutch cable or kink the exhaust. We ended up putting the engine as low as possible, and bending the fender just a bit to get it out. After it was out, we bent the body back.
After you get those bolts out – you can go ahead and remove the bracket. Get your new mount and bracket, and put it in the old location. We switched the bolts around a bit to make sure this fender bending problem does not happen ever again.After you get the bracket mounted back up, you can jack the transmission back up to make the mount go into the body. put the 17mm bolt back through the mount. After that, re-attach your ground, and you can re-assemble the right side engine stuff.
Front Engine Mount
The front mount is laughable! It’s the easy one. All you have to do is loosen the two 17mm bolts that hold the bracket to the front cross member. tilt the engine down, twist the old mount off the bracket there. Stuff the new one on, and bolt it back up. Couldn’t be easier!
If you have problems getting the mount off – You have a couple of options – You can cut the old mount off – it’s just rubber. You can also remove both of the starter bolts, this will release the inner bracket from the engine so you can take it out of the car.
Clean off your old bracket! We used the same degreaser from above to clean the bracket up.This mount doesn’t bear any weight – it is just used to take the torque when you accelerate. You don’t need to jack the engine for doing this mount.
Passenger Side Mount
Introduction
Time for the hard and evil one!! This one is so hard because of the timing belt cover. This is why there is no engine mounts in this location on any generation after the A1! I just happen to keep no timing covers at all in my car – but southcross isn’t so lucky (or stupid 🙂 )
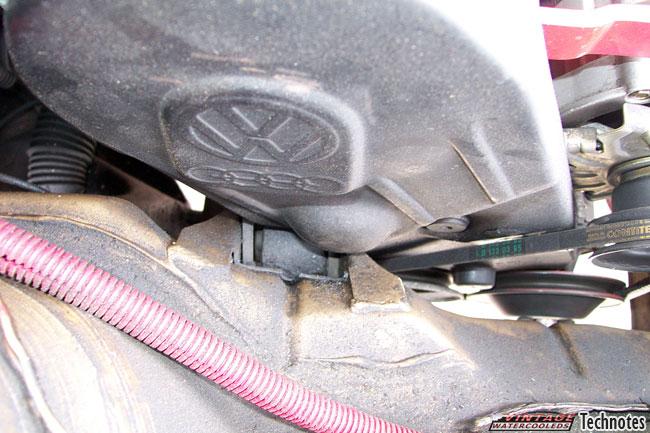
Taking the timing cover off
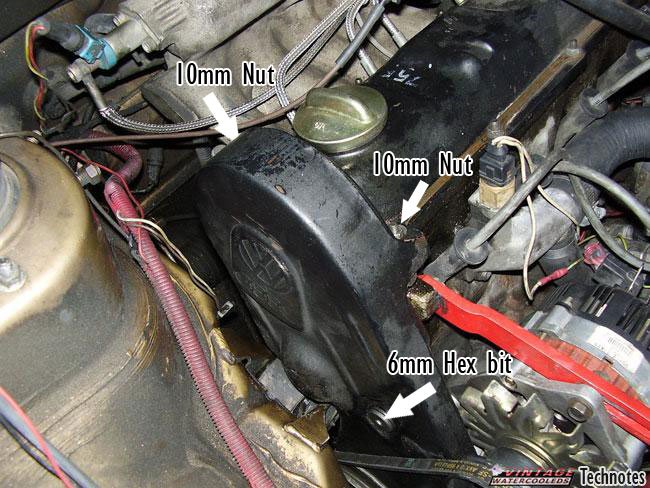
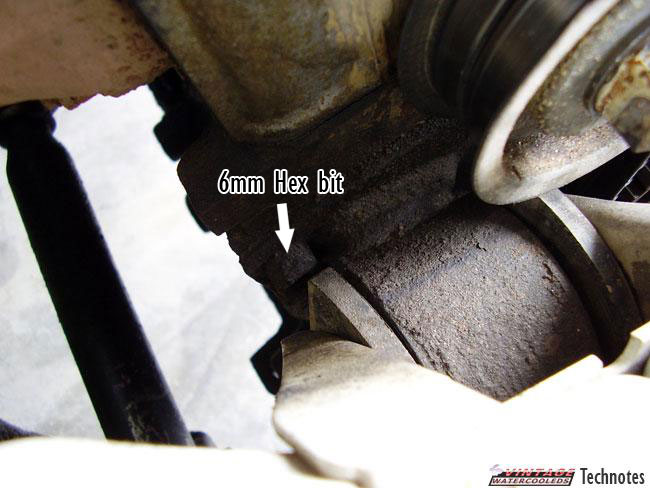
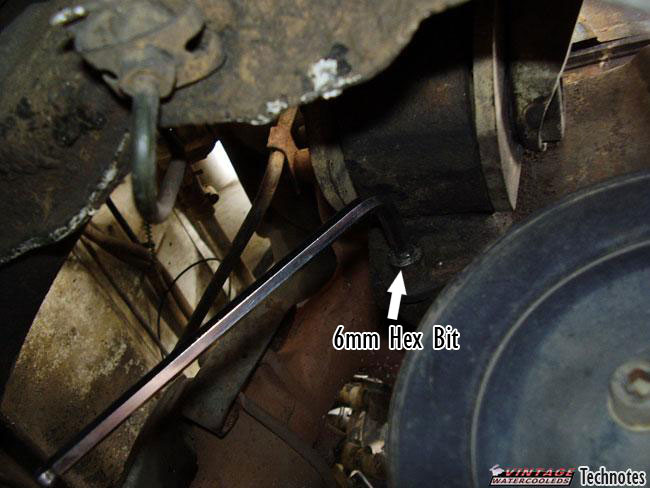
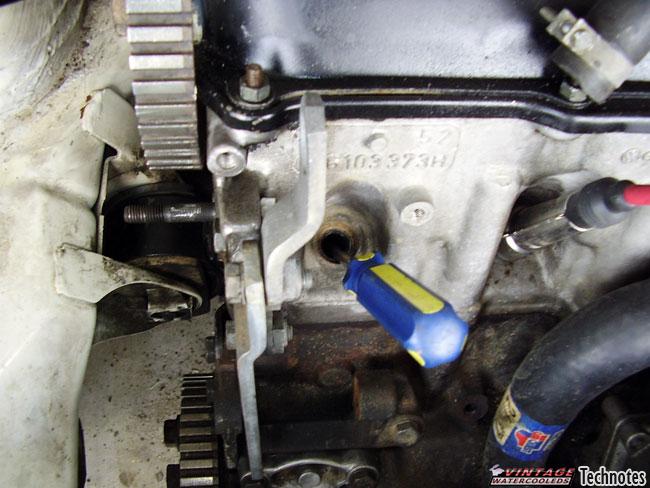
Alright – first thing is to get the upper timing cover off – You have to remove the 3 bolts that hold it on – two 10mm nuts at the top hold it to the valve cover. A 6mm Hex bit Alan thing holds the bottom to the lower cover. It may be covered with a plastic cap in your car – just pop that off with a screwdriver. It is about an inch across – you might have to dig mud or oil out of the hex area to get it out.After that is off – you can remove the top cover from the car.
Next is to remove the bottom cover. This isn’t easy. You have to remove both the crankshaft pulley and the water pump pulley.
Pulleys
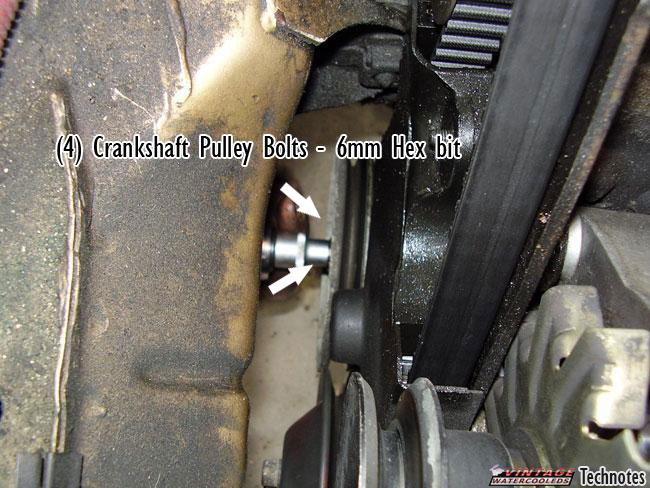
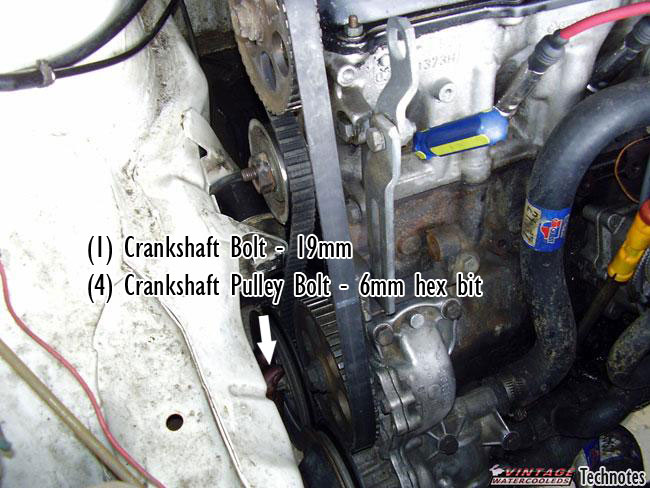
The crankshaft pulley is held on by four 6mm hex bit screws. If you have an air conditioner, you will have four 13mm hex bolts on the outside holding all this together. Cars with old A/C have lots and lots of metal shims that provide tension for the A/C belt.
If you have A/C and you want to abandon it – now is a great time to ditch the pulleys and extra weight and get non-A/C pulleys from a junk car, a seller, or the VW dealer. You can find out more about that in the alternator techtip – in the no-A/C section.
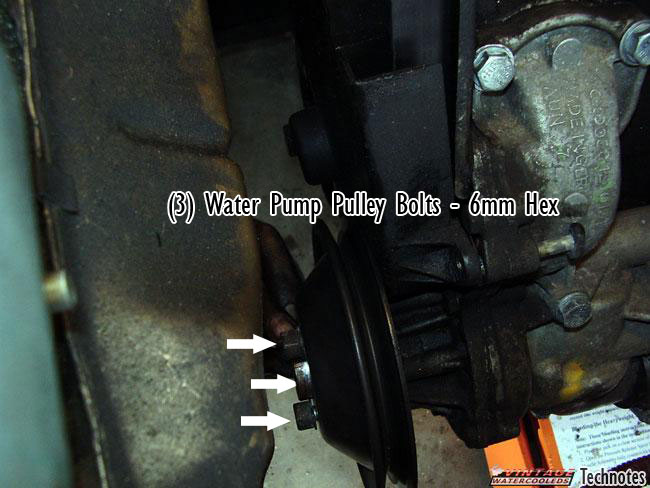
The waterpump pulley is held on by three 6mm hex bolts. You may be able to jam a cloth in between the pulley and the timing cover to prevent it from moving. I don’t suggest vise-gripping it – that will bend and warp the pulley. There also is a special tool to hold the pulley if you really want to get fancy.
Lower timing cover
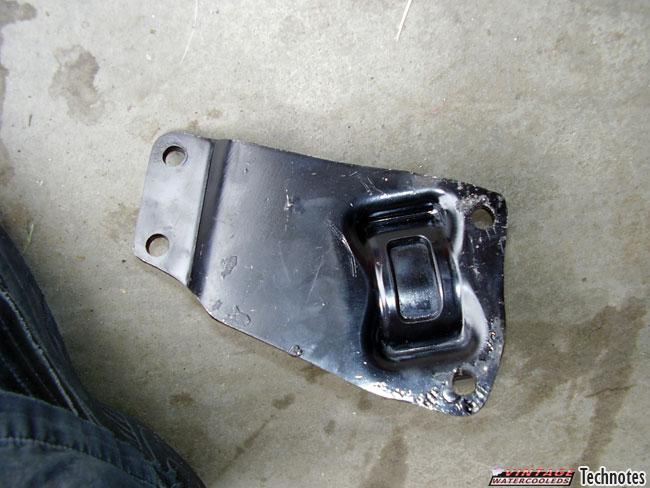
The lower timing cover is held on by 2 more bolts – both are 10mm. One is on the water pump – near the top. The other is right under and behind the crankshaft sprocket – kind of hard to see – You can look at this picture of the timing cover off the car to see where it attaches. Get at this one from under the car.
Remove the lower timing cover from the car. Put it aside and save all the bolts and nuts.
Removing the Timing Belt
Now it’s time to remove the timing belt. If you have a 16v – turn your engine to TDC now. NEVER TURN THE CRANK AND THE CAM ON THE 16V WITH THE TIMING BELT REMOVED! YOUR ENGINE WILL IMPACT THE VALVES!
This is an excellent time to replace the timing belt – If you can’t remember the last time you did it – do it now! Get a new tensioner too!
To remove the timing belt – you loosen the tensioner – it usually has a 15mm nut. Turn the center section to relieve the tension. The old-style tensioner has a large hex section you can grab with an adjustable wrench or vise grips – but the new style one requires a special spanner. Both of our cars have the old style tensioner.
After you relieve the tension – you can remove the belt. If you are re-using it – put it in a safe spot.
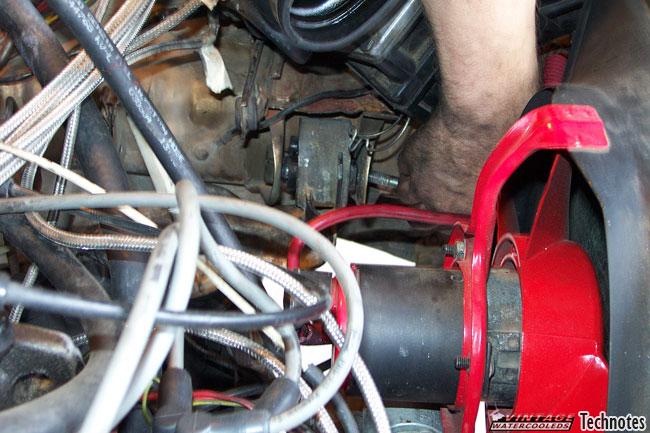
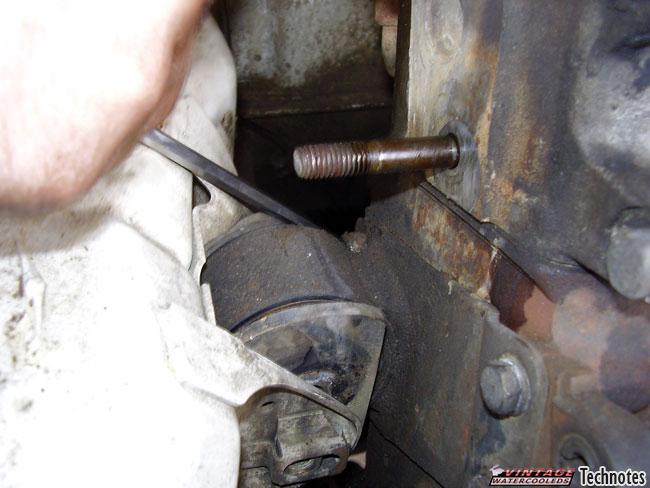
Remove the tensioner from the car by taking off the 15mm center nut, and sliding it off the Stud it is on. If your tensioner hits the frame rail and wont let you get it off – you can jack the engine up a bit, and lean on the bumper to make the mount flex a bit. If it still won’t come off – wait until you remove the engine mount’s center 17mm bolt, and jack the engine up.
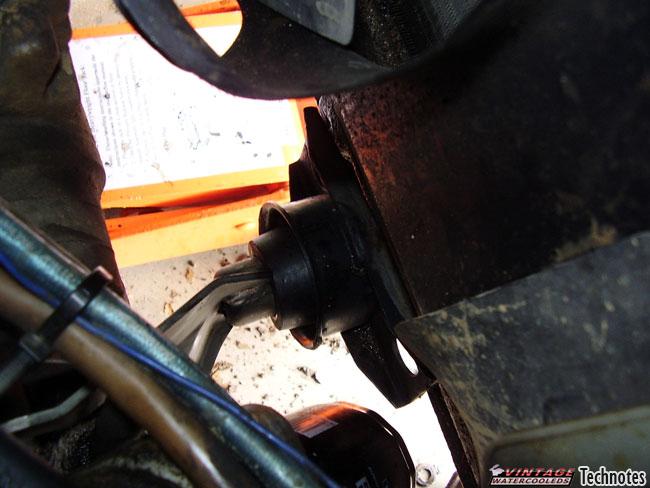
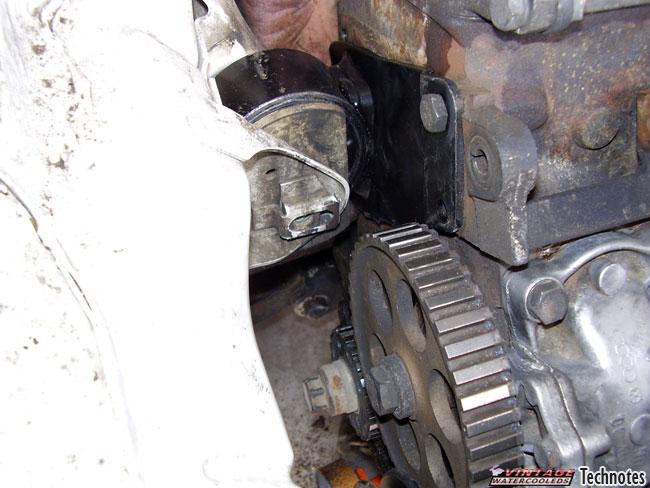
Getting the mount off
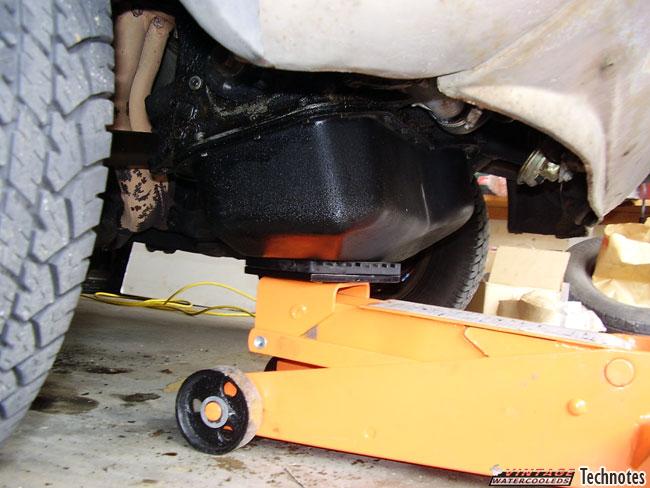
Alright. Now get your jack – and put it under the oil pan – use a block of wood so that the weight of the engine is spread out – you don’t want to crush the oil pan.
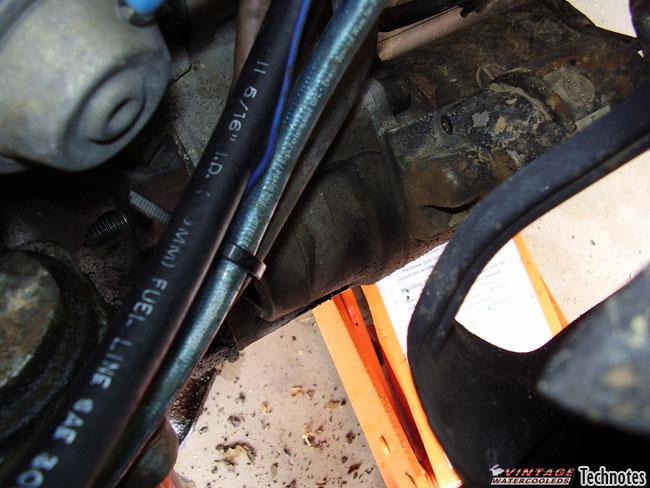
Take the center bolt out of this mount – I found it easier to get at if from under the car, in front of the wheel on the passenger side. Jack the engine up just a little bit to make loosening the mount bolt a little easier.
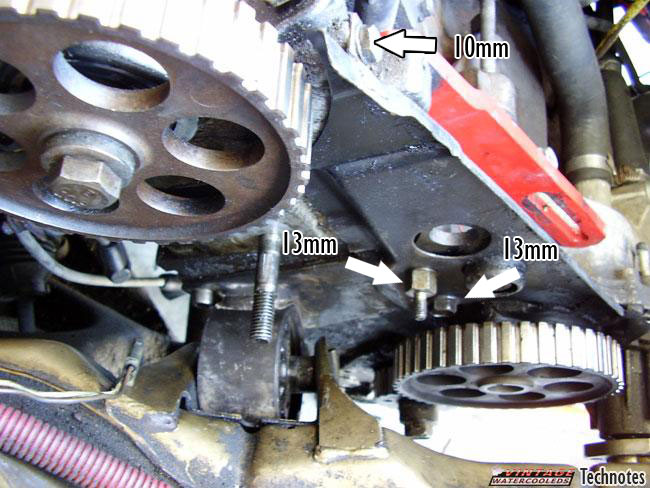
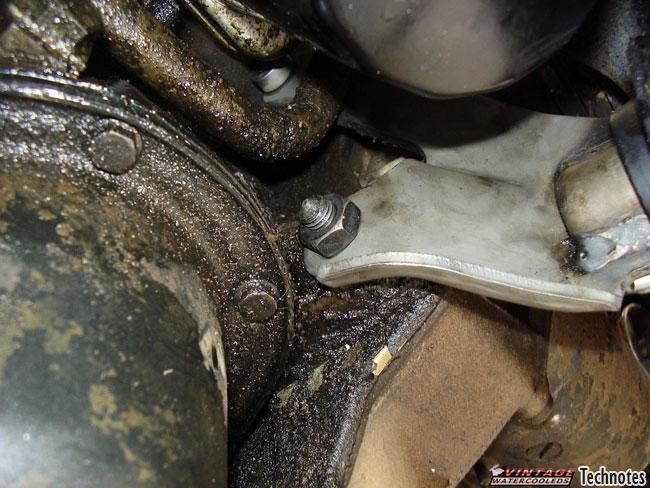
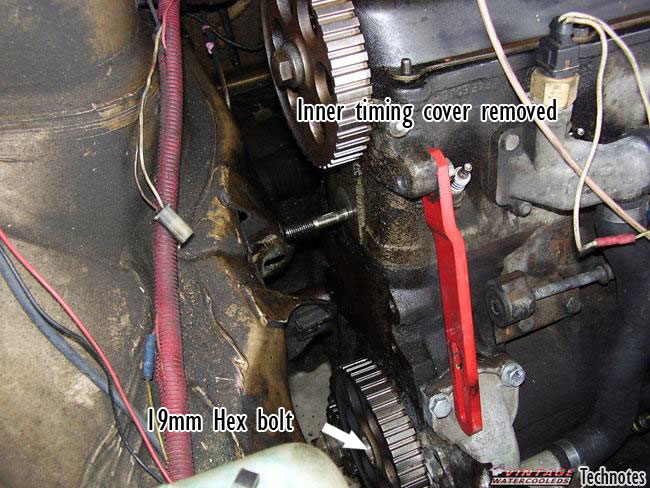
Time to take out the inner timing cover. There is a 10mm nut on top. On the bottom – it is held in by strange evil forces behind the intermediate shaft sprocket. So – we loosened the intermediate shaft sprocket and pulled it off a bit to get the cover leaning forward. That bolt in the middle of the sprocket is 19mm. In the middle of the timing cover, you need to take off the two 13mm bolts from the front part of the bracket (they also hold on part of the alternator Bracket or a/c bracket). These bolts are also what holds on the front part of the mount bracket itself.
Loosen the rear transmission mount (two 17mm nuts at the body) and the front mount (two 17mm bolts on the front cross-member). This will allow the engine to swing on the transmission side mount so you can raise and lower the engine.
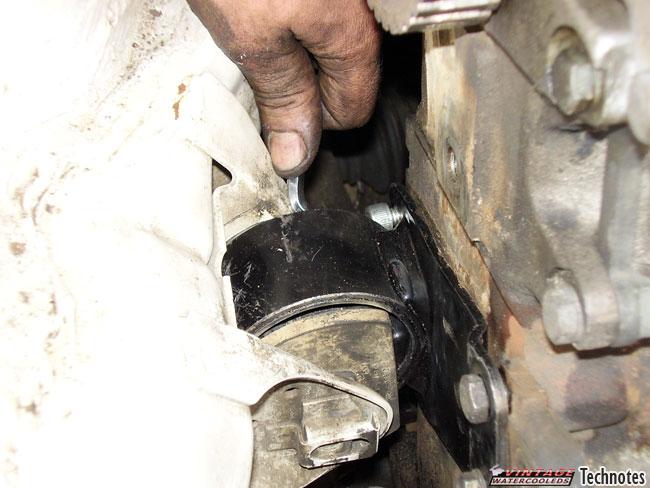
Loosen the 17mm main mount screw from the engine mount. I found this easier to do from the underside of the car – with the car on the ground. The bolt faces the rear.
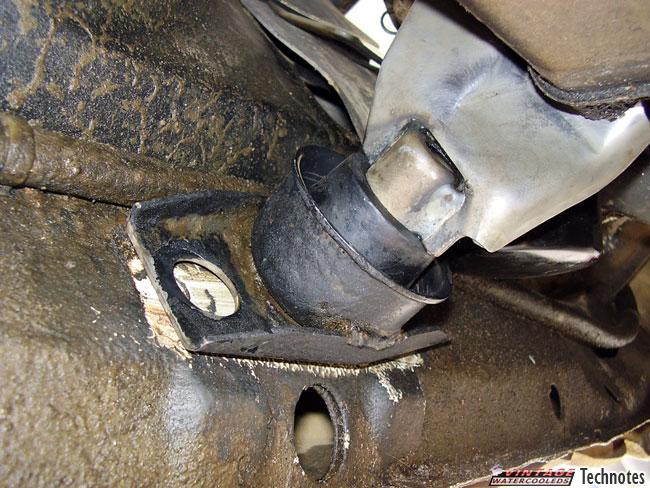
Alright. Now you can see the engine mount and the two remaining mounting bolts to the engine block.
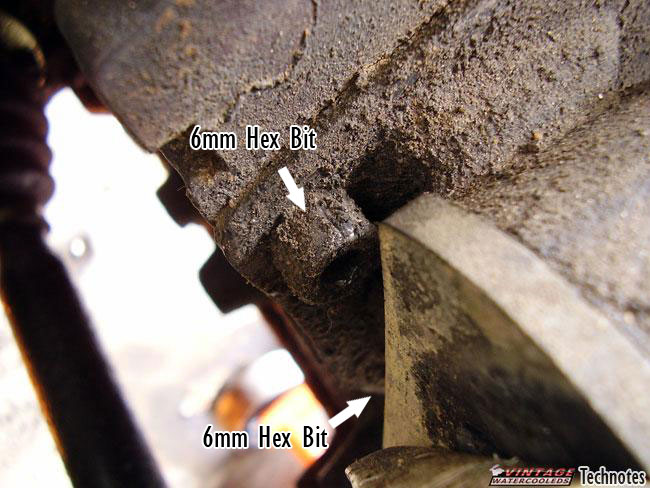
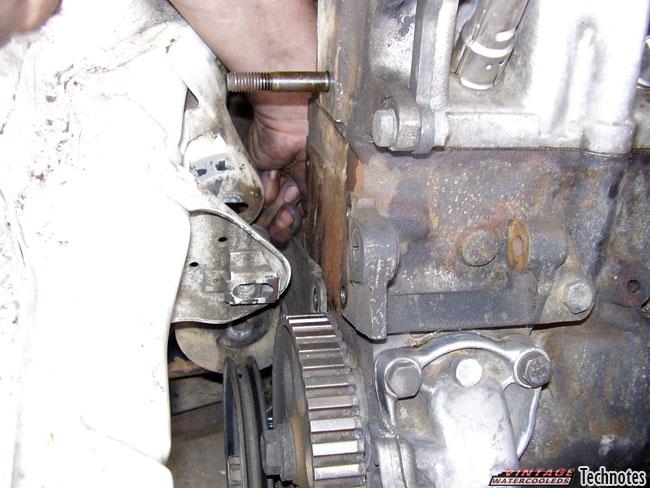
Remove the two 6mm hex bit screws on the back. Get at these with an Alan wrench – I had a cheap, short one – it worked just fine. I jacked the engine up a bit to get at the top one, and let it down a bit to get at the bottom one from under the car. I included two pictures of the bracket so that you can see the location of the bolts.After the bracket is loose – lower the engine some more with your jack. You can remove the bracket. Watch that you don’t hit the hard metal brake line with it.
Press the mount
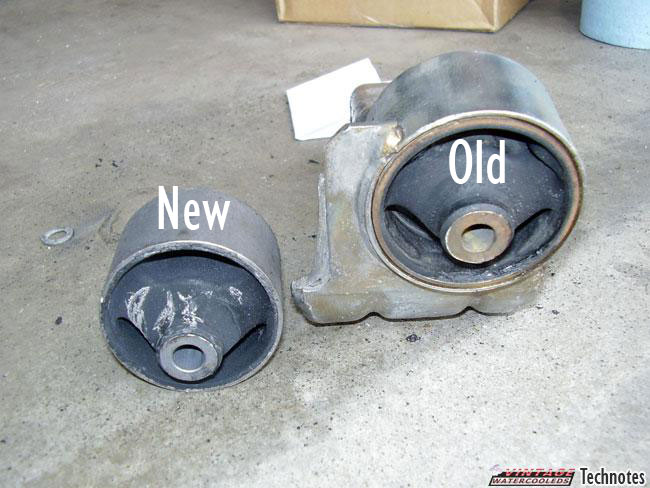
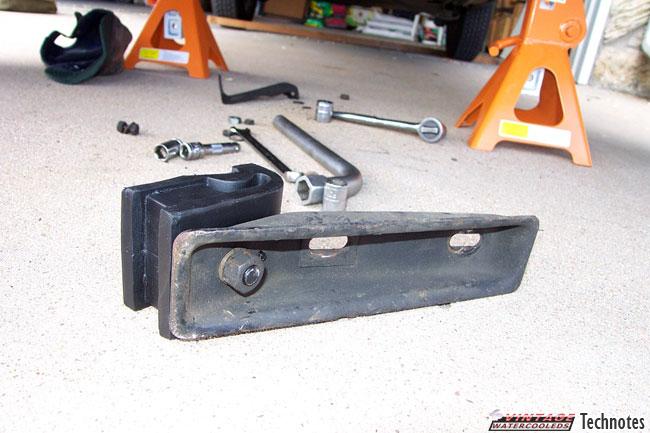
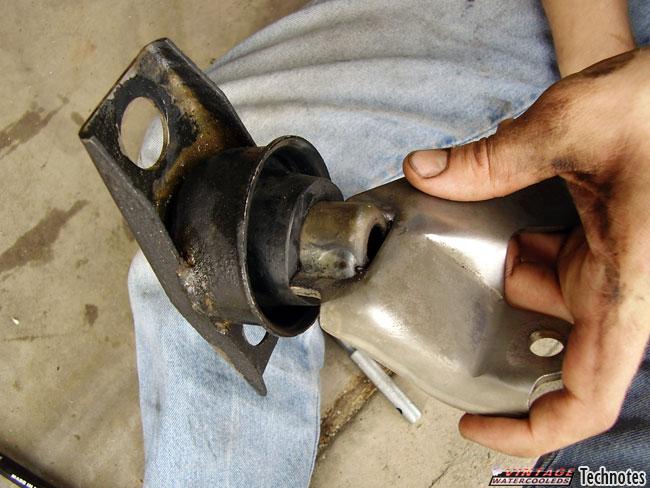
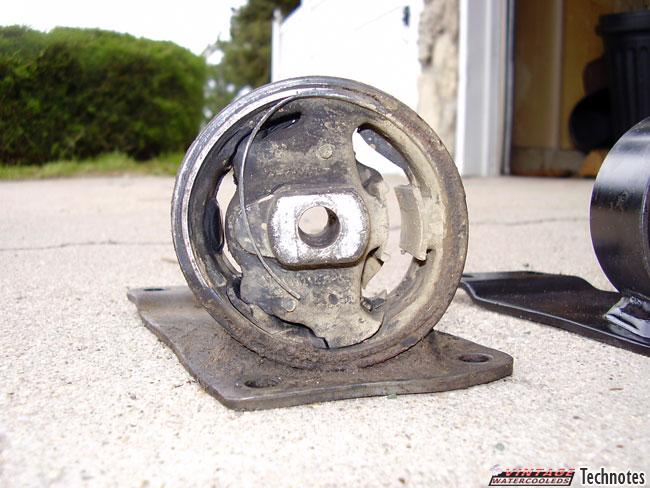
Now – Take it to the machine shop to have the new mount pressed into it. My engine mount was so bad that it was broken all over, and the bracket was twisted and bent. Here’s a comparison shot. Evil stuff there. I ended up using the bracket from my parts car – which was in perfect shape.
TAKE A BREAK!! You deserve it after all that dang work!!
After the mount is pressed

After you get the new mount in – you can slap it back on the engine and put the bolts back in.Jack the engine up to raise the mount up into the bracket. Put the center bolt back in.
Don’t smash
your exhaust!
It’s fun to say that in only two sentences. It’s actually very hard. You’ll be jacking the engine up and down and screaming and cursing at your engine by the time you are done. If you have no sway bar, you can lower the engine down a lot more, but if you have one, you might bent the exhaust if the engine is too low.
Aligning the Engine Mounts
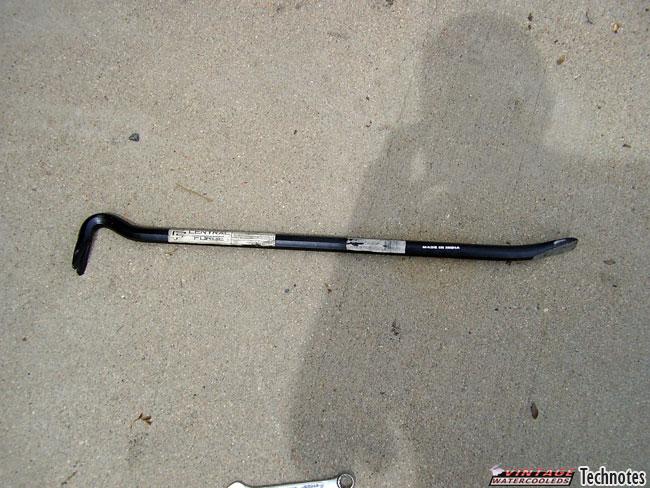
When you get it in – get a pry bar. You need to center the engine in all the mounts. Make sure there is even amounts of distance on the sides of the side mounts.Re-attach the rear transmission mount and bolt it down loosely.
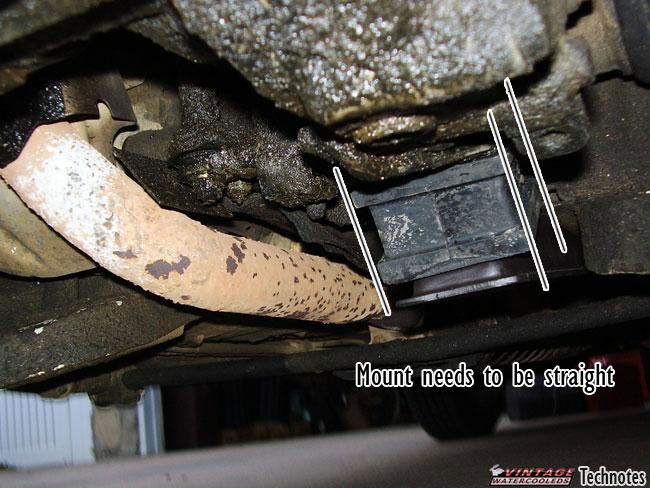
The key here is to check the rear transmission mount and make sure it is straight. Make sure the side mounts are centered in their brackets. Bolt them down when you are completely satisfied with the centering of the engine. Put the bolts back in the front mount and tighten them.
Timing the Engine
Now comes the fun part. Time to re-time the engine. Yay.
Make sure your engine and crankshaft are at TDC. If you have an 8v – you also need to align the intermediate shaft with a mark on the crankshaft pulley. There’s a dot on the outside of the intermediate shaft sprocket, and a notch in the crank pulley. so install the crank pulley temporally so you can line stuff up. Put these right at each other. Sometimes you don’t get a mark on A/C cars. HA HA!!! Actually – just remove the distributor cap – and turn the shaft until the rotor aims at the mark in the distributor body at the top. If you have a dust cap there – you have to push it aside to see that mark. The camshaft mark is on the INSIDE of the pulley for 8v cars. Align it with the flat if the cylinder head.
The best way to ensure that the engine is at true TDC is to take out the #1 sparkplug, and put a screw driver in. Turn the engine until the screwdriver is at it’s highest point.Now that you have the engine all timed, put the timing belt back on. Make sure it goes right from the crank to the intermediate shaft sprocket. Then up to the cam, and down around the tensioner. Once you get it all toothed up, tighten the tensioner. If you have an 8v – tighten it until you can turn the belt a half turn from how it is supposed to be. If you have a 16v – it’s a quarter turn.
Putting the rest back together
Fun. Now remove the crank sprocket again. Put the lower timing cover back on. Remember the bottom and front nuts there.
Put the pulleys back on.
Put the upper timing cover on. The two 10mm nuts and the 6mm hex bit thingy hold it on.
Put your alternator back where it was, and install the V-belt. Re-tension it.
Sounds easy, huh!? Well – it took us 5 hours. So have fun!
Cleaning up the mess
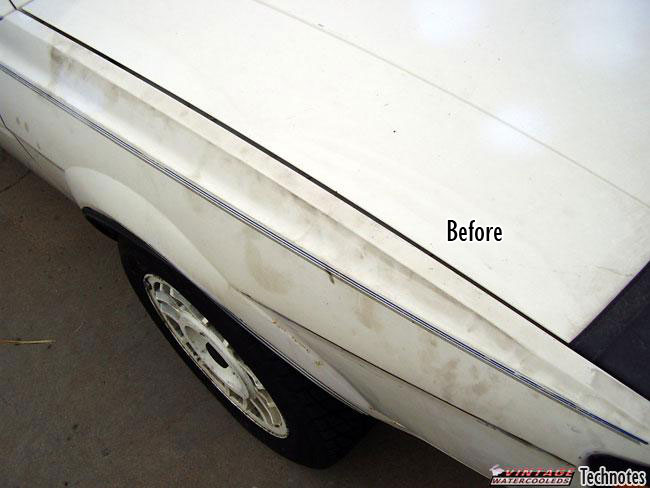
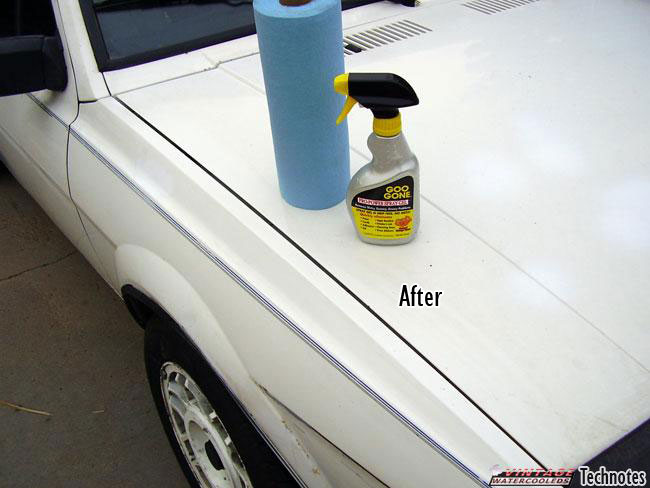
Keep your car looking clean! I used some Goo Gone on my fenders after I was done – that stuff works good!