
Got new locks or doorhandles and need to re-key them to your old key? It’s all explained here! Thanks to Joe Mair for this technote.
Tools needed:
- Philips head screwdriver
- Thin flat head screwdriver
- Pick or pair of tweezers
- Lightweight lubricant
- Common sense
This technote is brought to you by scirocco*joe, who wrote and did all this, and by sciroccojim, who thankfully took the time at the recent Fall Foliage Cruise to explain some of the basics for this process. It is only with his expertise that I am able to bring you this technote.
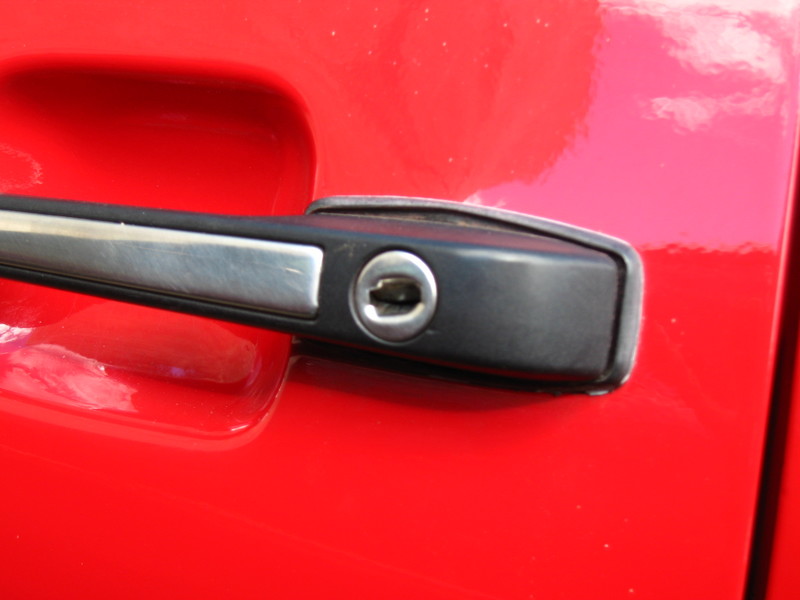
So, perhaps you’re the second, third, seventh, or eleventy-billionth owner of that sweet, sweet Scirocco that sits in front of you. It may not even drive yet. That’s ok. Mayhaps one of the prior owners swapped the keys in one or more of the door handles. Perhaps you paid a locksmith to replace your ignition switch. Or, perhaps some local hooligans used a modified key (screwdriver) to gain access to your car, somewhat like this:
Regardless of how you got here, you have keys that don’t match, and you’d like to have a one-key system. Well, today is your lucky day!
First of all, if you’re just swapping the lock cylinder from one door handle to another, this is going to be an easy job. If you’re re-keying a cylinder, you’ll need to do some more work.
So, we’ll start where we always start – at the beginning!
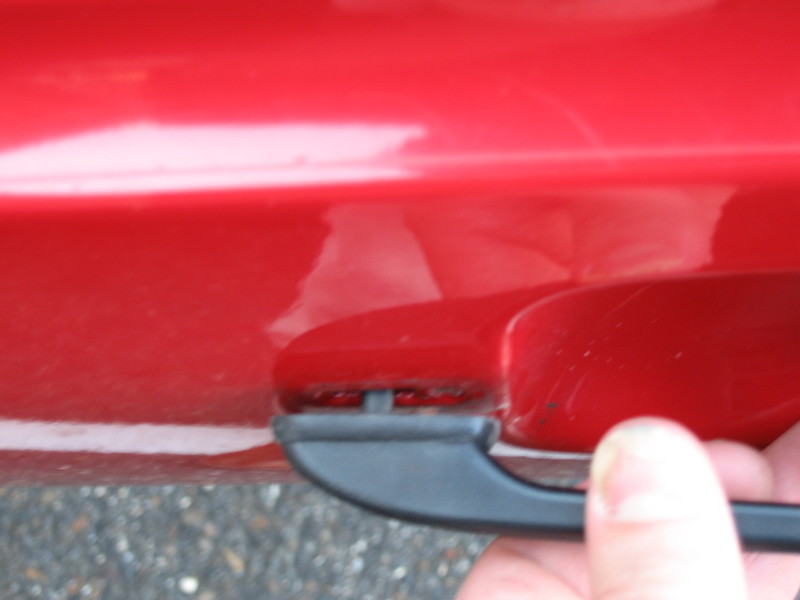
You’ll need to get that pesky door handle off. First, open your door so that you have all of the hardware exposed. You probably have a silver metal or black plastic trim piece on the outside of the door. You’ll need to take a thin flat head and gently pry at the rear of the trim piece while pushing slightly towards the front of the car. Here’s the spot:
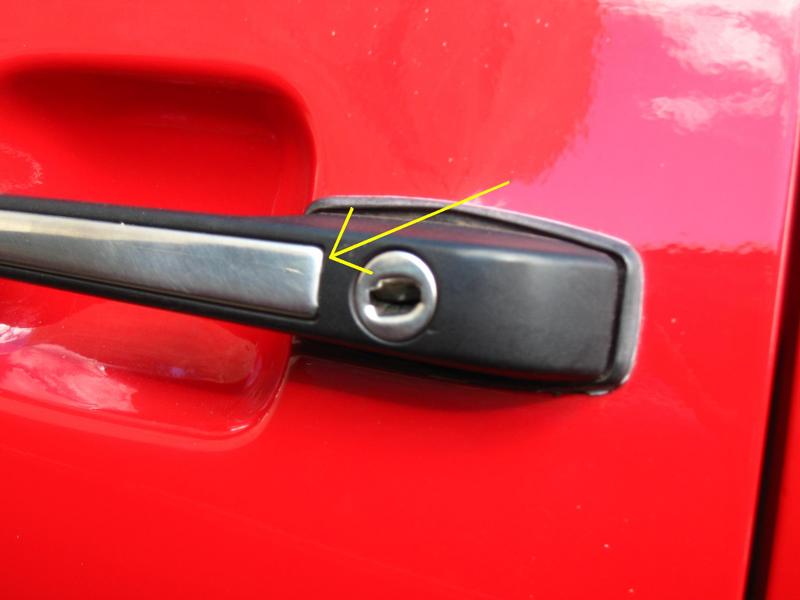
There is a little tab at the front of the trim and a spring tab at the back. Once you free the rear tab, you’ll be able to slip the front tab out.
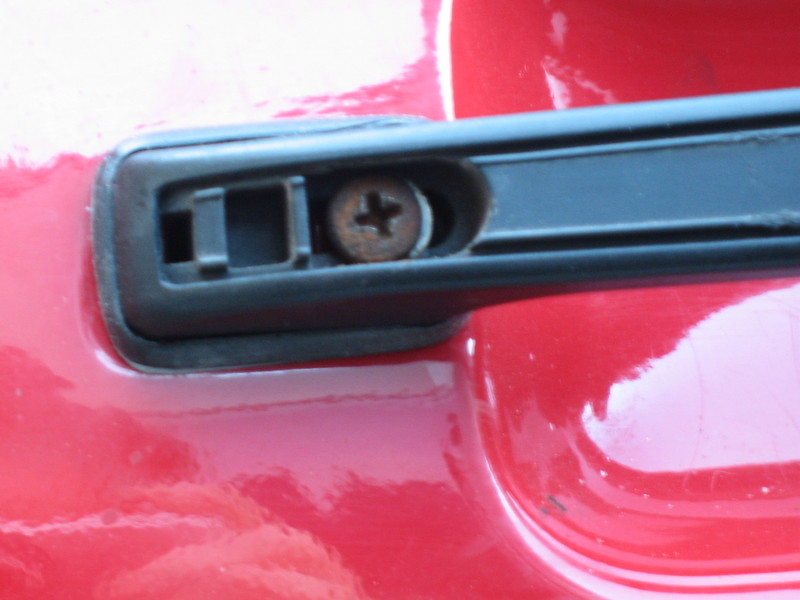
Now, take a look at the inside edge of the door behind the handle. There will be a philips head screw there. It looks like this:

You can unscrew that, and place it off to the side.
You might have noticed that there is another philips screw underneath the trim panel on the outside of the door handle towards the front of the car.
You can remove this screw now as well. There might be a washer behind that screw, so be careful removing.
Now, believe it or not, that’s pretty much all that is holding this door handle onto the car. However, there’s a little tab at the front of the handle you need to clear before you can remove the handle.
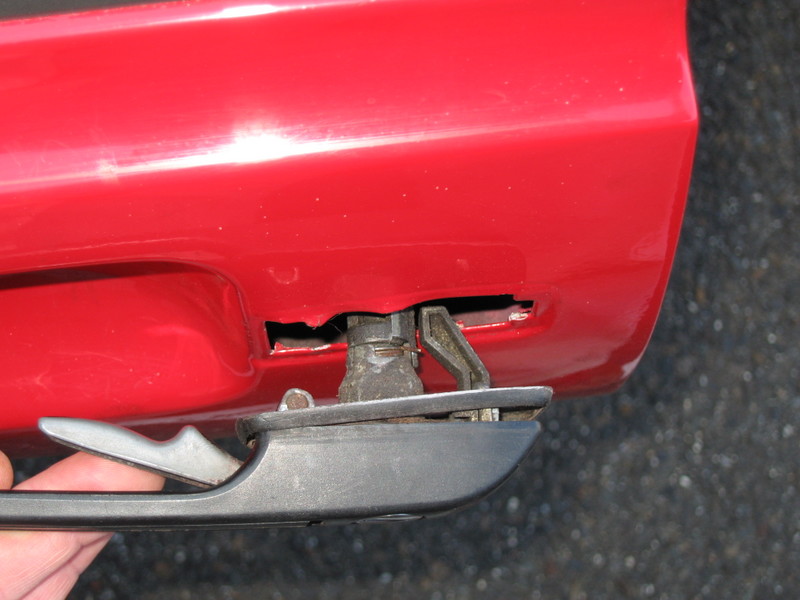
Slide the handle towards the front of the car, and slowly pull it away from the car.

Watch the rear, as the “push down” and “lock” levers can chip the paint if you aren’t careful. Pull slowly and angle the handle down towards the ground to clear the mechanism.
There are two gaskets that fit between the handle and the door, one at the front and one at the rear. The rear is the bigger one. Take these off the handle and save them. They will probably fit better than any replacement gaskets.
You’ll notice that there are two levers inside of the door where the door handle just was. The one closer to you opens the door. The one further in locks and unlocks the door. Go ahead and play with them for awhile. Bask in the mechanical simplicity of the 80s!
Ok, back to work, you slacker!
So, you’ve got this door handle in your hand. Go ahead and pull the lever. Watch how it actuates the lever and pushes it downward. If you have a key that works, take a look at how that moves the locking mechanism in the back of the handle.
It is always a good idea to get a nice feel for a working mechanism before you go ahead and take it apart. Otherwise, you might not have as much luck getting it to work again.
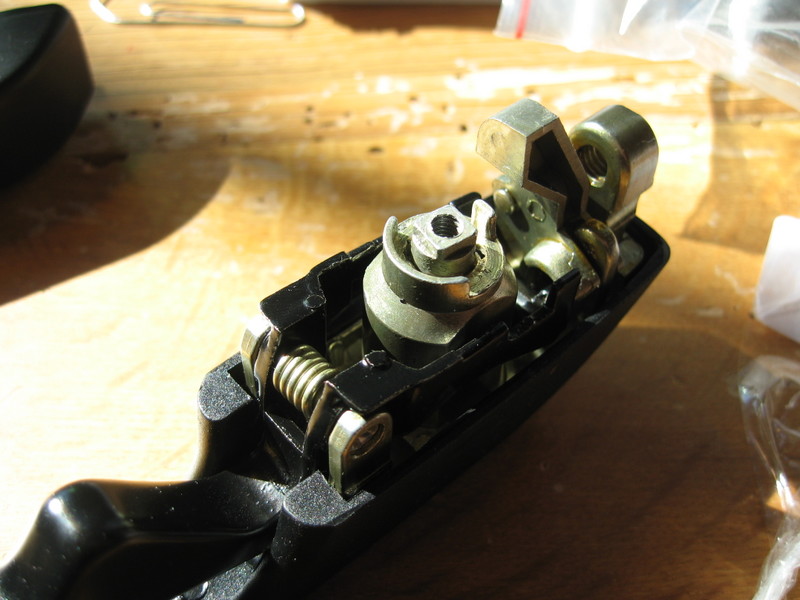
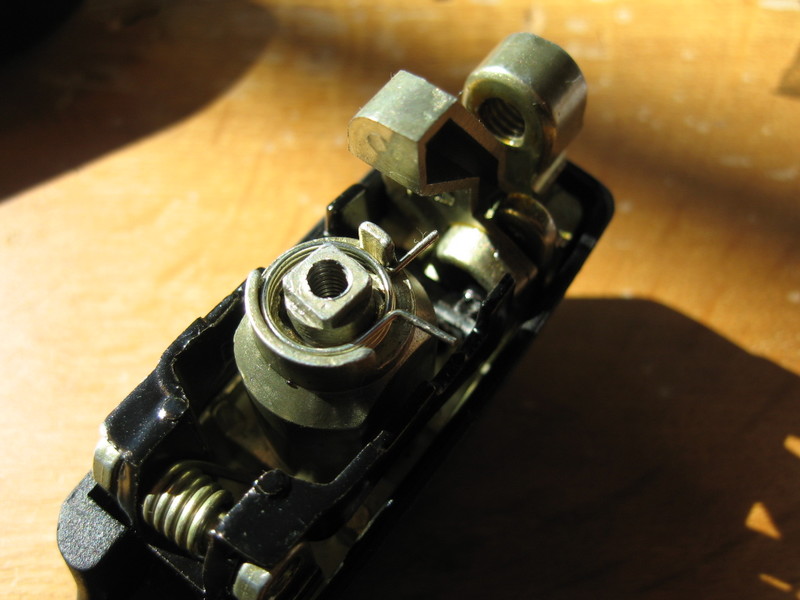
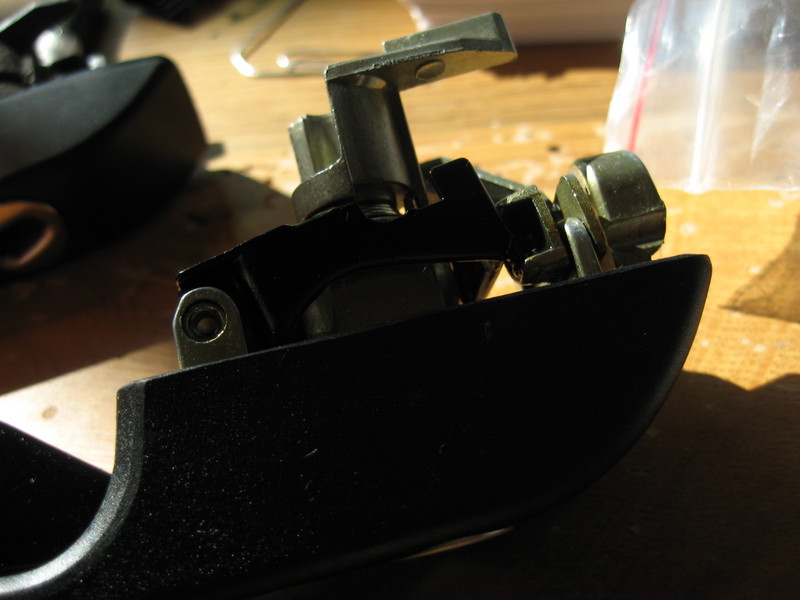
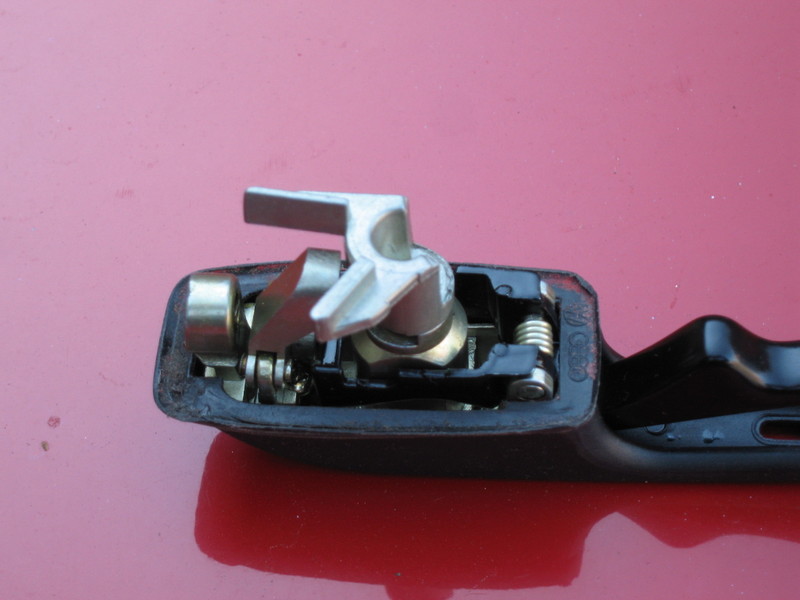
Now, behind the lock cylinder, you’re going to see the lever with two paddles. This is the lever that locks and unlocks your door.

In its resting state, one paddle points towards the rear of the car, level with the ground. The other paddle points about a 45* angle down and towards the rear. You are now going to remove that paddle.
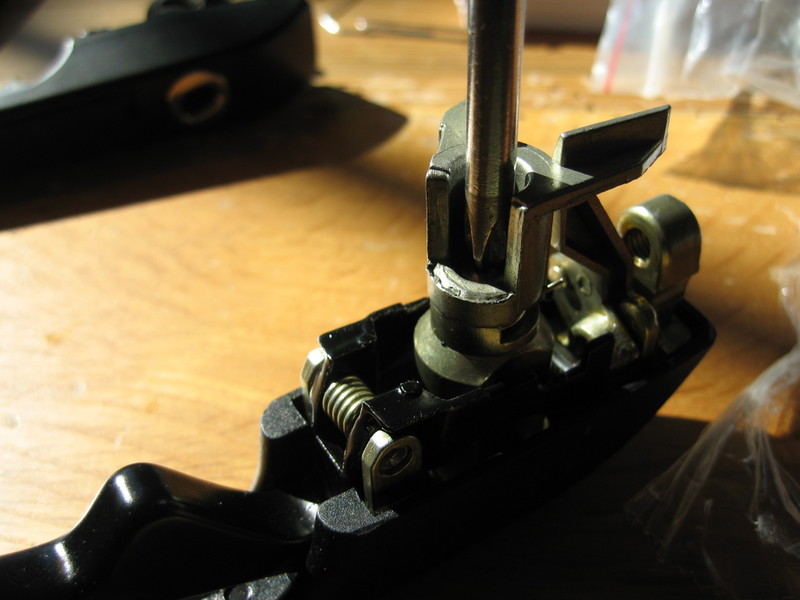
Place the handle with the mechanism face up and use a philips head to remove the screw holding the paddles onto the rear of the lock cylinder.
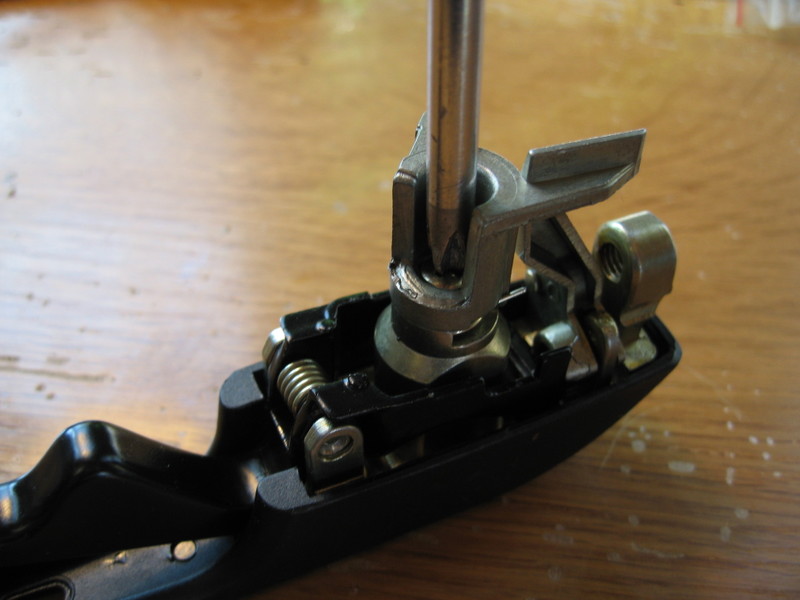
Do pay attention to the fact that there is a loaded spring behind the paddles. It might jump out at you when you remove the screw, so don’t let it get away from you. You’re going to need it.
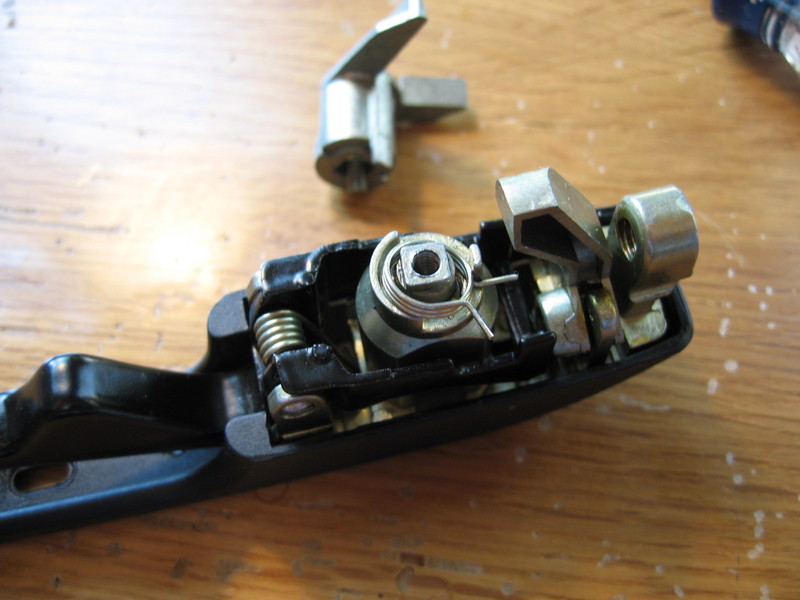
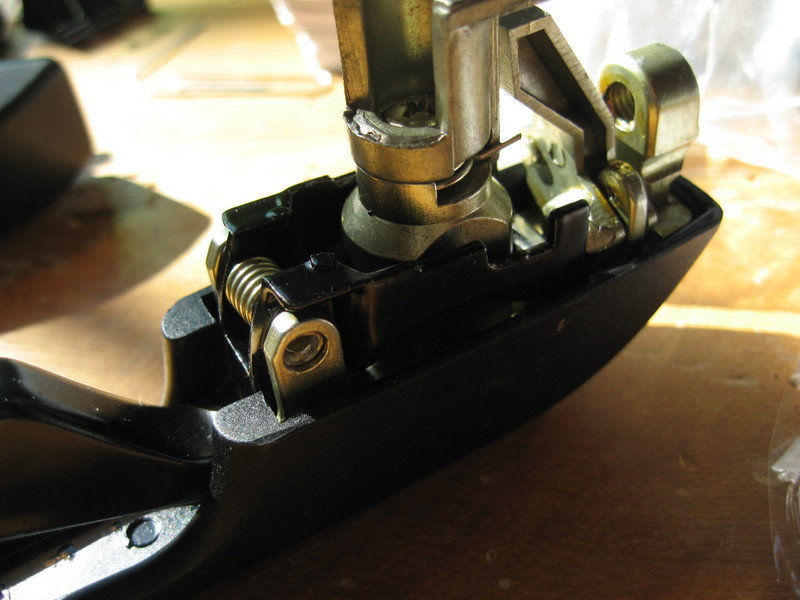
Here you can see the spring behind the paddles. This is not where the spring should be positioned when reinstalling. Take the spring off and set it somewhere safe.
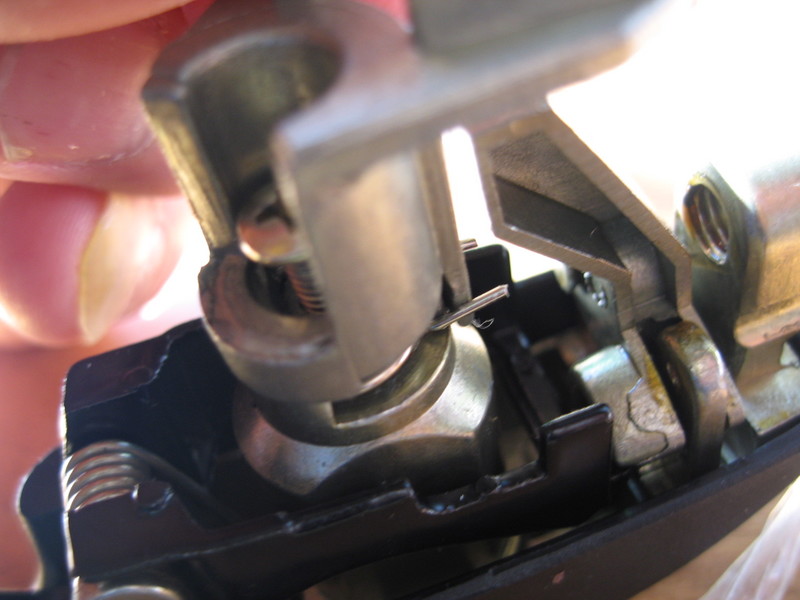
Now, see that little box cut that surrounds the hole where the philips screw came out of? That is the end of the lock cylinder that we will now remove. Put the handle on its side and push that box towards you to slide the cylinder out of the handle.

Here she comes!
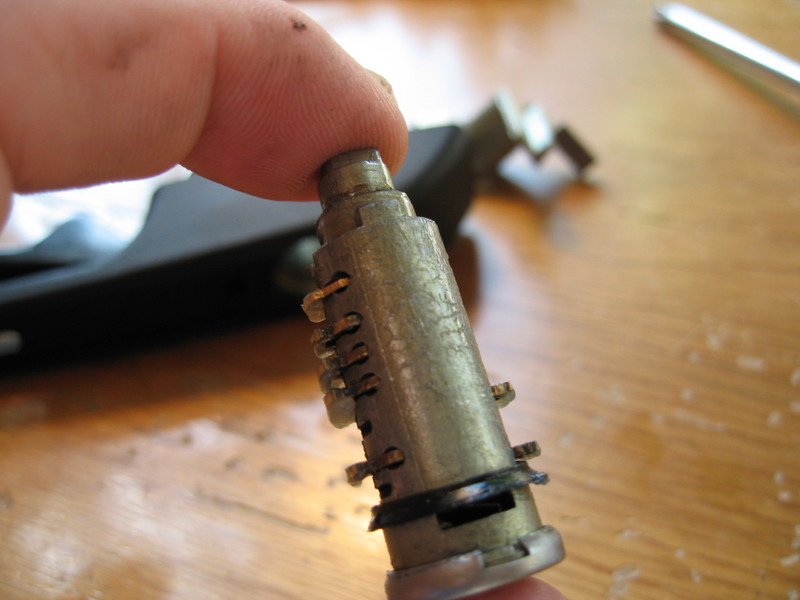
Now, you can carefully admire the beauty and complexity of the lock cylinder mechanism. It’s really not that hard to figure out how it works.

Neat, huh?
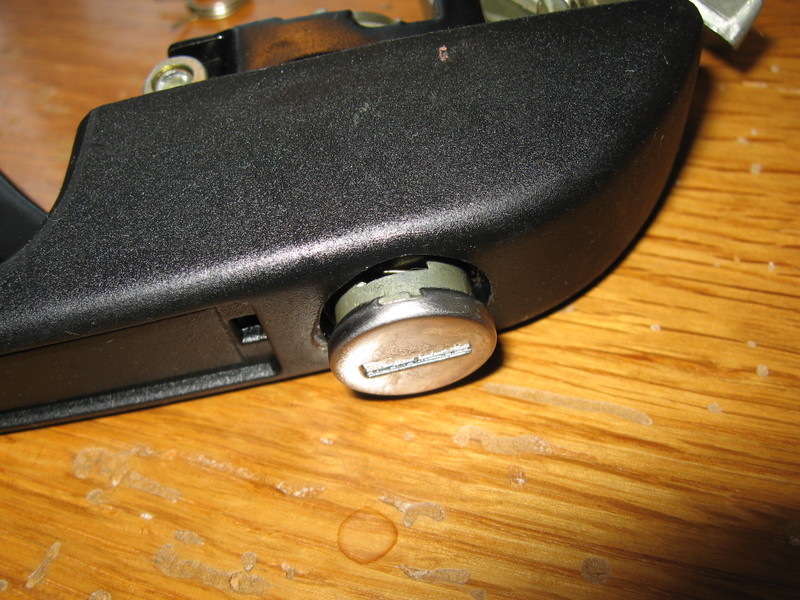
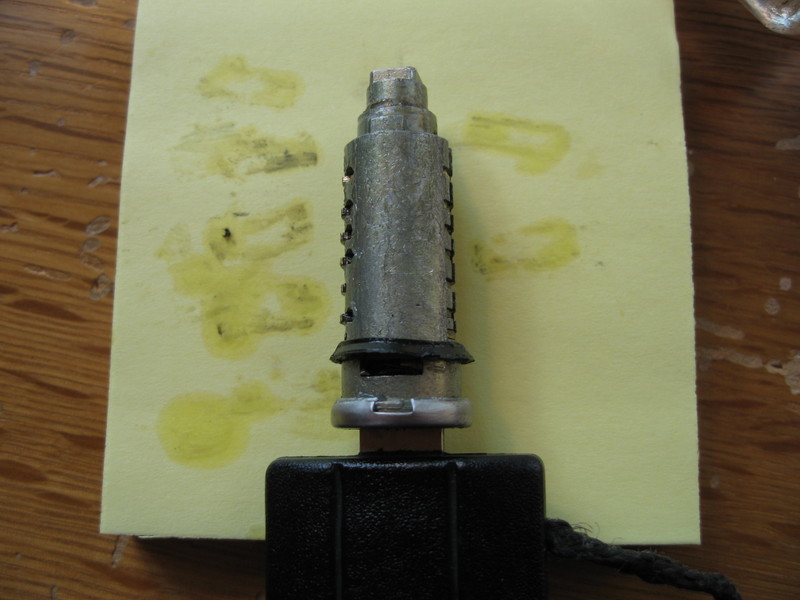
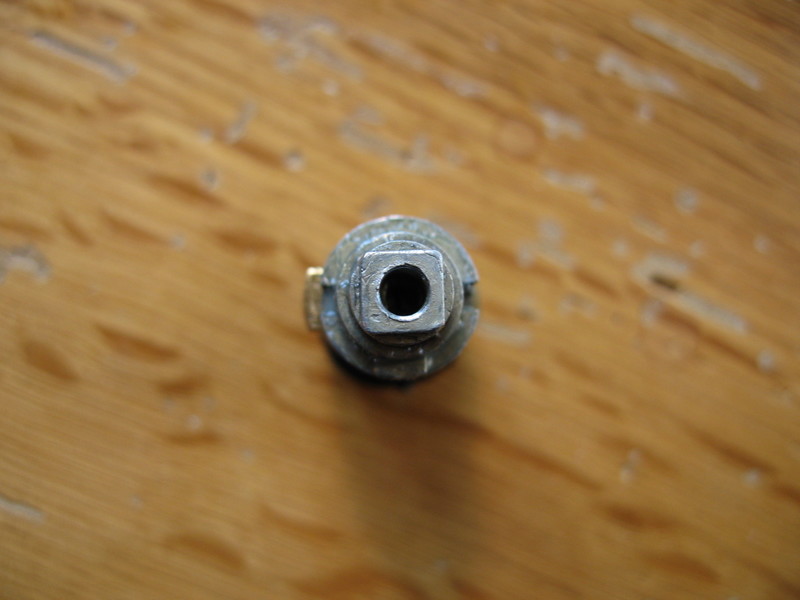
Now, if you look closely, you’ll notice a couple of things. First of all, there is a square notched at the top of the rear of the cylinder. This lets you know that the cylinder is face up. It will only fit into the handle that way. If you put it in upside down, it will not fit in flush with the outside face of the handle.
Also, you may (or may not) see a round black seal towards the outside of the cylinder. This seals the internals from getting filthy with outside dirt and crap. This is a new cylinder, so it is still there, but chances are your older one is either broken, severely worn, or totally gone.
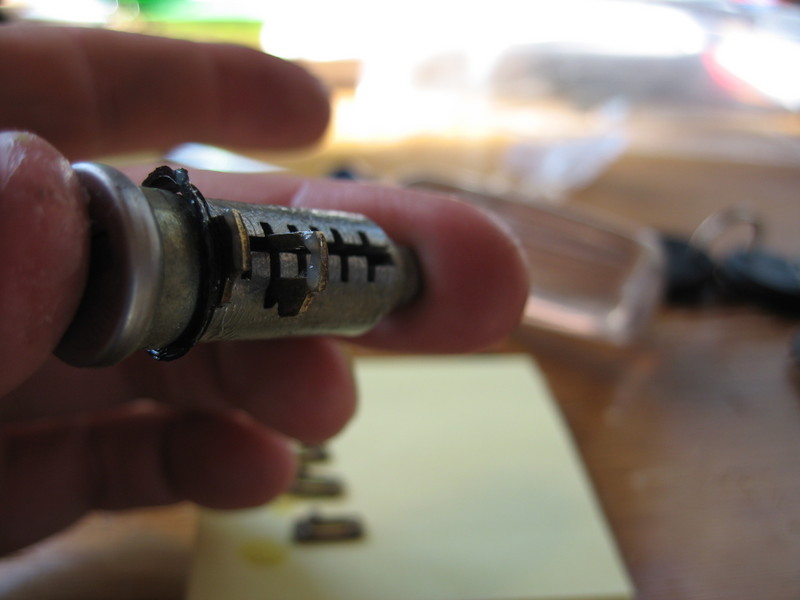
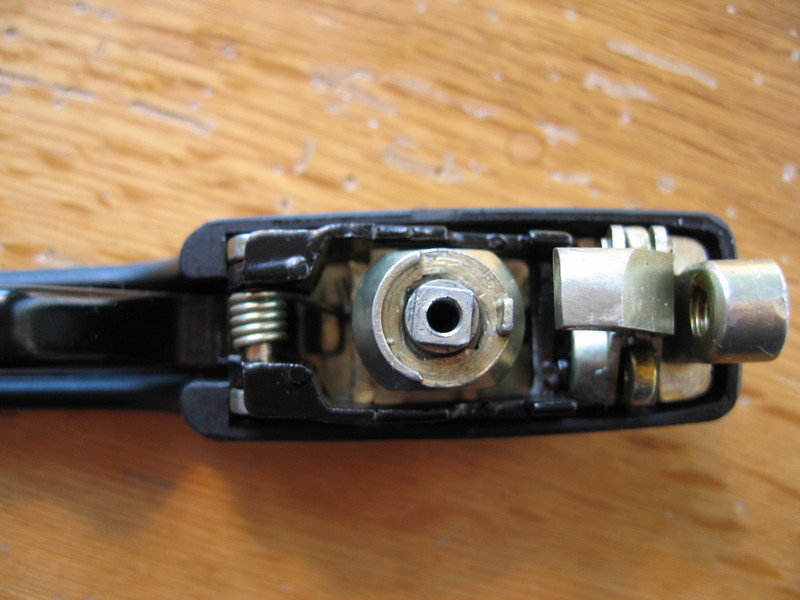
Now, it’s time to understand how the cylinder and the tumblers work. Lets take a look at the inside of the door handle where the cylinder came from.
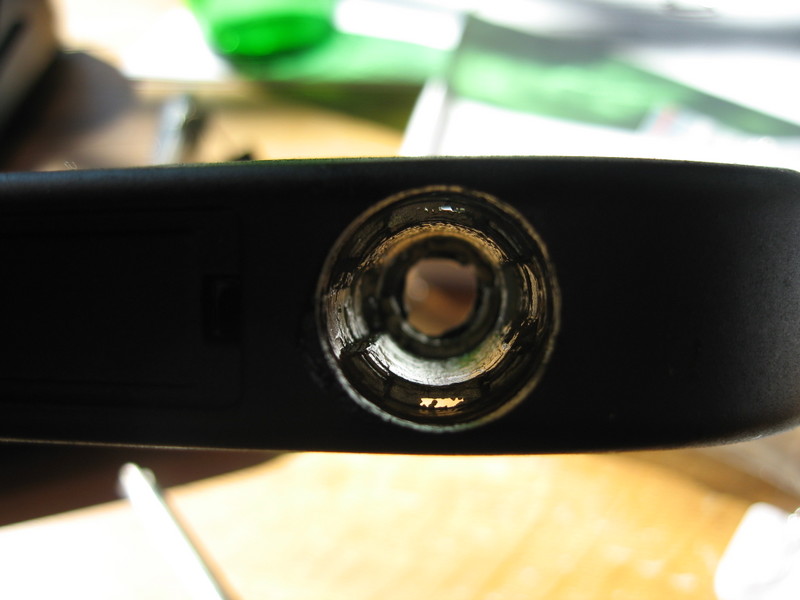
If you look closely at the picture above, you can see two channels on both side of the hole where the cylinder fits. Now look again at the cylinder you removed from the handle

See how it has five little brass tabs on the left and two little brass tabs on the right sides of the cylinder? Those fit into the channels on both sides of the handle. There are small springs the force the tabs away from the center of the cylinder. So, without any help, they are forced outwards against the walls of the channel. The brass tabs are the tumblers that need to line up in order for the cylinder to rotate and your door to open.
Now that you know what it looks like, imagine that this cylinder is back inside of the handle. With all of those brass tabs or tumblers (I will probably refer to them as tabs or tumblers interchangeably) in the way, they cylinder cannot rotate to actuate the paddles in the back of the handle to unlock the door. The tabs are stuck in the channel. So, we need to have a key fit in the cylinder that is just right in order to pull the tabs inward enough to line the tabs up smooth against the sides of the cylinder so that the cylinder will turn and the door will unlock.
Watch what happens when you have the wrong key in there.
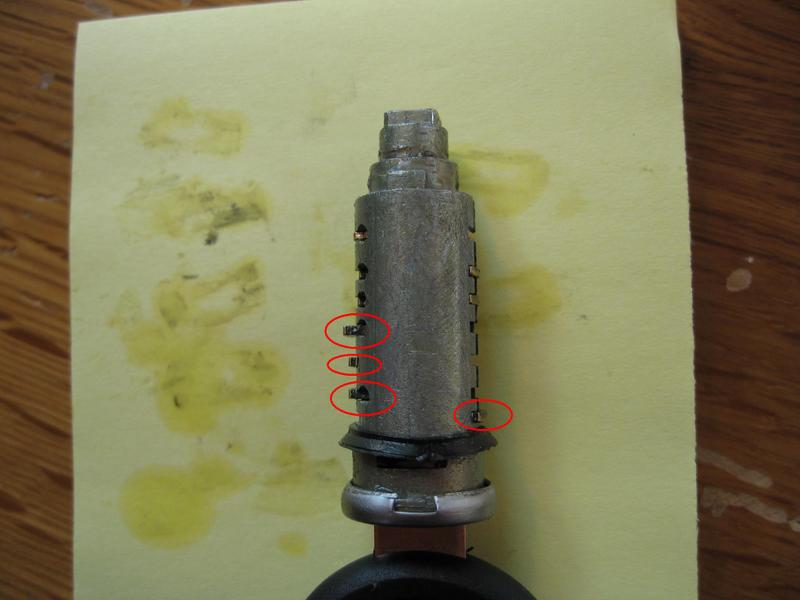
Lets take a look at the tabs from top to bottom. You can see that tabs 1, 2 and 3 actually fit well. They are flush with the sides of the cylinder. So, the key is very similar to the correct key. However, you can see that tab 4 does not fit well. The key did not pull the tab in close enough to be flush.
Tab 5 is the first tab that normally sits on the right side. You can see that the key pulled it too far inwards, so that now it is sticking out the left side. Tab 6 on the other hand is the same as tab 4. Tab 7 normally sits on the right side, and has not been pulled inward enough, as it is still poking out a bit. So, we have a close match on three out of seven tabs. Not bad.
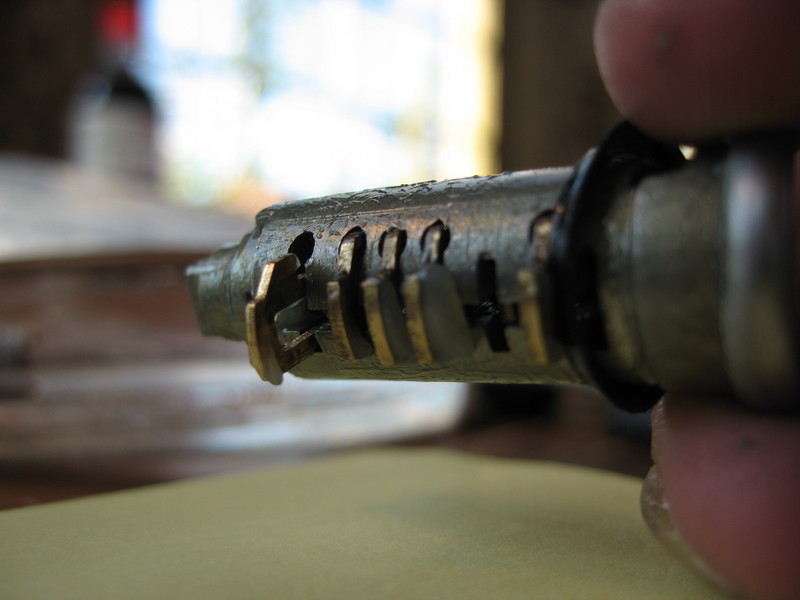
Here’s what it looks like with the right key in there.
See how all of the tabs are lined up so that the outside of the cylinder is smooth? This will allow the cylinder to turn freely.
Now, let’s look at those tumblers out of the cylinder.
You can use your forefinger and the nail of your thumb to pull each tab slowly out. You can also use a pick or a pair of tweezers. Since I’m planning on swapping all of the tumblers out of one cylinder and put them in a new cylinder, I will place them down in order so that I can replace them in the same order without playing a game of trial and error.
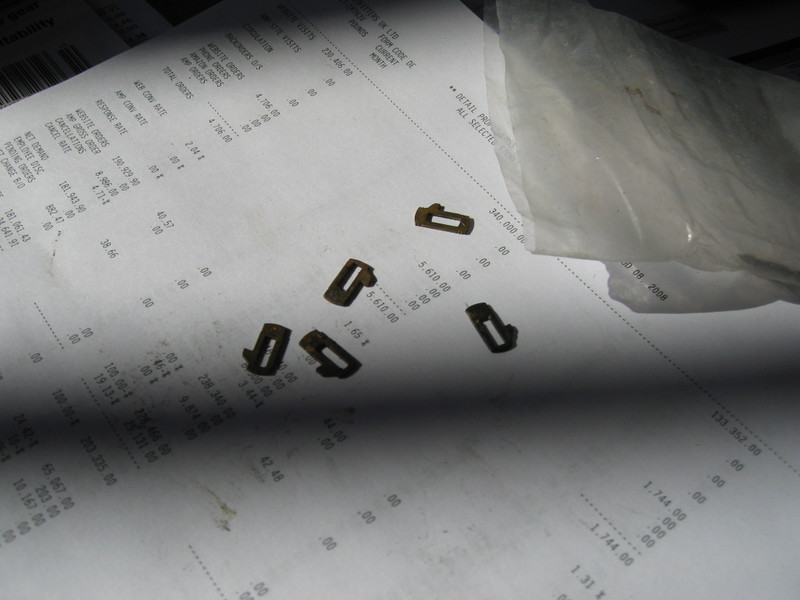
So, let’s pull tab 1 out carefully.
Ok, not too bad. Onto tab 2.
You can pretty much continue down the line like this.
Please be aware of the tiny springs that rest behind each tab in the lock cylinder. They are the reason that the tabs “spring out” when the key is removed. They don’t typically fall out when a new lock is disassembled, due to the grease in there, but they will probably fall out on older locks.
Take care to make sure there’s a spring in each section of the cylinder when you insert the tabs. There’s a round hole on one side of the cylinder where the springs go in (not the same side for each one).
You’ll also notice that each tab has a “fin” that sticks out. The five tabs on the left have fins that point up and the two tabs on the right have fins that point down. Just so’s you know.
So, now that you’ve removed the five tabs on the left, it’s time to do the same with the right.
Now, when you’re done, this is what you should have.
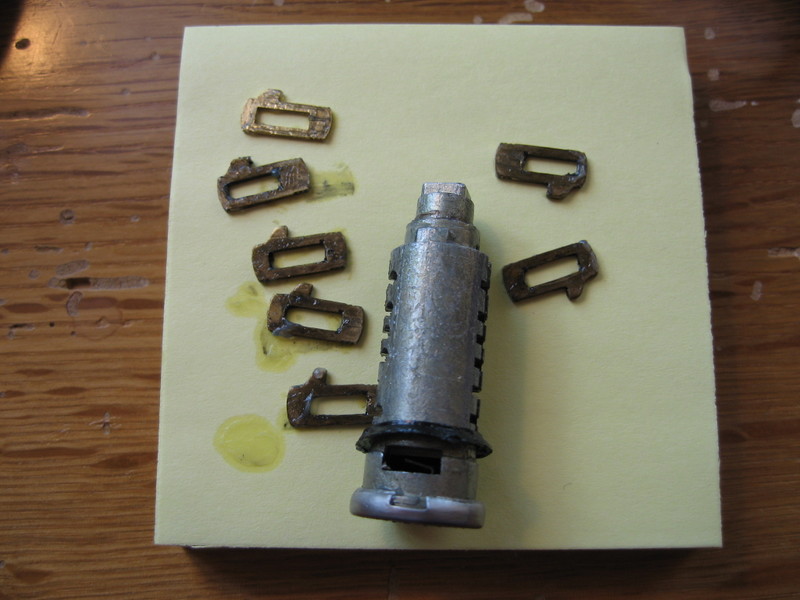
You can see the tabs with the fins up on the left, and the tabs with the fins down on the right.
Now, if you’re just swapping tumblers, you can replace all of the tabs into the new cylinder. If you are re-keying an existing tumbler, you’re going to need some extra tabs.
This is what I have, courtesy of sciroccojim:

No, that’s not a baggie full of an illicit substance! Get your head out of the gutter! It’s a baggie of brass tumblers!
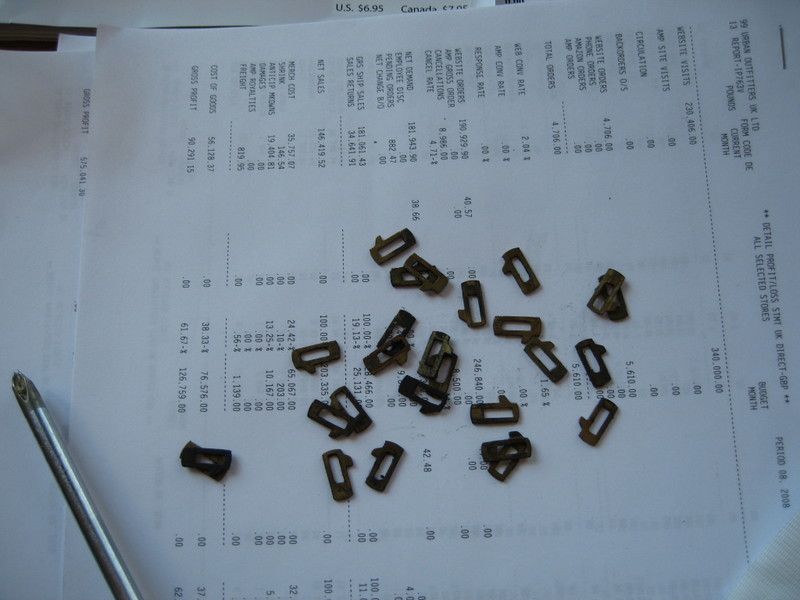
Now, I’ve heard you can get spares from the dealership, but perhaps local locksmiths or junkyards can find them, too. It’s going to be a mixing and matching game to get the right ones you’ll need. Unfortunately, it’s a trial and error process. The slot in the middle of the tab is where the key fits, and how far it is pulled into the cylinder depends on the position of the fin on the tab and the offset of the center opening to the left or the right of the tab.
In my case, I’m just swapping tabs, so let’s do it.
You’ll put them in one at a time, same order you took them out in. When you replace them, make sure you add a little lightweight lubricant to allow for a long and useful life! The better lubricated the tumblers are, the longer the parts will last and the easier they will turn and unlock your doors! Plus, if the lubricant is coating the metal, there will be less of a chance of moisture taking up the space and freezing your lock in the winter. At least, that would be the case for those of us in the northern climes.
Also, when you press the tumblers in, push lightly to ensure that they spring back easily. Their resting position should be the same as when you took them out, sticking slightly outward as before. Take a look:

Ok, you’re almost finished. Make sure that when your key is inserted, all of the tabs are flush against the cylinder. You might as well be sure.

In my case, the first tab had worn so much that it left a little bit sticking out and wouldn’t allow the cylinder to turn. The old handle had a little groove in it from use, but the new handle was unforgiving. Since I knew the two keys I had were the same for tabs 1, 2 and 3, I just grabbed the new number 1 tab and used that instead of the old number 1 tab. Good as new.
Now, I sat the cylinder pointing upwards like this:
and slid the handle down onto it like this:
Now we’re ready to replace the spring. The spring forces the lock cylinder back to center whenever you lock or unlock the car. You feel it every time and it keeps the cylinder opening level with the ground when the handle is mounted in the car. So, this is where we are at:
Now, you’re going to take the lock return spring and sit it on top of the square at the back of the lock cylinder. You’ll put the spring so that one bend is against the tab like this:
and then push the other bend over the top of the tab so that it is “loaded” against the other side of the tab like this:

It will take a few times to get set just right and if you get it on the first try, you were just lucky.
Now we’re ready for the locking paddles. The underside of the paddles has a box cut that will fit perfectly into the rear of the cylinder’s box tab. All you need to do is make sure that the fin tab on the mounting side of the paddles sits right between the bent edges of the spring, just like this:
Now don’t let go, because that spring will want to force the paddles off the cylinder. Grab that philips head screw and driver and secure the paddles back to the cylinder.
This is what it should look like now:
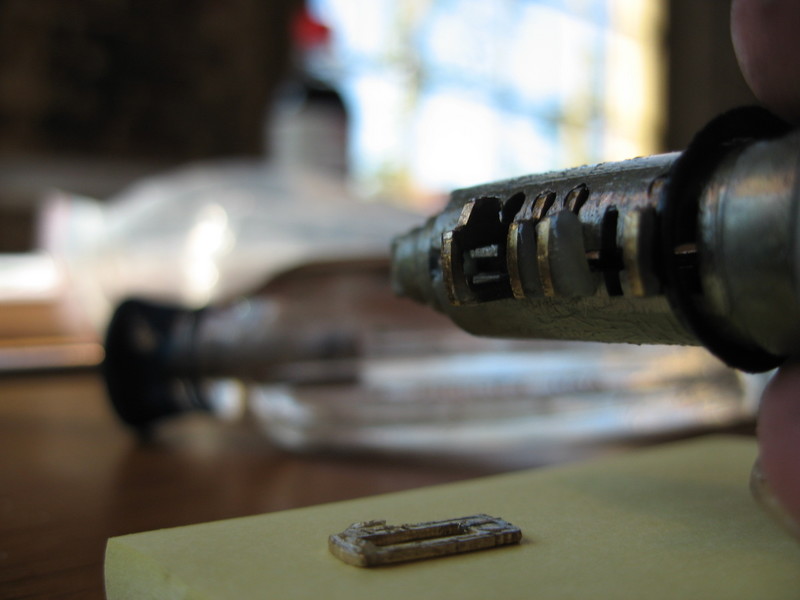
You might as well check that key again. You don’t want to attach it to the car only to find out that it won’t turn.


Looks good to me!
Now, back to the car! You’ll slide the rear in first, and again, don’t forget to put on the little gaskets on the front and rear!
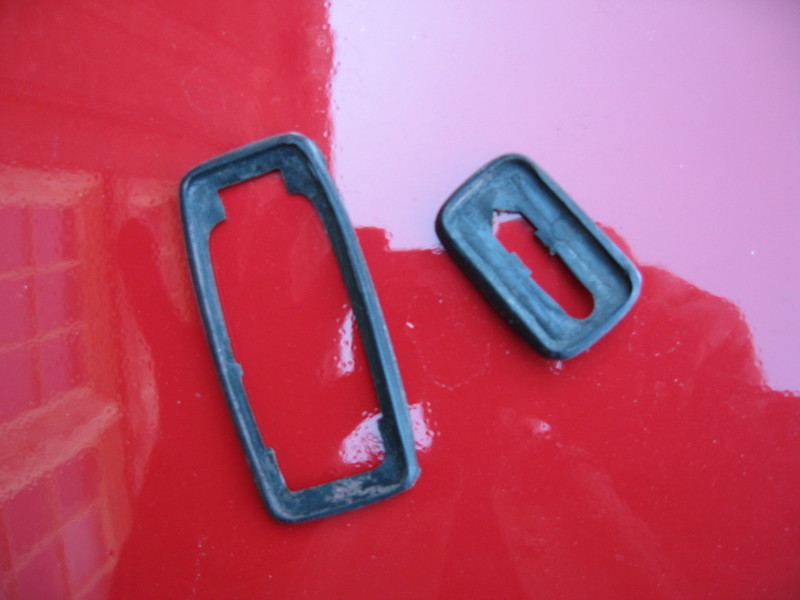
The bigger gasket has a small notch and a large notch. The large notch fits on the side closest to the door opening lever. If you install backwards, its going to look warped. Here it is the correct way:
Alright, slip the rear in first, then the front, and slide the handle towards the rear of the car to lock in place.

Install and tighten the front screw and then the rear at the back side of the door.
Now, install the trim piece, and you’re done!
Now, be proud of what you’ve accomplished today! YAY! Aren’t you glad you did this yourself?
Fin.