
There are two main types of terminals used in early watercooled VWs. The first style is the 1/4″ quick-disconnect terminals – called FASTON. The other type typically goes into multiple contact plastic housings. While it is most commonly know as a fuel injector connector, the correct name is Junior Timer and was made by AMP.
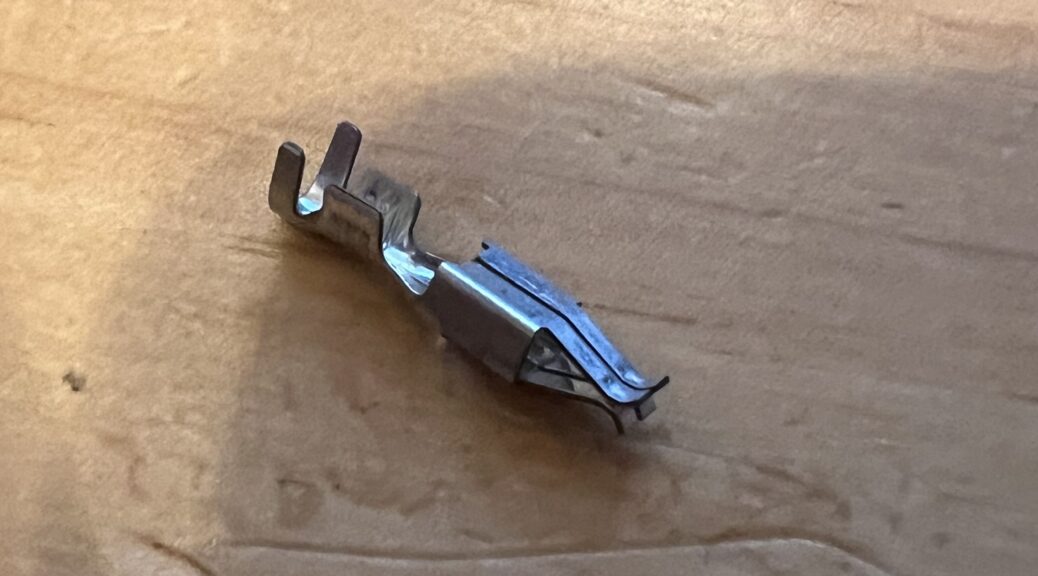
The type of crimp is called an F-crimp. This is sometimes referred to as open barrel and is similar to GM/Delphi Weatherpack/Metripack crimping. This is an open, double barrel crimp. They usually have a section that crimps a wire, and a larger section that makes a mechanical connection with the wire insulation. This crimping method is easily repeatable, reliable and more corrosion resistant than soldered connections.
These part numbers can be found on electronic suppliers such as Mouser or Digi-Key.
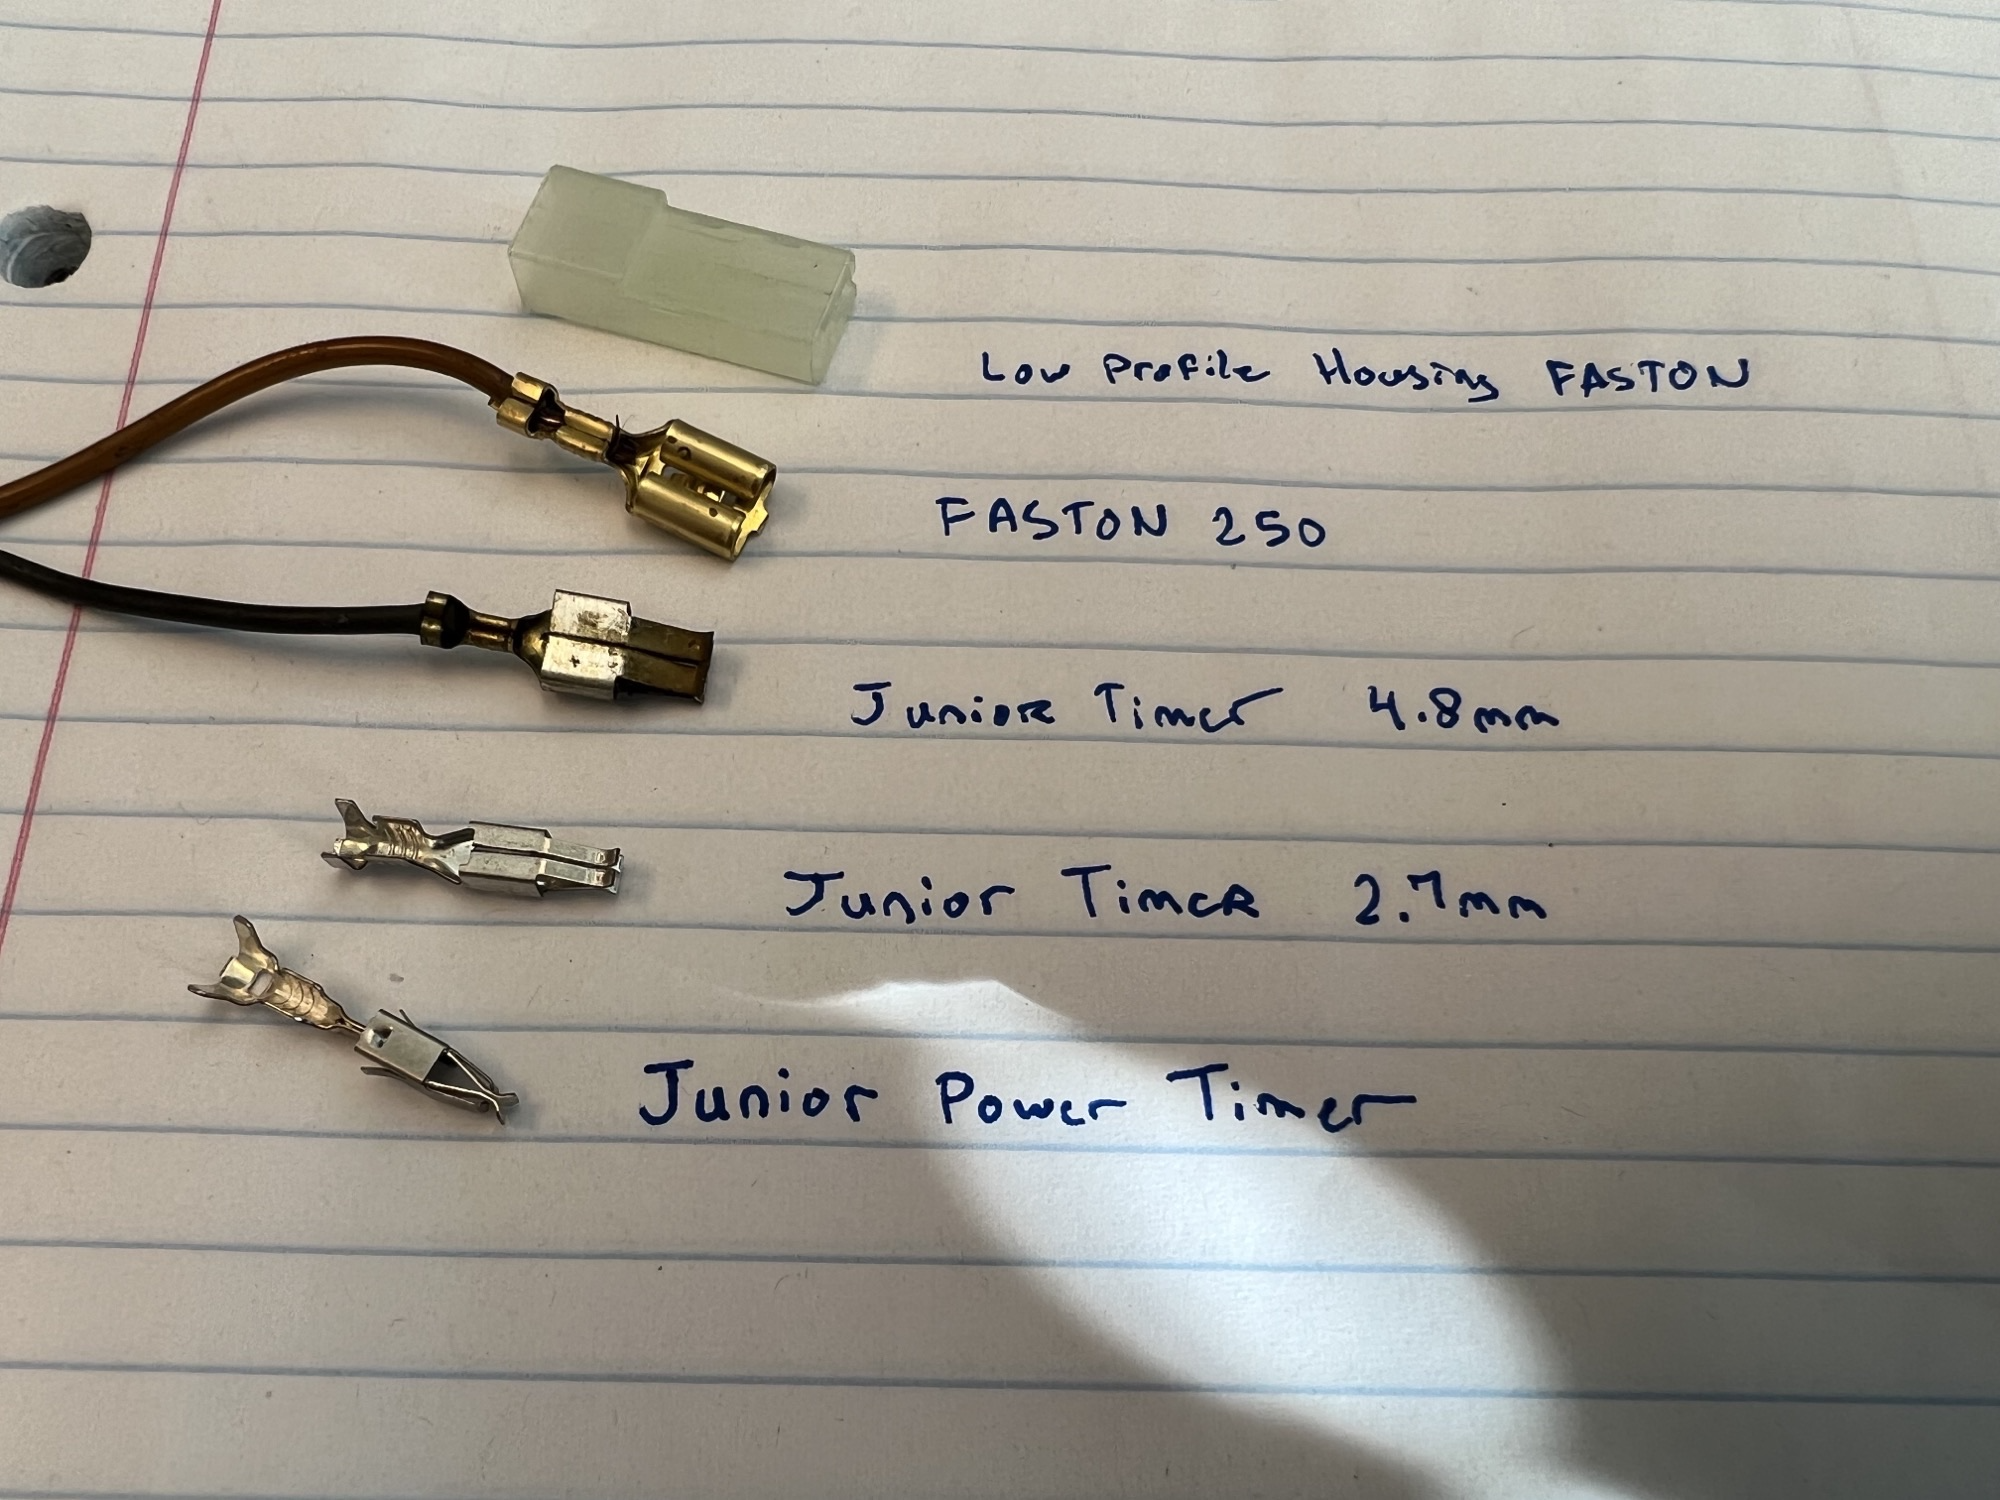
Fuel Injector Type Terminals
The 2-pin connectors used everywhere on VWs, Audis and many other brands. These are commonly known as Bosch connectors, AMP connectors, or fuel injector connectors. They are actually called Junior Timer connectors. The company currently making them is TE Connectivity (Formerly known as Tyco Electronics and AMP).
The later series called Junior Power Timer has an extra stainless steel cantilever spring, and an additional locking tab. These are used on Audis, and on later VWs. They are generally compatible with Junior Timer housings.
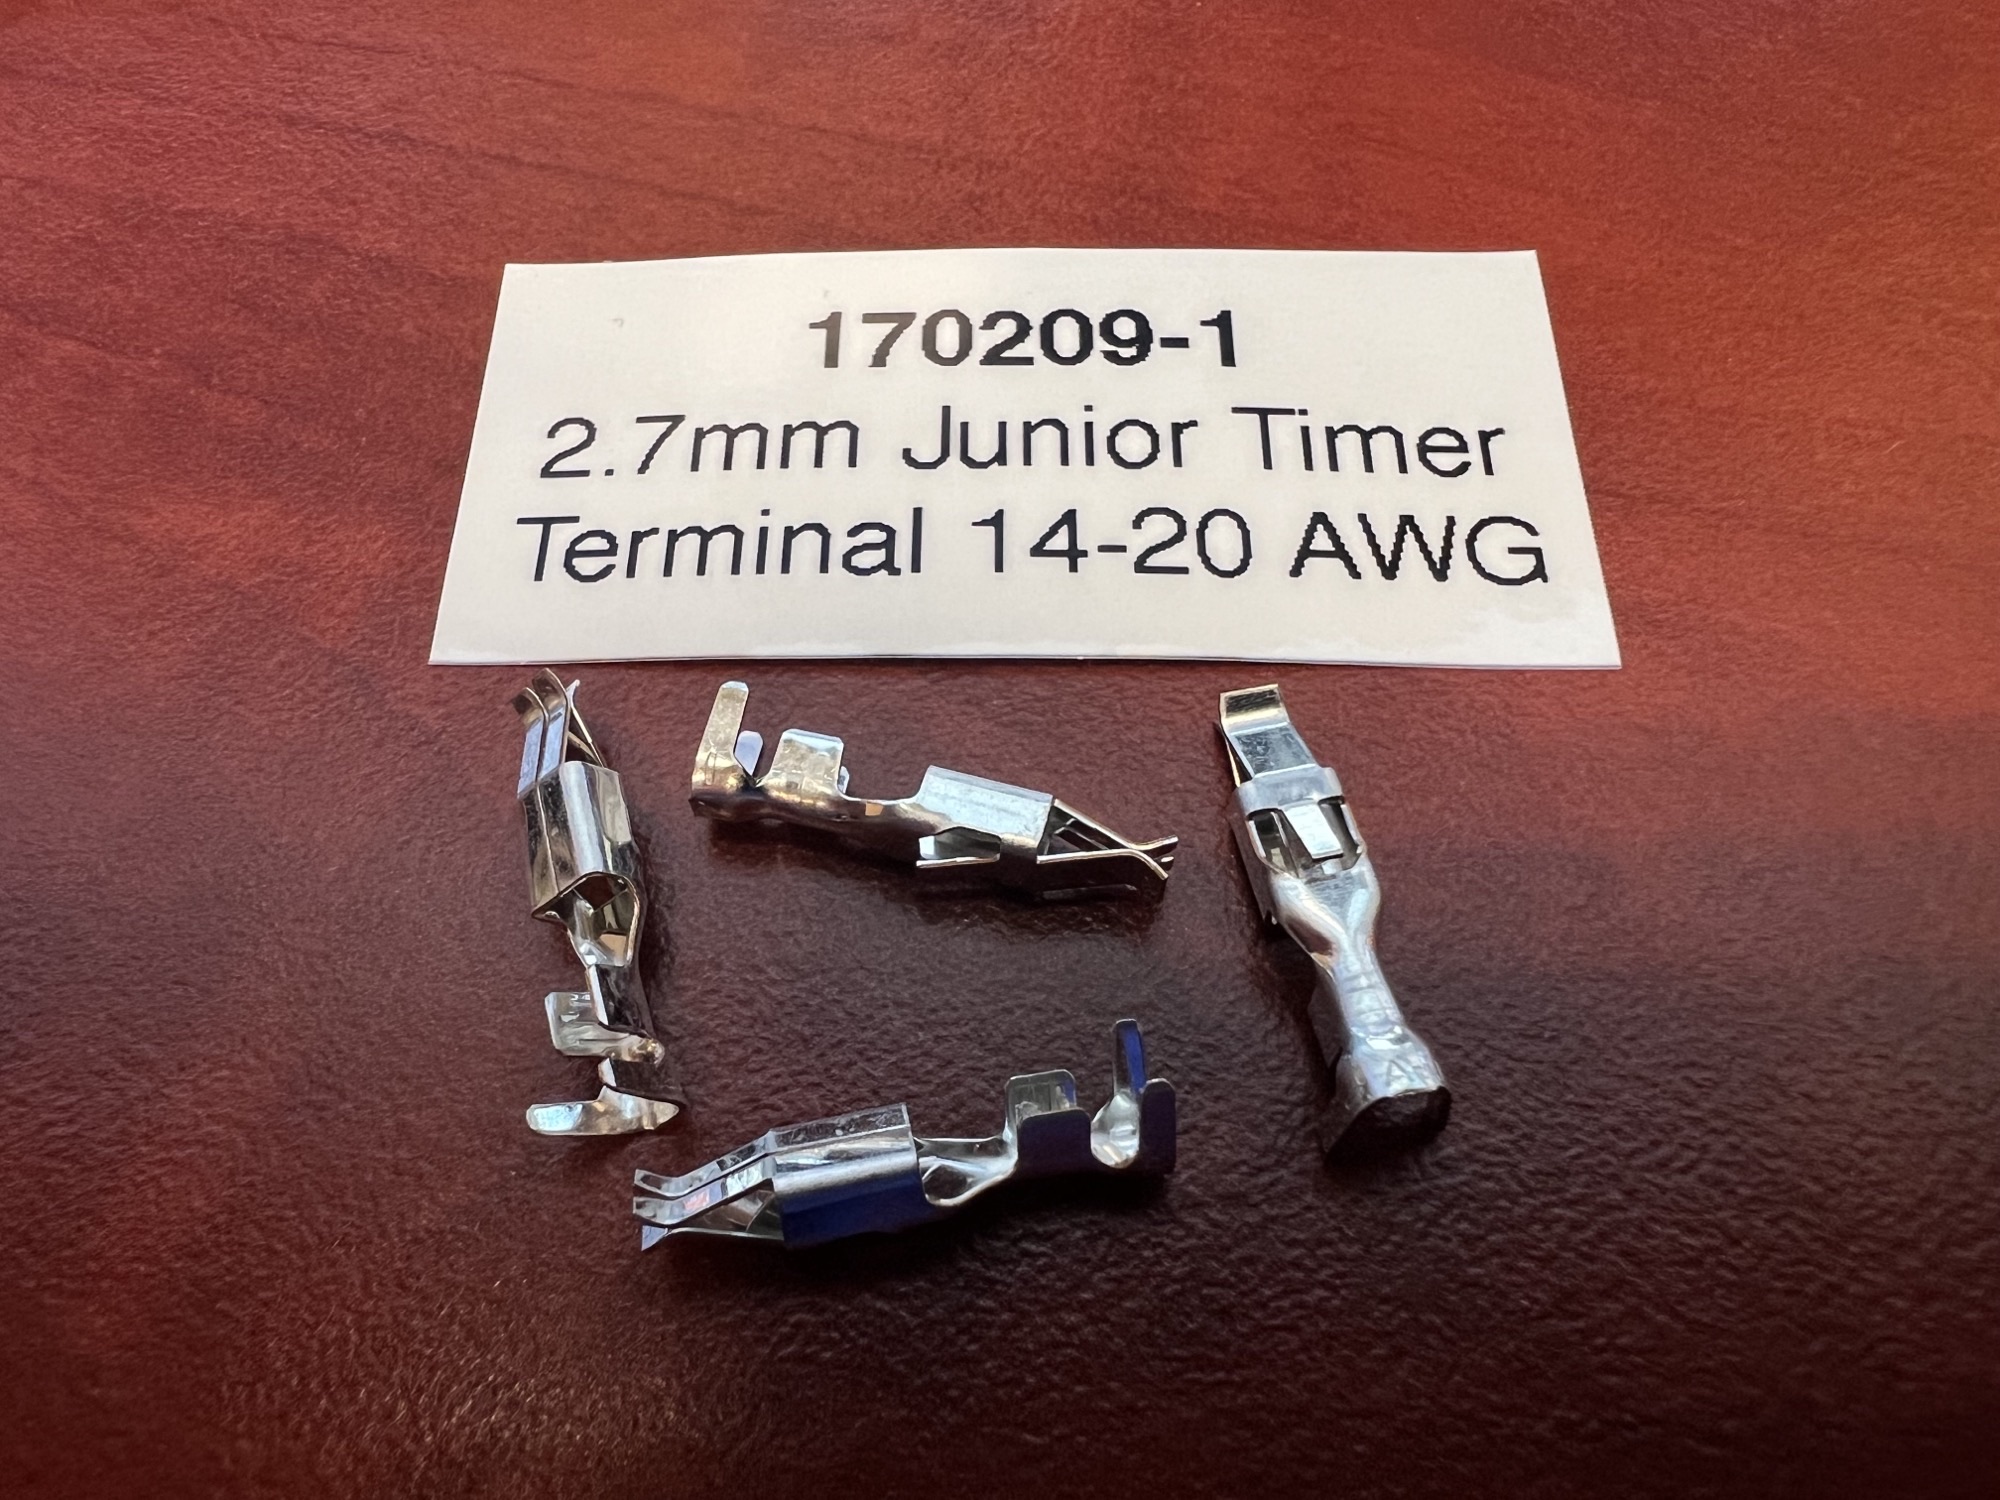
P/N: 170209-1
Name: Junior Timer 2.7mm receptacle
Wire Size: 14-20 AWG
Max power: 24A
Material: Copper contact with tin plating
Max Temperature: 125°C
Locking Lance: Yes, 1 on back
This is the standard receptacle terminal with one locking lance. The width of the terminal fingers is about 2.7mm. This is used in various places:
- Cold Start Valve
- Aux Air Valve
- Idle Boost Valves (2-pin on/off and 3-pin variable on 16Vs and Digifant)
- Warm-up Regulator
- Frequency Valve on CIS-Lambda
- Differential Pressure Regulator ON CIS-E and CIS-Motronic
- Fuel Injectors on Digifant
- Throttle Position sensor on some Digifant and Motronic systems
- Oxygen Sensor Heater connector on 16V and many later cars
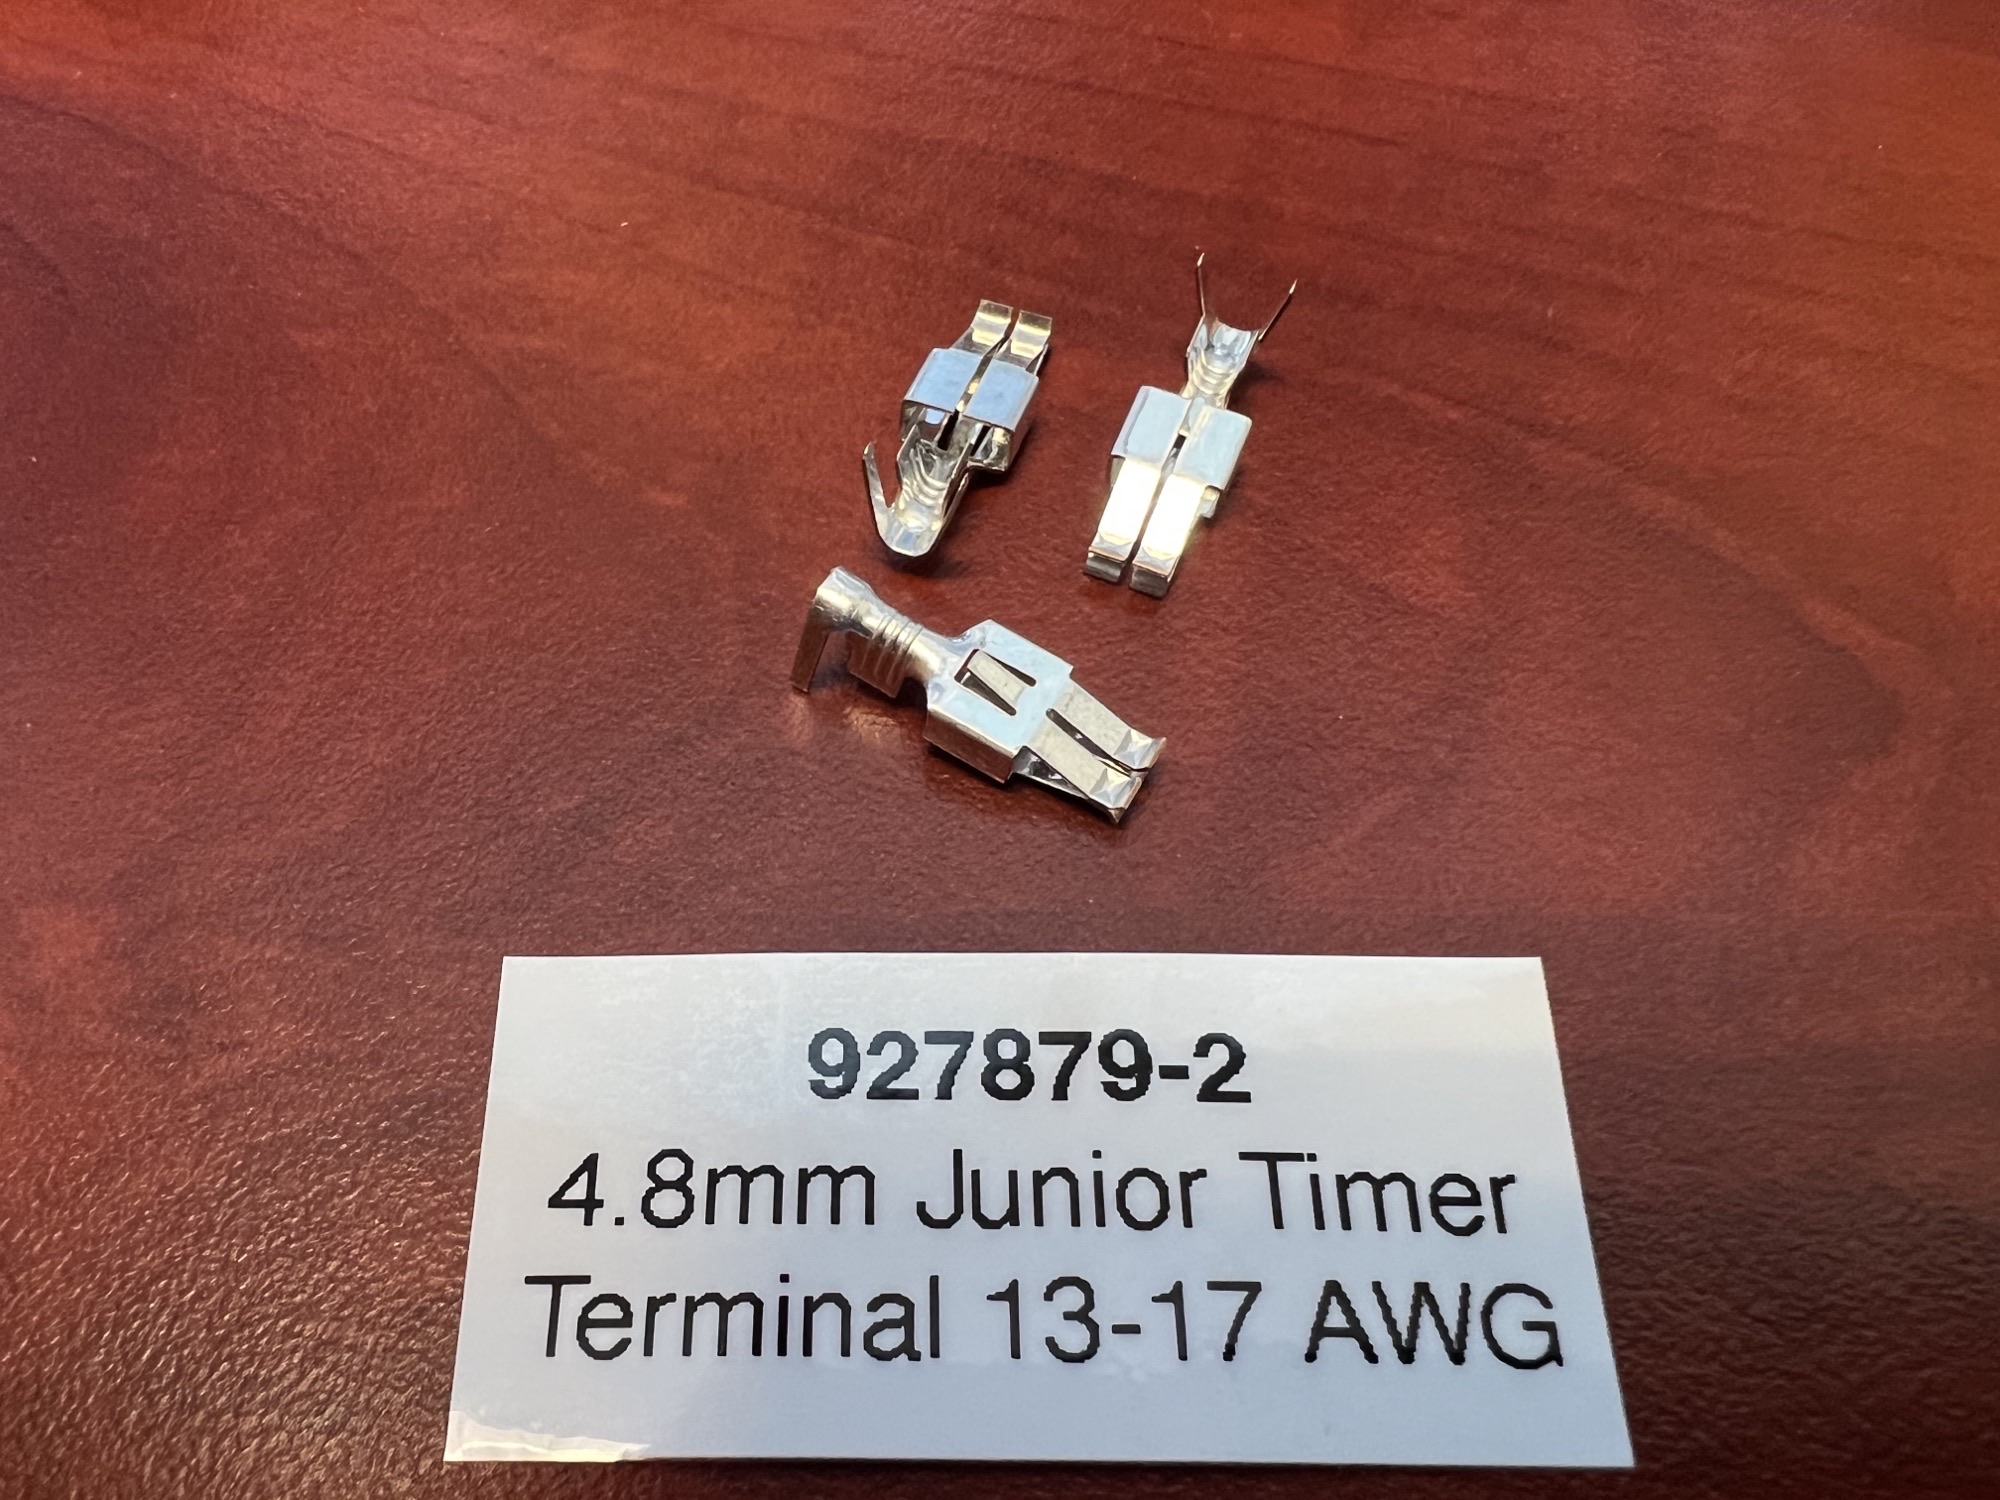
P/N: 927879-2
Name: Junior Timer 4.8mm receptacle
Wire Size: 13-17 AWG
Max power: 40A
Material: Copper contact with tin plating
Max Temperature: 125°C
Locking Lance: Yes, 1 on back
This is a wider contact, only used in a few places:
- Transfer Pump connector inside the fuel tank on 2-pump cars such as 1984.5 – 1992 Sciroccos and later Cabriolets
- Possibly the terminal used in the Mk3 starter solenoid connector
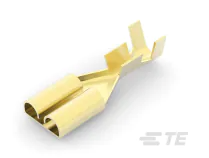
1/4″ Quick-Disconnect Receptacle Terminals
These are known as FASTON receptacle terminals. They are described as .250, 6.3x18mm, or just 1/4″ quick disconnects. Sometimes incorrectly described as spade terminals. The measurement is based on the width of the tab. They have a locking lance on the back for locking into terminal housings. They are very common in many cars, and other applications. Just a few examples of where they are used:
- Ground connections at fuse panel (with no housing)
- Many single connectors on the back of the fuse panel
- Throttle wide-open switch on CIS cars
- Oil Pressure sensors
- Oil and coolant temperature senders
- Radiator fan switch connector
- Various in-harness connectors
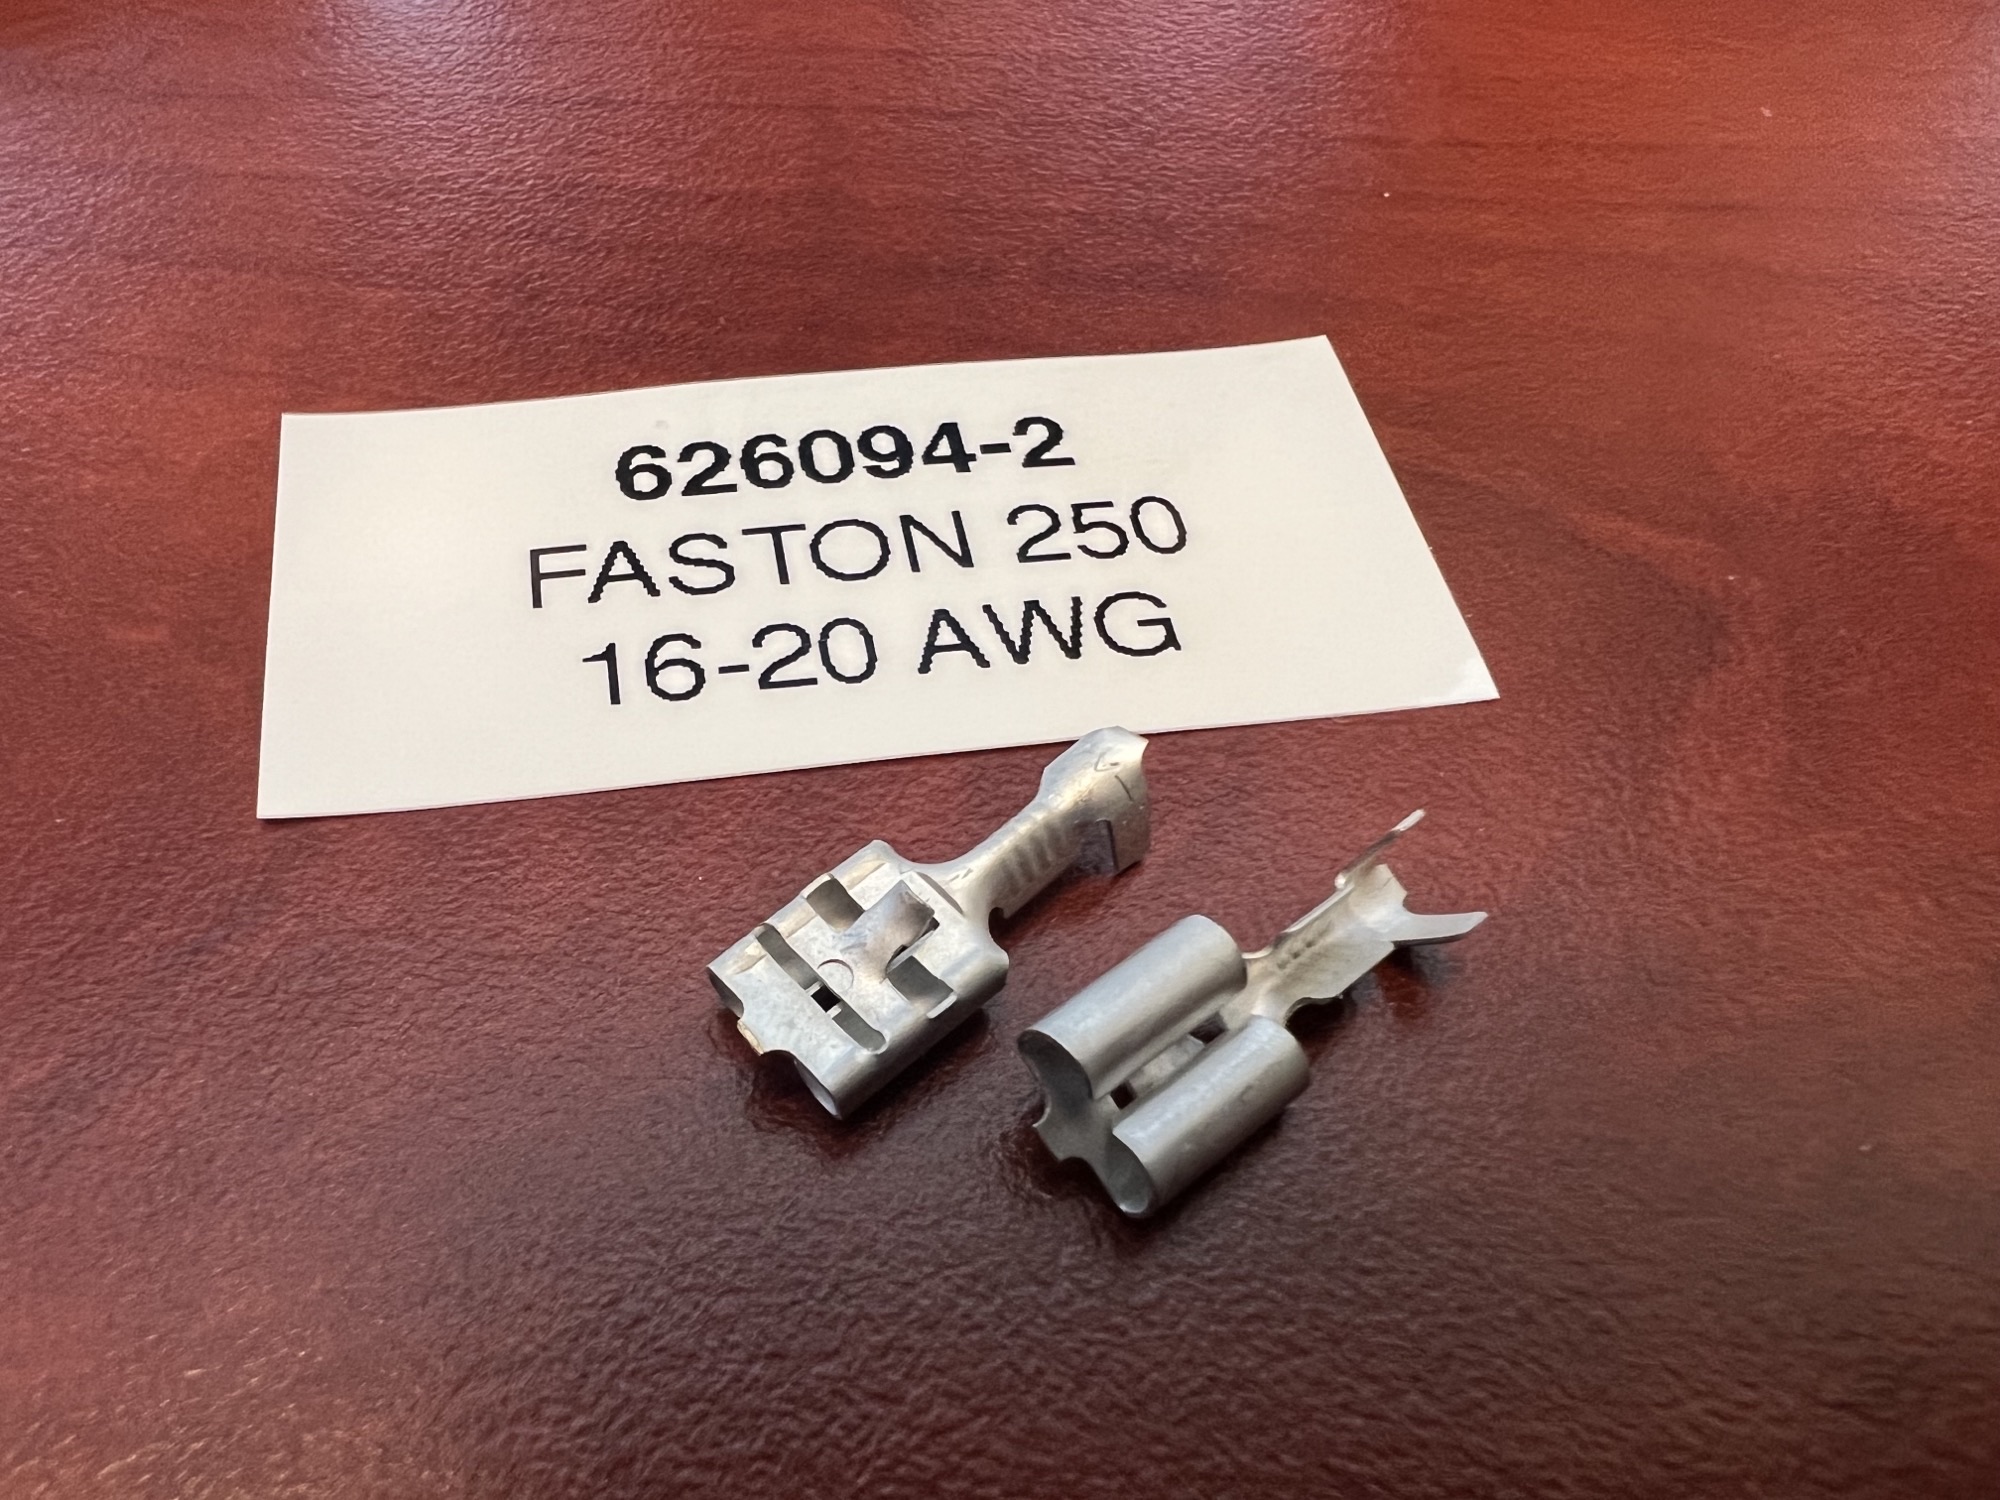
P/N: 626094-2
Name: FASTON 250
Wire Size: 17-20 AWG
Max power: 28A
Material: Brass, tin plating
Locking Lance: Yes

P/N: 42238-2
Name: FASTON 250
Wire Size: 14-18 AWG
Max power: 28A
Material: Brass, tin plating
Locking Lance: Yes
P/N: 170054-1
Name: FASTON 250
Wire Size: 16-20 AWG
Max power: 28A
Material: Brass, unplated
Locking Lance: Yes
1/4″ Connector Housings
These are the clear plastic housings that are normally over these connectors. This is a clear/natural plastic, and matches the original types typically in 70s and 80s VWs. The locking lance on the FASTON terminals will lock into this.
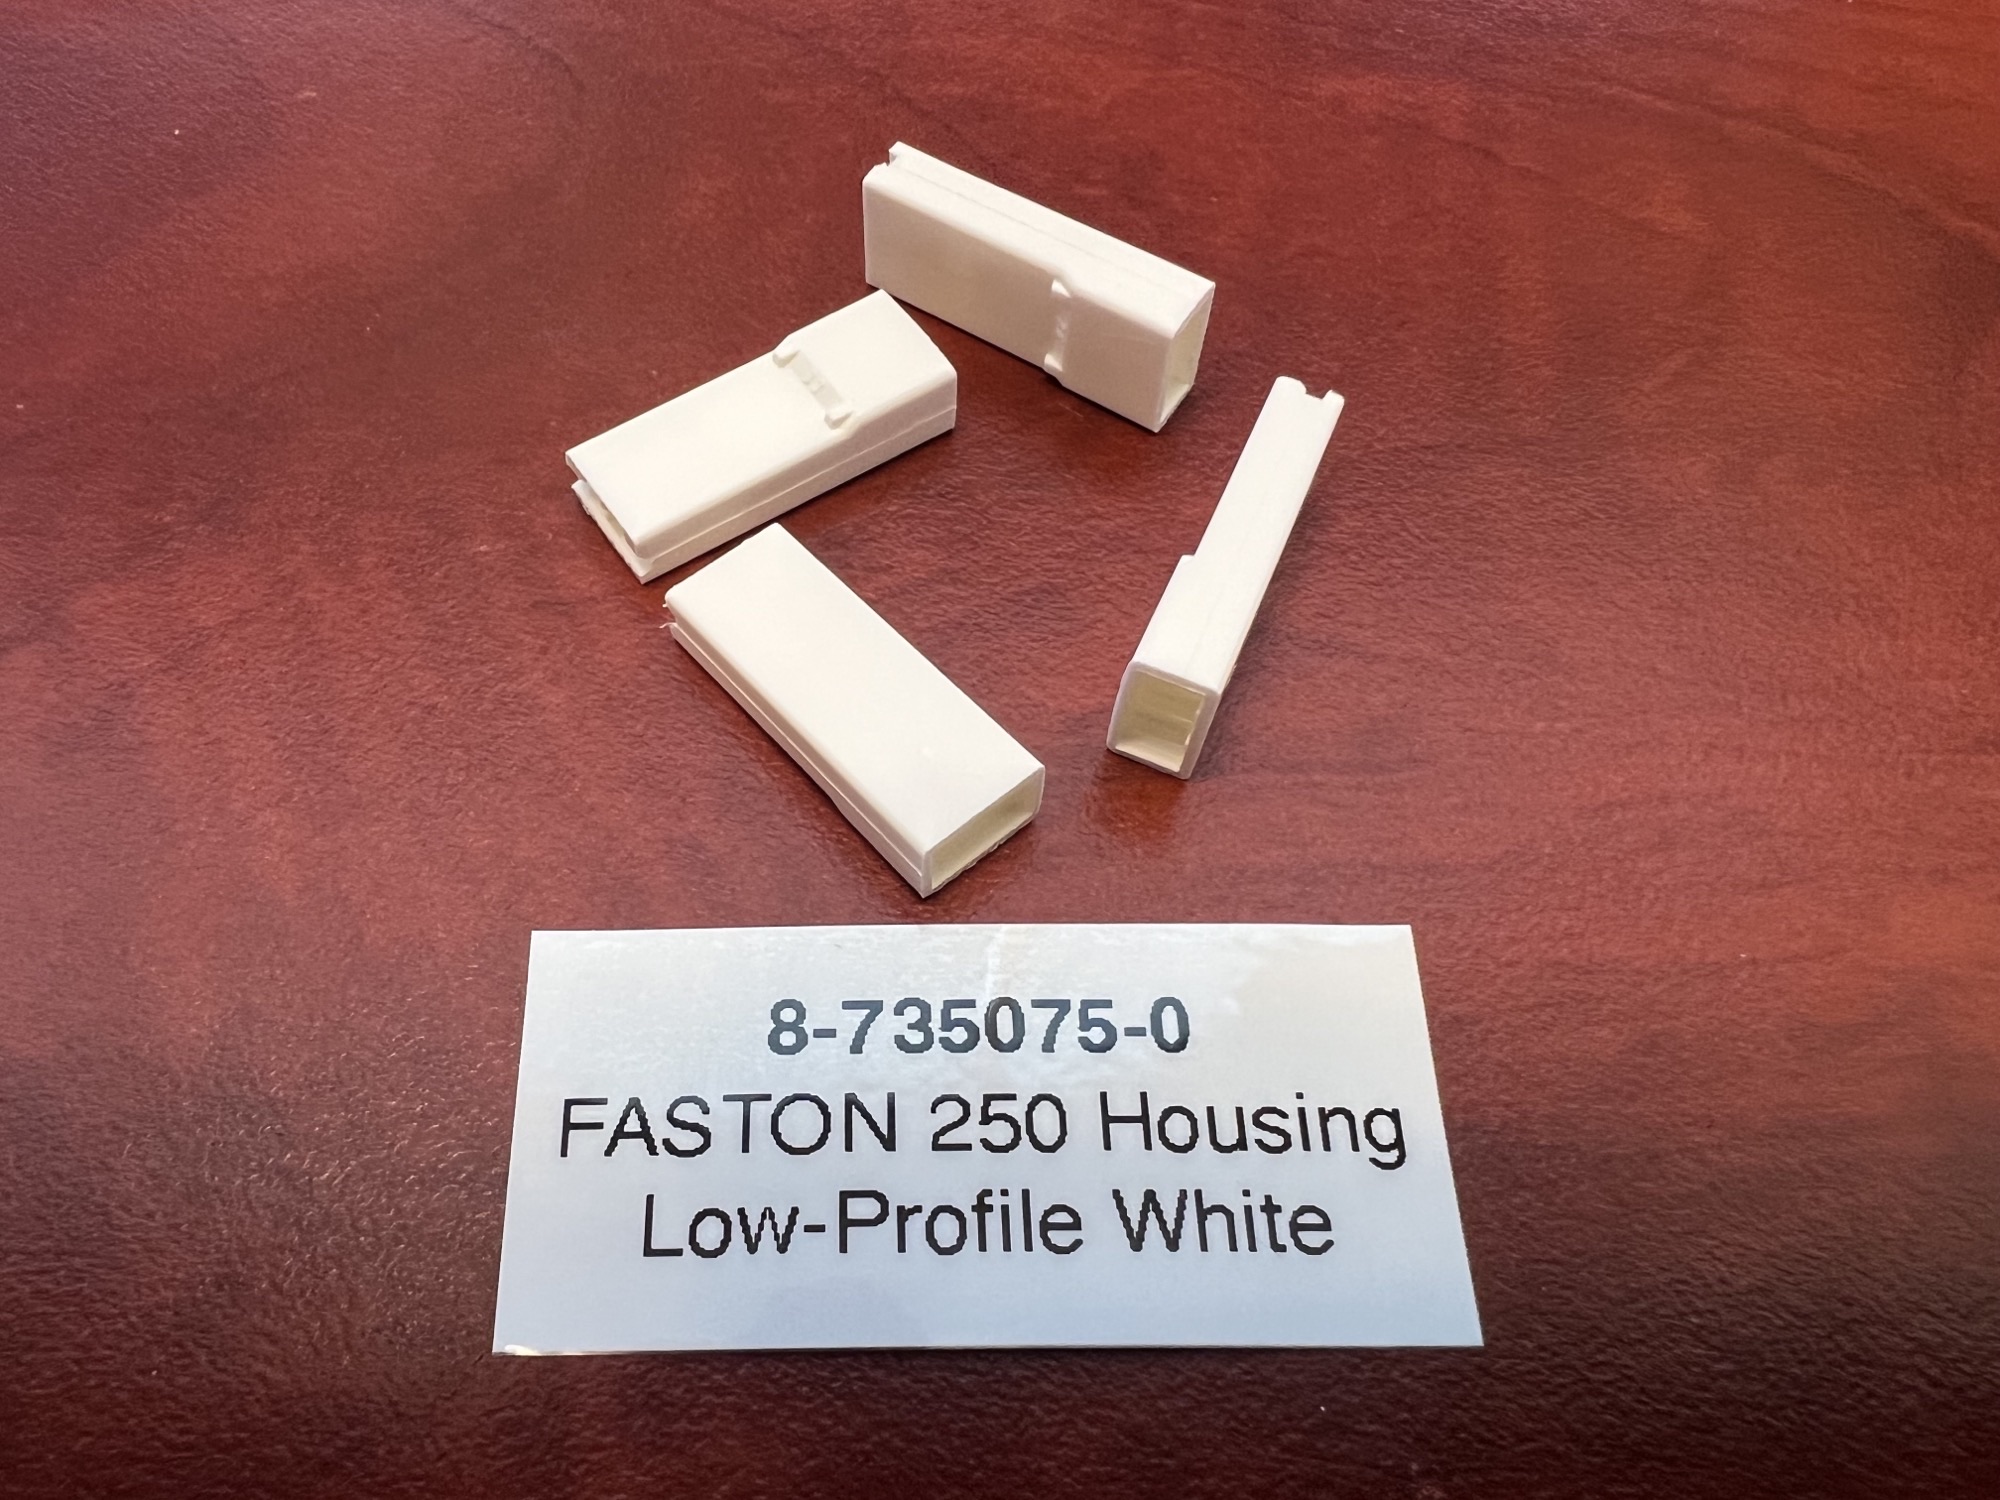
P/N: 8-735075-0
Name: Low profile, single contact, FASTON 250 housing
Color: Natural
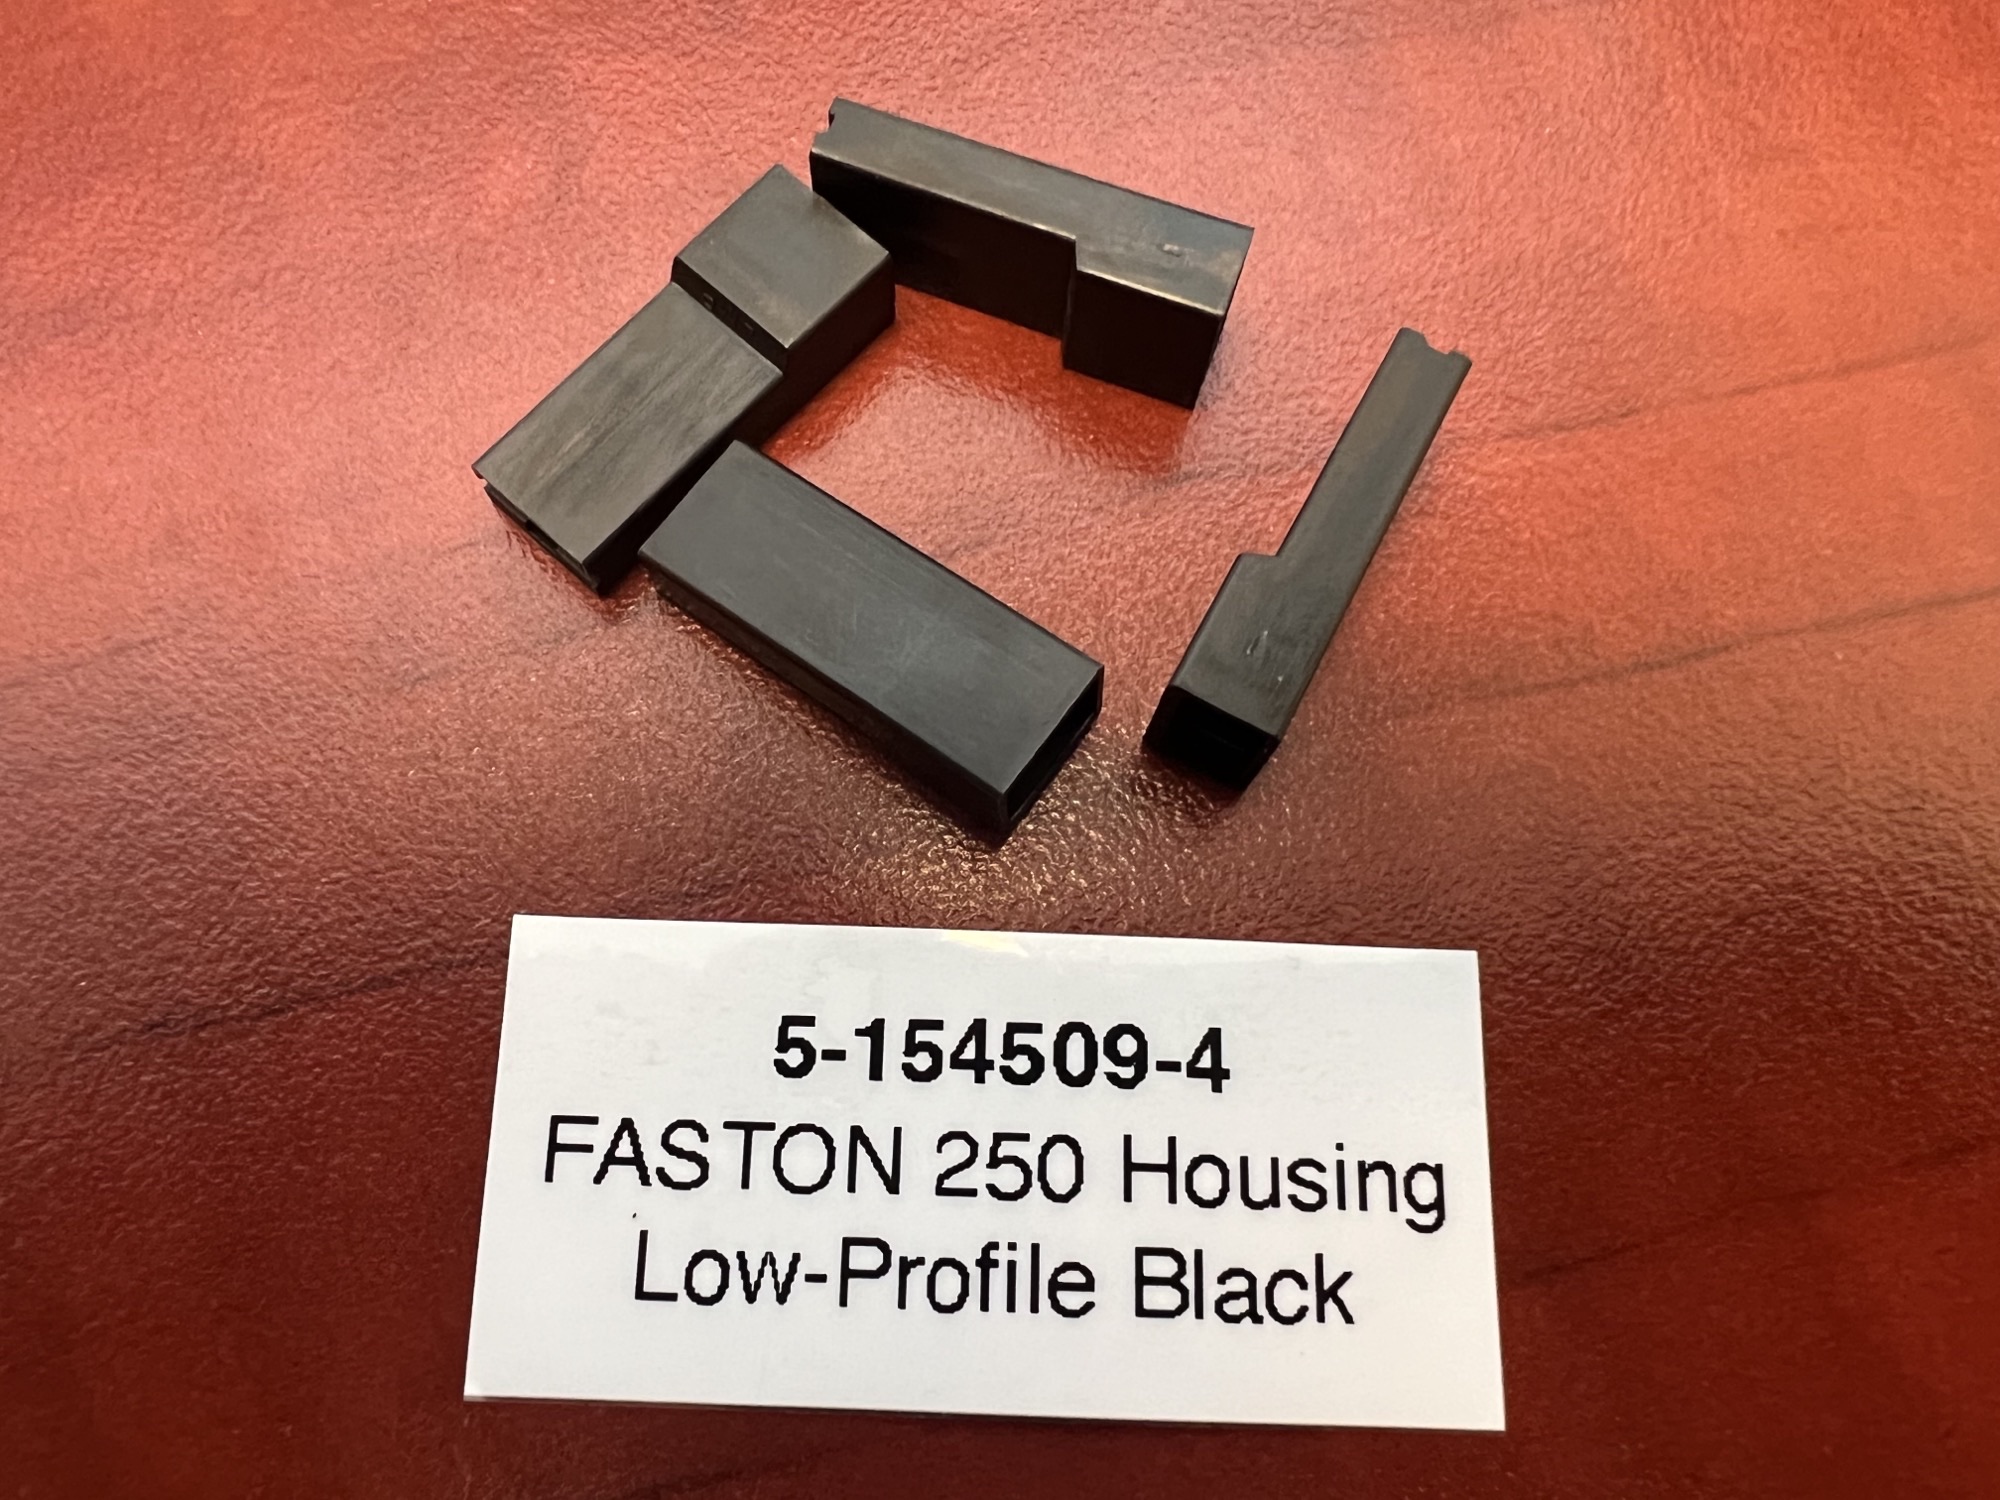
P/N: 5-154509-4
Name: Single contact, FASTON 250 housing
Color: Black
The black variation of the plastic housing. This is used specifically on the throttle body open-throttle switch connectors on some cars.
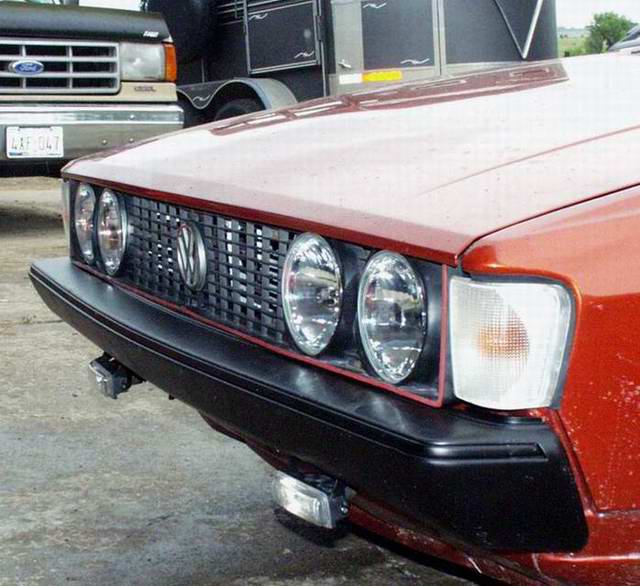
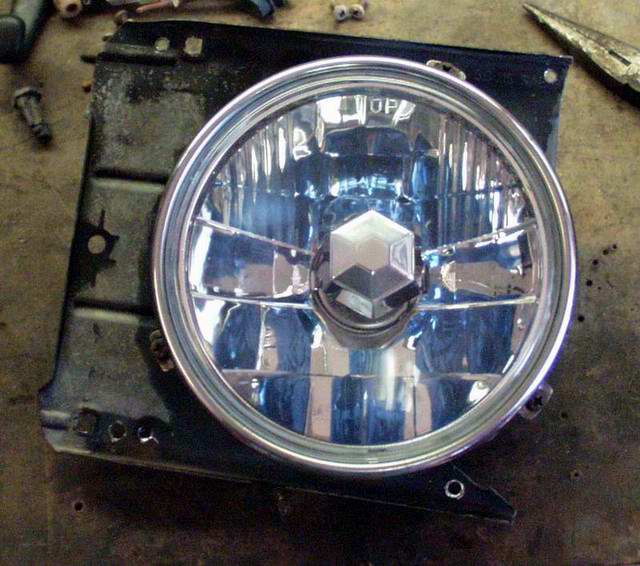
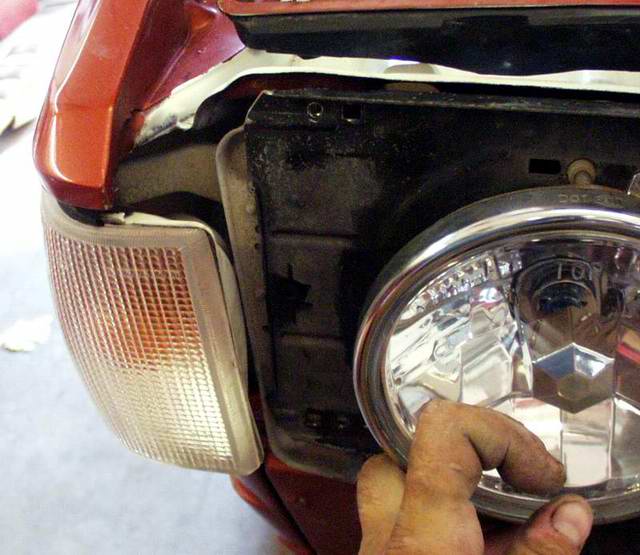
Headlight Connectors
The H4/9003 bulb and the sealed beams use a larger size .312 or 8mm/7.92mm connector. The American size of 5/16″ (0.3125″) The flag terminal style is seen often here in aftermarket connectors for a low profile.
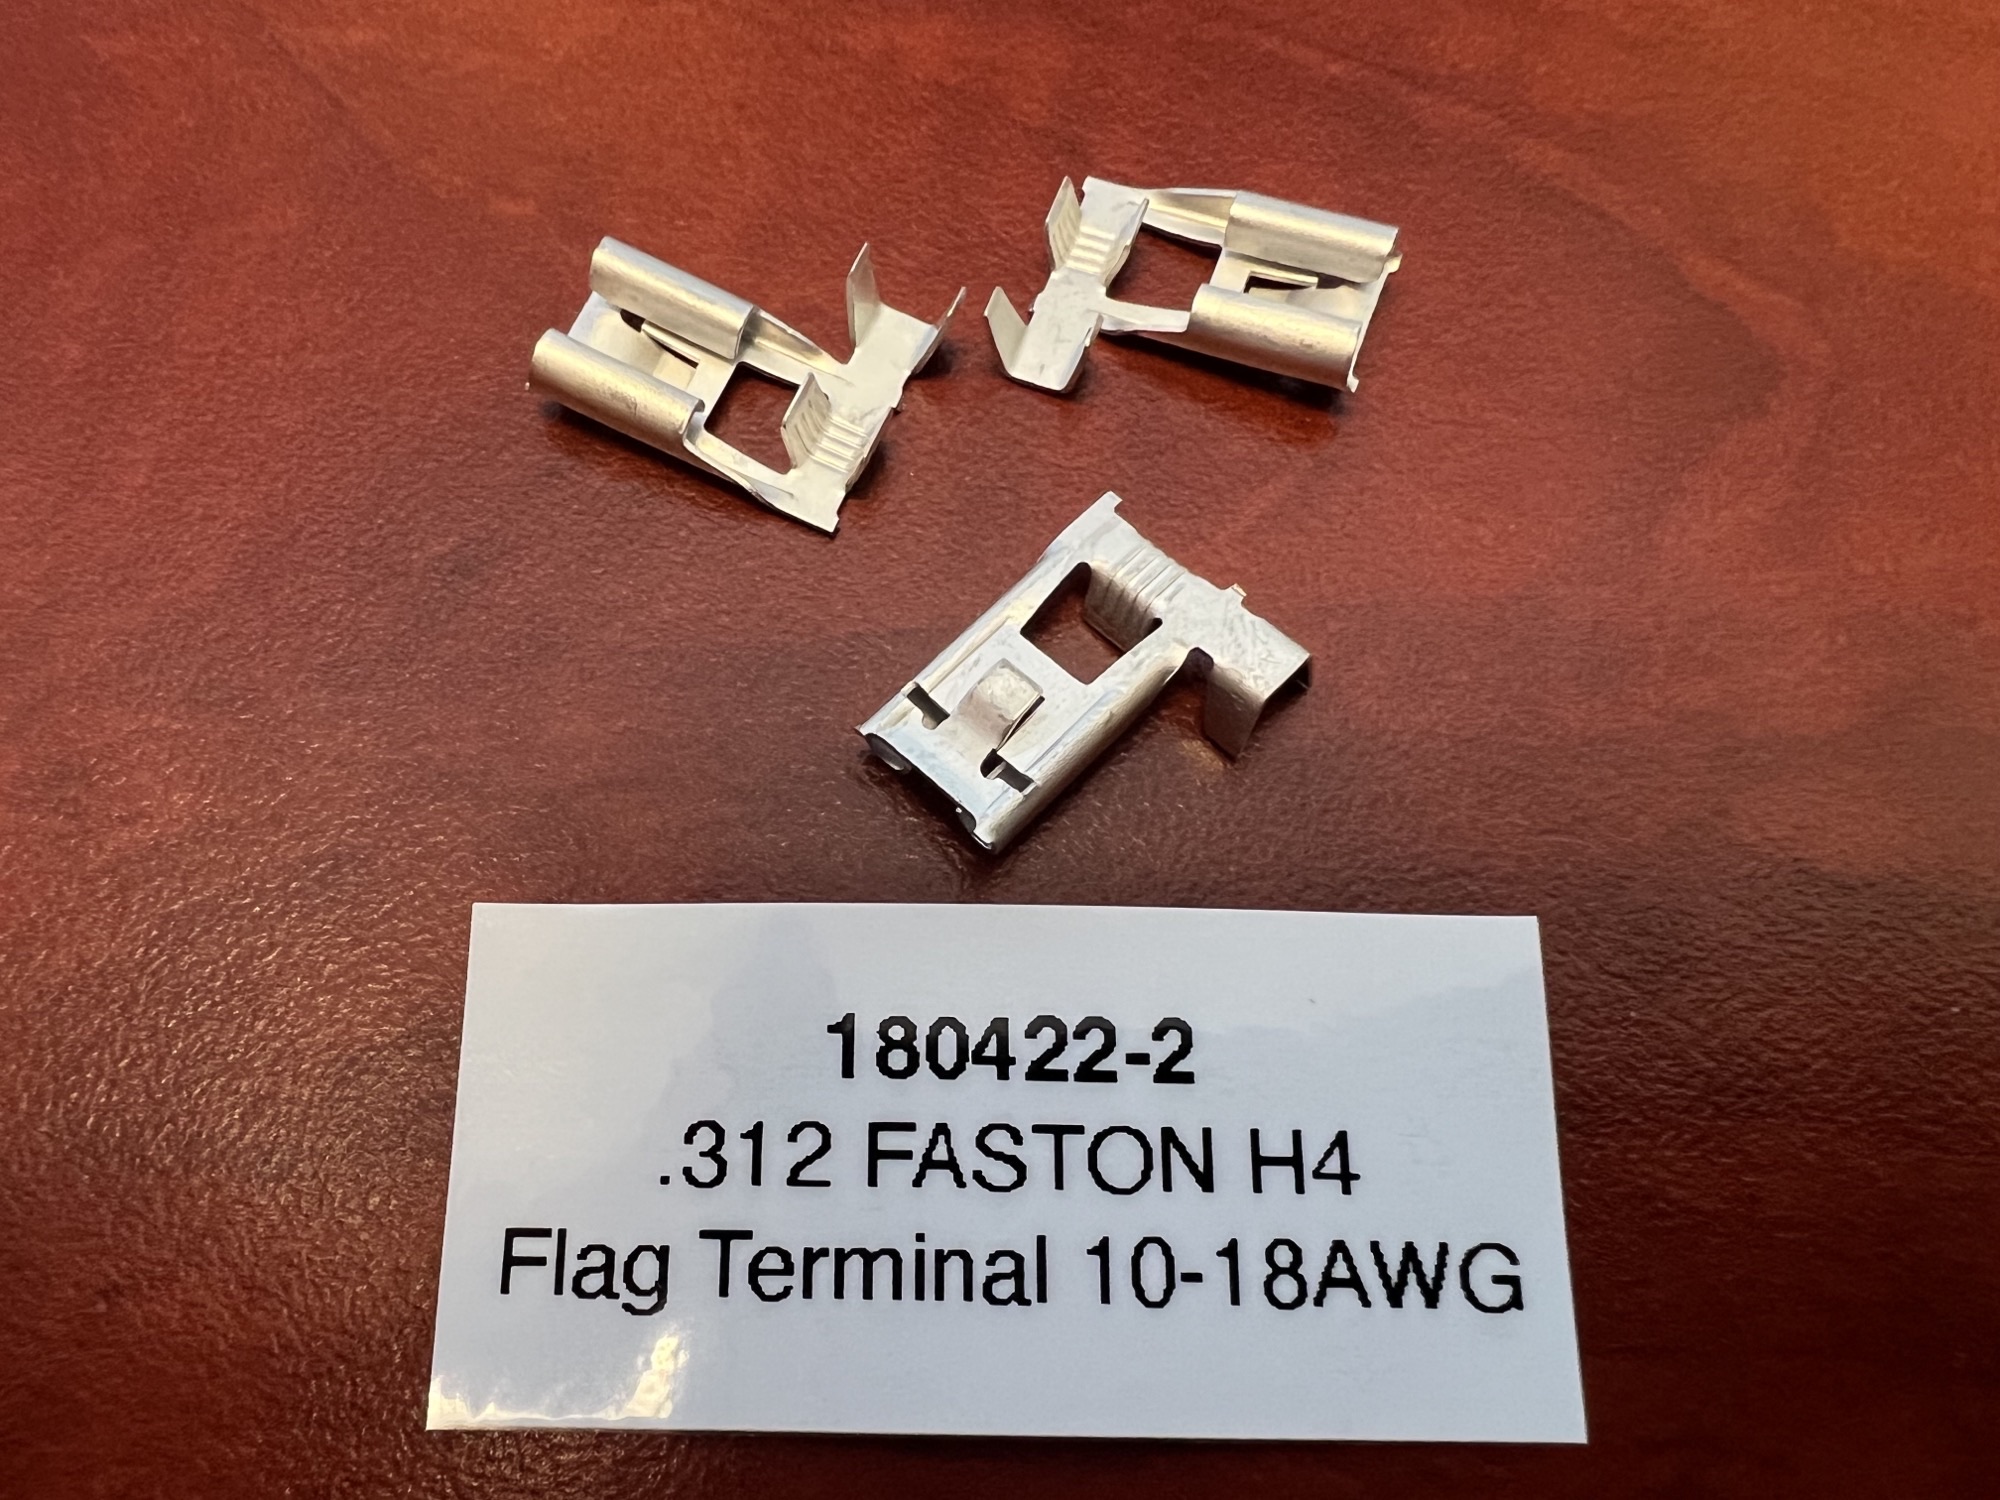
P/N: 180422-2
Name: 312 Series FASTON 90 degree flag terminal
Wire Size: 10-18 AWG
Max Power: 28A
Material: Brass with tin plating
Locking Lance: Yes
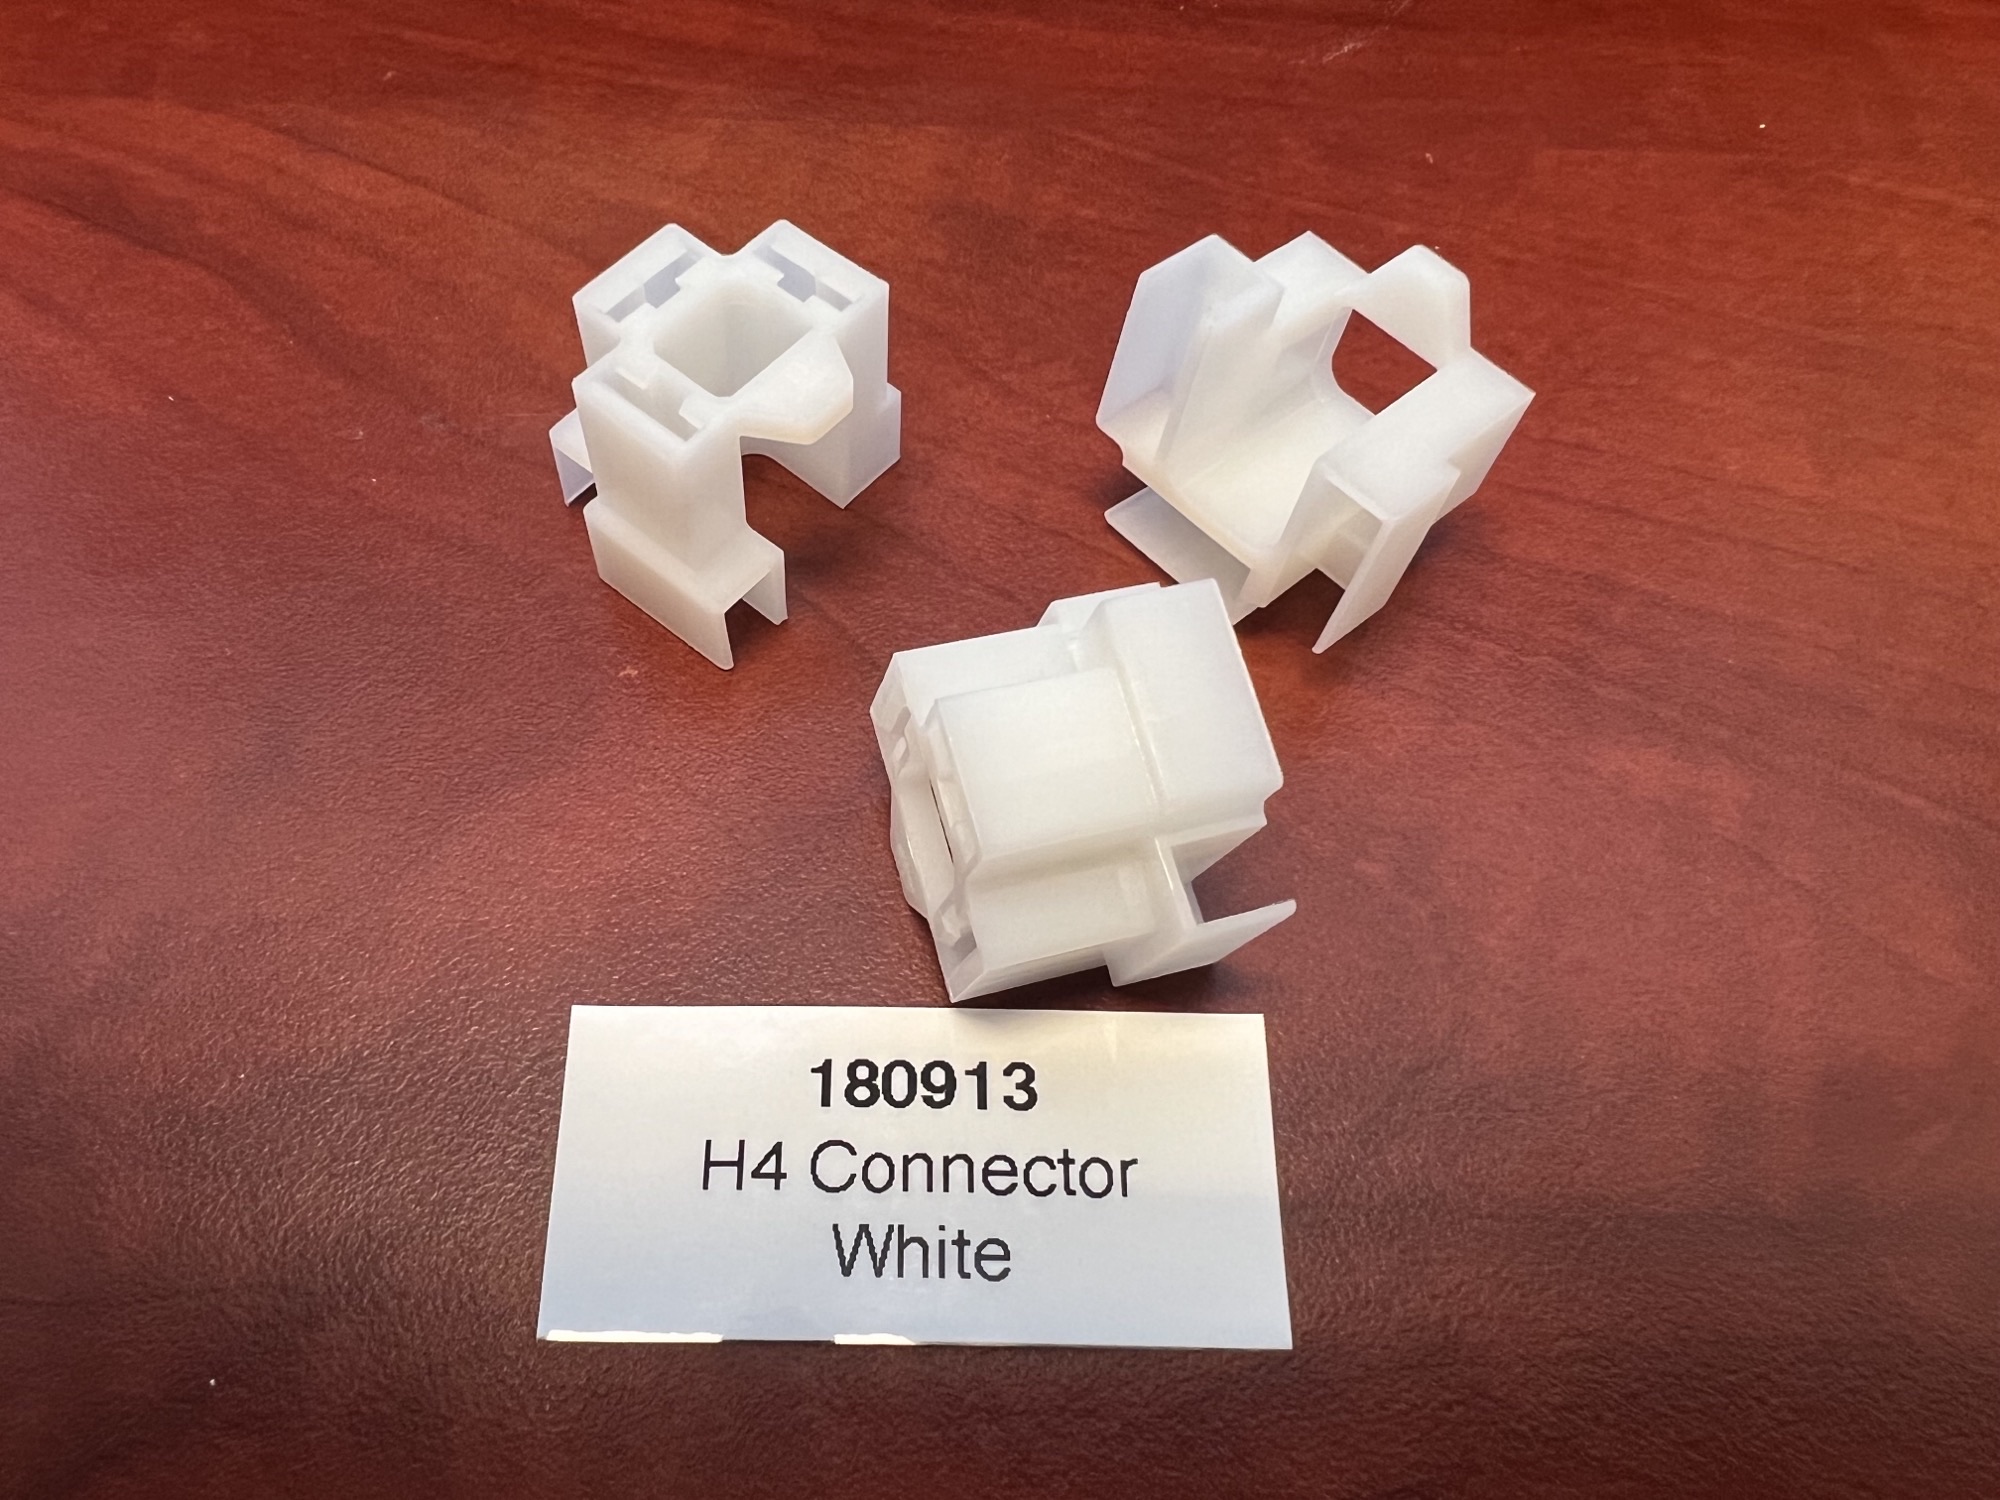
P/N: 180913
Name: H4/Sealed Beam Connector 3-Pin Housing (Flag Style)
Color: Natural
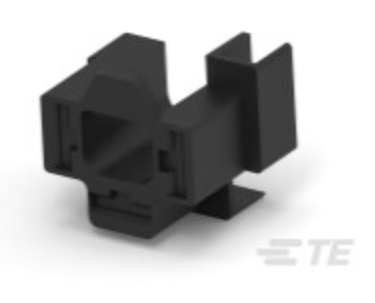
P/N: 180913-5
Name: H4/Sealed Beam Connector 3-Pin Housing (Flag Style)
Color: Black


 This article is about how to polish the ridges off of the Mk2 Scirocco’s tailights to give them a smooth, glassy finish. It makes me want to eat some candy!