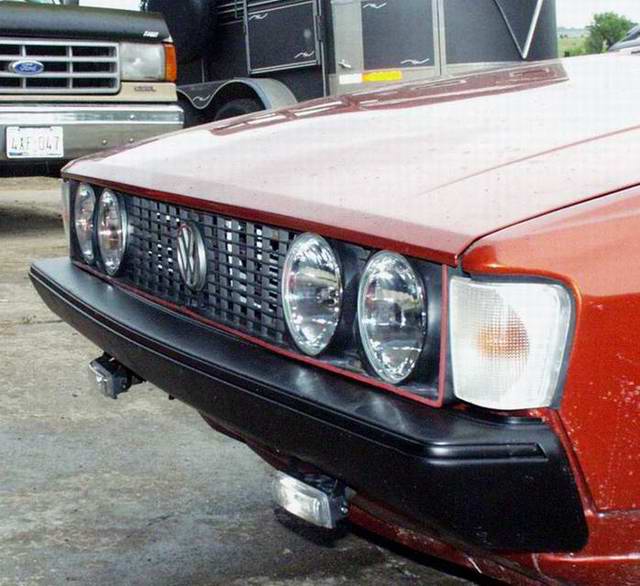
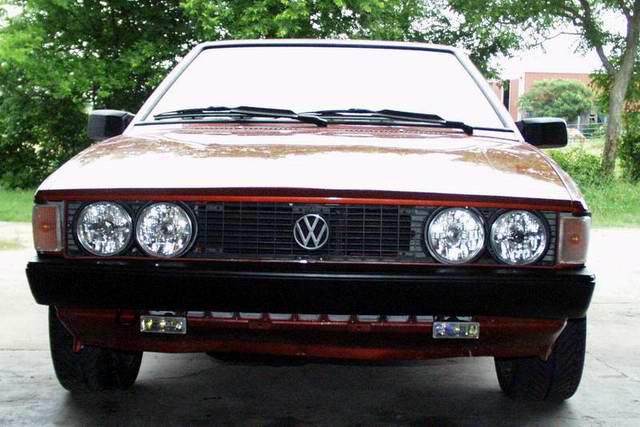
Round Headlights on a Scirocco, is like returning what was taken away with them 4×6 headlights. Annoyed at the cost of euro lights and its wide distribution, I decided to move back into time and change the missing link on my Scirocco. to give it back its purebred look that VW took away in 82.
Parts needed for this project:
2 complete PAIRS (4 assemblies) of Scirocco Mk1 headlights frames,
1 complete pair (2 Assemblies) of Mk2headlight (USA OEM),
1 GTI or Mk1 Scirocco Grill (or make your own).
cut each Mk1 headlight assemblies in two parts, keep the low beam (outside beam lowest profile) parts.
Now remember this is a custom install there is no perfect way unless yours a welder :), so you need to make the Mk1 parts (2 per side) so that when you hold the grill up against it, the headlights are spaced properly and centered the VW insignia in the middle of the grill parts. (this is the annoying time wasted moving the left and right side by hand (suggestion hold grill against radiator frame, line up one headlight drilled holes, screw it in, place opposite side in as well the other should fall in place.
Now cut the MK2 brackets has shown.
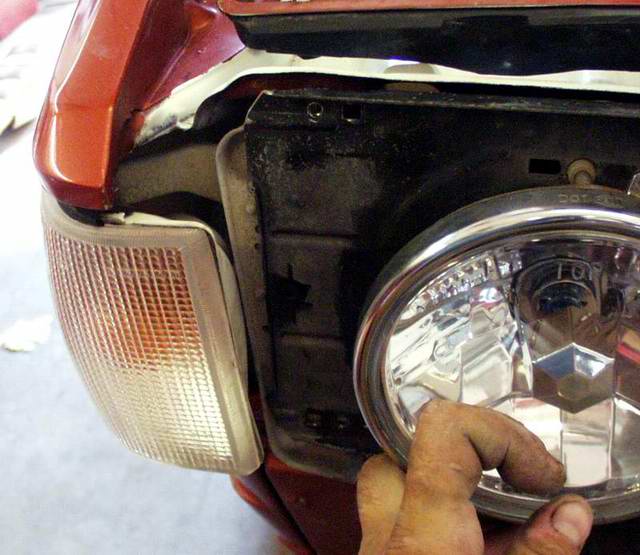
mount your corner lights back on it and install on the corners of the car 🙂 if you left enough metal on ends it will fit perfectly aligned (maybe a little trimming involved) with your Mk1 brackets, I slid mine underneath and use screws to hold it in place (upper and lower corner screws of the Mk1 corner headlight).
This picture is to save yourself a lot of time if you encounter this situation… it doesn’t fit properly, don’t hack at it, grab the other corner light, your tying to use the wrong corner in.
the grill has 2 holes (a top and below) in between headlight, use a long screw with a sleeve to prevent screw to pull it in too far. and 4 in the split part of it (only the top ones touch metal.)
there your done, select you headlight as you wish, and go drive your car around.. and don’t forget to post on VWVortex your job, so the rest of the folks can gawk at it.
ATS Technote: How to upgrade, or replace your Master Cylinder. This technote shows the install of a 22mm Master Cylinder. This upgrade is a must if you are installing larger brakes, such as the 10.1″ 16v setup on an older car.
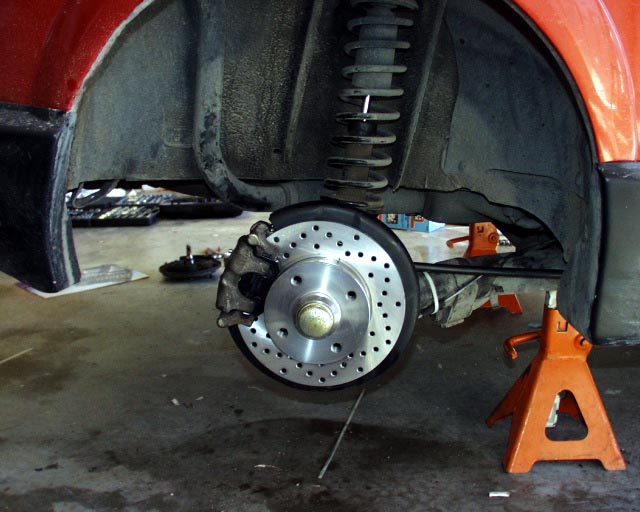
The Scirocco 16v came with rear disc brakes – it was theonly A1 that had them stock. Upgrading for looks? Better braking? Here’s how to do it.
Special thanks to Brendon Porter (AKA VWralley on VWVortex) Patrick Buearu (ATS Technotes) and Rob (AKA Mk1scirocco1980 on VWVortex) for pieces of this technote. This is a combonation of of those, plus a few more pieces added by me (Timbo).
ALL Sciroccos are on the A1 chassis (Mk2 roccos are still A1 as well) – And this will also apply to any Rabbits, Cabriolets and 80-84 Jetta. The first car being shown is a Mk2 1985 Scirocco, the second is a 1980 Mk1 Scirocco. A2 conversions are similar.
The easiest way to to this is to find a 16v Scirocco in the junkyard. Good luck finding one these days! Get the whole back axle. Maybe buy the parts off of eBay or Scirocco classifieds. The 16v Scirocco has 8.9″ disc brakes in the back. Keep in mind that they weigh about 5 more pounds per side, and that’s un-sprung weight too.
There are several performance companies that still sell the disc brake stub axles new as of 2026.
A new brake master cylinder is not necessary unless you are also doing 10.1″ front brakes, because these disc brakes move less hydraulic fluid than drums. If you need to swap master cylinders, check the Technotes for that.
VWralley adds, The proportioning valves are VERY important. If you don’t put them in, your rear wheels will lock and cause your car to fishtail everywhere and it is very dangerous, especially in the rain. The stock rear beam mounted prop valve properly adjusted for a lowered ride height or aftermarket adjustable valves available through Jegs, Summit Racing, etc… I have HAD to change pad compounds in my car AND run the inline valves to make it even safe to drive, and it STILL locks up under heavy braking at freeway speed. any less and you will have SEVERE rear lock up issues with any hard braking. anyone who has experienced this once (and believe me it only takes one time!) will wholeheartedly agree
Parts List
New Scirocco 16v parking brake cables (one for each side)
Stainless braided, or stock 16v rear brake lines
brake fluid for your system, DOT3 is what is factory
New or used calipers, if you get used, make sure the parking brake section is not frozen
Caliper carrier brackets
New or used stub axles for disc brakes
Bolts for stub axle – M10 x 1.5 x 32mm grade 10.9
Caliper bolts – often in a brake hardware kit
Brake pads (new)
Brake discs (new)
Brake dust shield (optional, really)
Disc wheel bearings
New grease seals
Disc brake wheel bearing grease
New grease caps for the bearing (might come with a bearing kit depending on where you buy)
16v Scirocco brake pressure reducers (inline at the master cylinder)
Adjustable proportioning valves
Useful Part Numbers
Scirocco 16v rear discs: 357 615 601 Scirocco 16v rear caliper (left): 191 615 423 AX Scirocco 16v rear caliper (right): 191 615 424 AX Scirocco 16v proportioning valves: b 533 612 151 A *Jetta GLI and Golf GTI with rear discs have the same part numbers for these*
Removing the Drums
First, jack the car up, and properly support it.
Chock the wheels. This is important because you need to release the parking brake to get the drum off.
Take the rear wheels off, and remove the dust cap in the center of the drum with a pair of Channel-Locks. Inside, you will find the nut. Remove the cotter pin with a pair of needle nose pliers, remove the nutlock thingy, and remove the 24mm center nut and washer – it should be very easy to come off – less than 10 ft/lbs, you can often do this by hand.
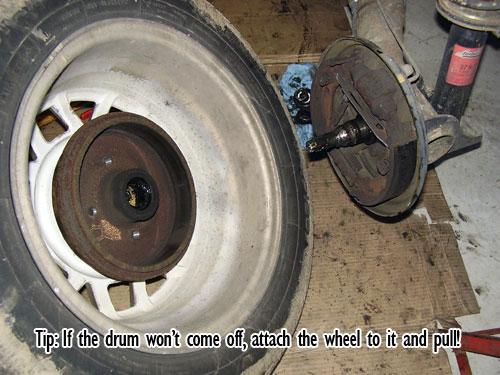
Make sure the parking brake is off. I don’t know how many time’s I’ve started banging on drums that won’t come off when it’s actually being held firmly in place by the parking brake! If you can remove the drum, great – rip it right off. If not, simply put the wheel back on, put a couple of lugs in, and use that to remove the drum. Easy!
Next, disconnect the brake line from the back. it should be an 11mm nut flare nut.
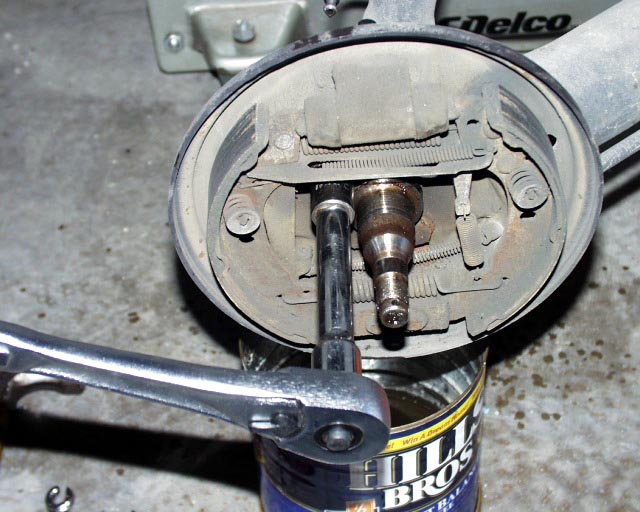
Remove the 4 bolts holding the drum to the axle. They should be 15mm.
Clean the area up if you wish, paint it with some rust eating paint or whatever.
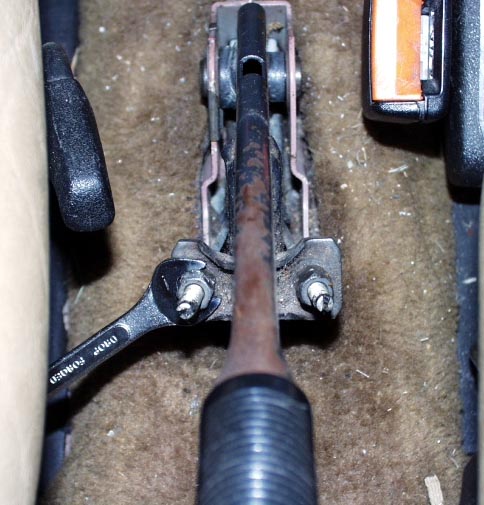
Next, remove the parking brake cables from the car entirely. You need different ones for the disc brakes. You may find that this step is easier if you remove the passenger seat. The nuts are 10mm, but it’s a fiddly job. The cables are slotted, so you could theoretically hold them in place with a screwdriver. I’ve had that work like once ever.
Now is a good time to optionally swap the lever for a later A2 lever, which is a bit stronger and better looking.
Removing the 10mm nuts, as viewed from the front
Assembling the rear disc brakes
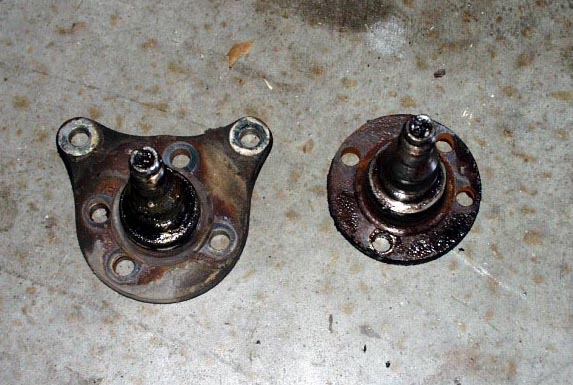
Disc stub axle with caliper mounts vs the drum stub axle
This picture shows why you must swap the stub axles – the disc stub axle has the ear to hold the caliper. Also, the bearings are a bit different.
Clean up the stub axle as best you can, and make sure it doesn’t rust. WD-40 is a water disipator – hence the name. Spray it on.
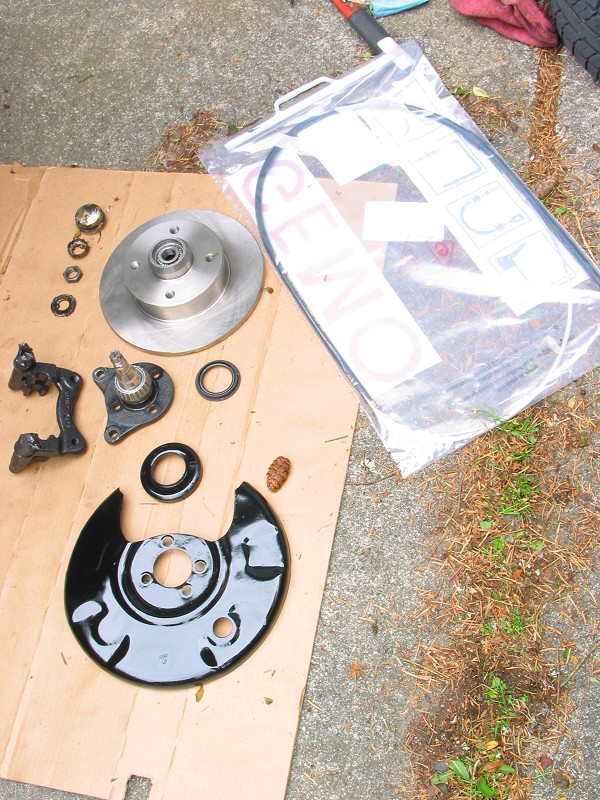
Parts needed for the conversion
Here is a layout of parts for the brake conversion. Also shown is the dust shield. You can also see the Scirocco 16v parking brake cables in the bag.
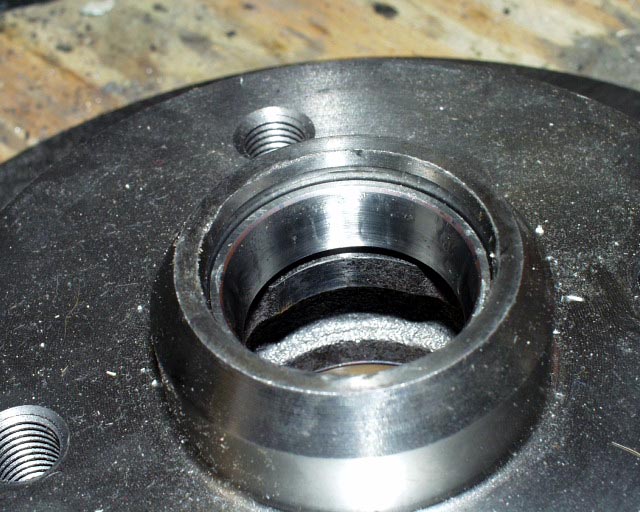
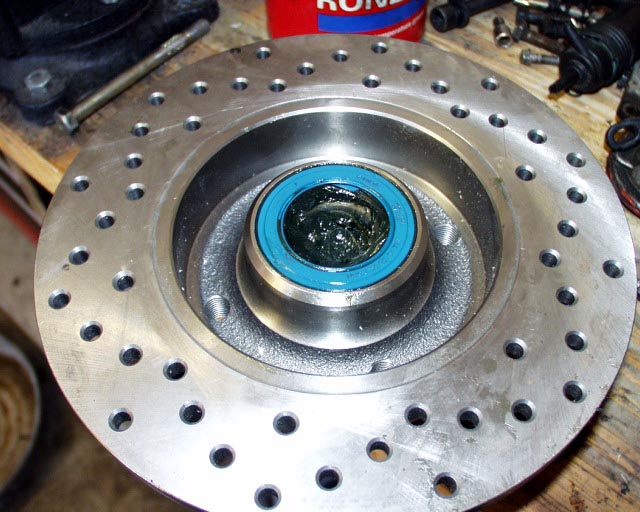
Outer bearing race in place
There are many ways to slip the wheel bearing race into the disc, you can use a long bolt like a starter bolt, and gently tap around the race to slip it in. I often like to use a large socket with a diameter similar to the outter edge of the race, but smaller than the bore of the rotor. You do NOT want to gouge the races for OBVIOUS reasons. The picture shows you how far you have to go, if you notice there is still a space below the race and the final edge where it should sit, continue to tap it in until it sit completely on this inner edge.
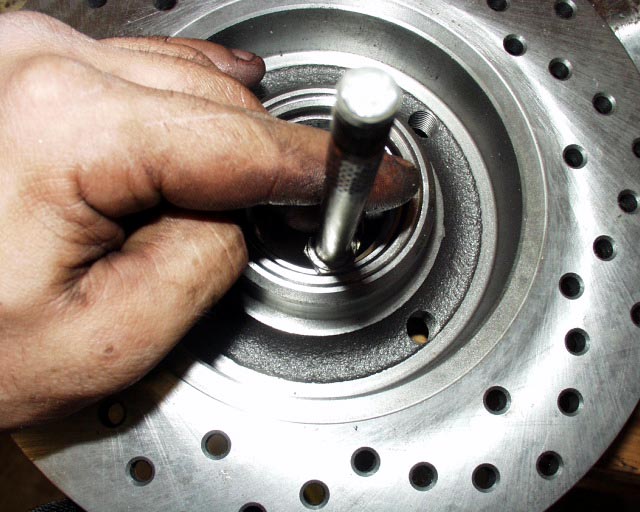
Driving the inner race into place with a starter bolt head
Proceed to insert the inner bearing race into the rear of the rotor, again the race is to be pushed in all the way until it seats on the inner edge.
Now, pack the bearing chock full of bearing grease. Get it in all of the needle bearings. Wear gloves – it’s real messy – but this will last years if you do it thoroughly.
Inner wheel bearing grease seal in place
Put the inner bearing into place, and then put the new inner grease seal on top.
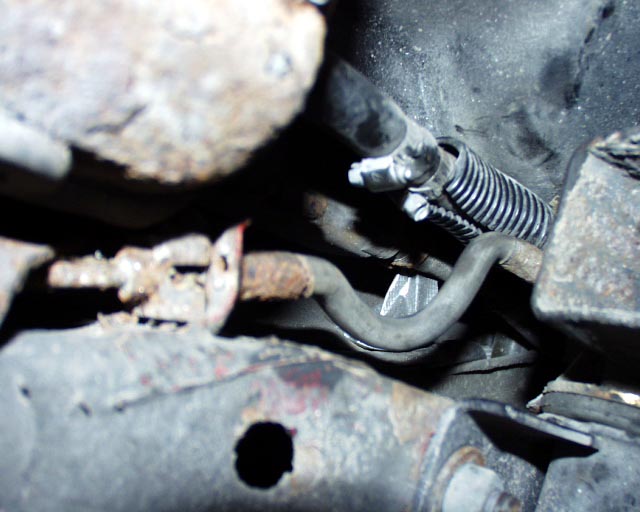
Rubber lines on the top of the axle beam
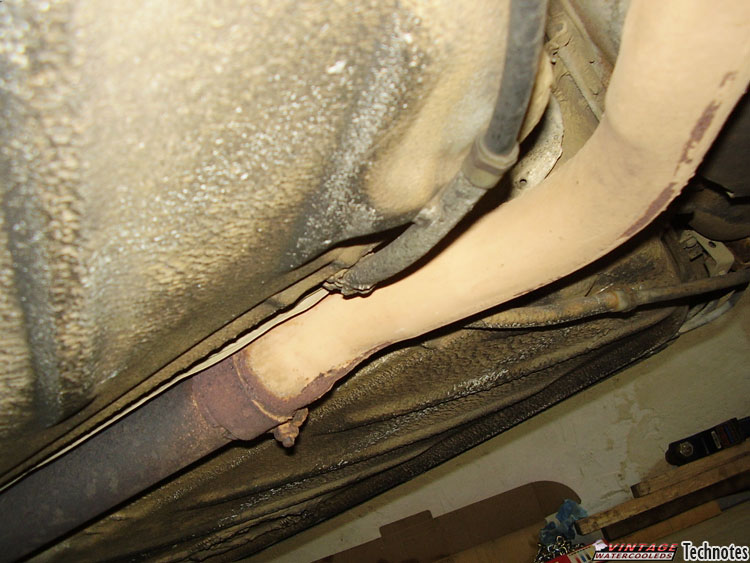
The only major issue in doing this conversion was to change the current brake line (hard line) from atop the axle to below the axle, So this picture shows the location of the first rubber line that needs to be disconnected (which I replaced with the dual female ended stainless line later, and then straightened out the line (be careful not to kink or fold it).
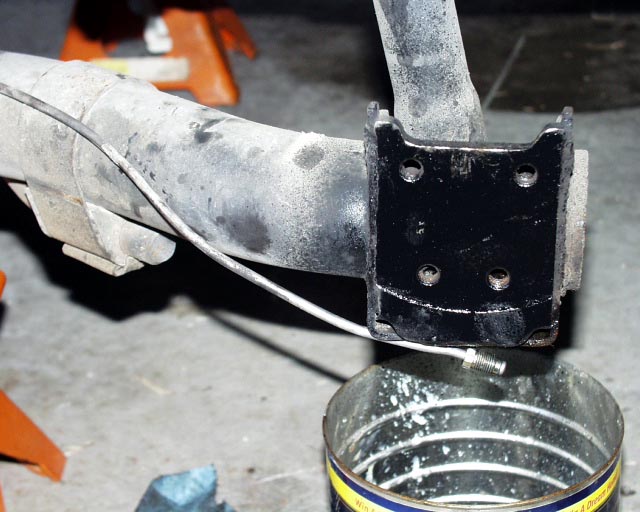
The picture below shows the routing of the stainless steel brake line on the axle beam. You can use fuel line rubber hose, slit on one side to provide additional anti-friction for the hard line against the rear axle. Re-close the clamp on the upper end of the axle to hold the line in place.
Rear hard line rerouted to the bottom
Clean out the bolt holes with a tap or blow them with compressed air. Bolt the new spindle into the same location as the old spindle with the dust shield (the big old black thing) in front of it. The bolt pattern is such that you cannot do it wrong. The four bolts get 44 ft-lbs (60 Nm) of torque.
Slide on the brake disc. BEFORE doing anything else, make sure you bolt the carrier down to the spindle with the brake disc in the carrier, the two carrier bolts get 25 ft-lbs (34 Nm) of torque. Then you can put the outer bearing on, washer, nut, nut locker, and cotter pin. The 24mm spindle nut only gets FINGER tight. This is just like drums where you tighten it enough that you can just move the washer with the tip of a screwdriver. Spin the rotor several times while tightening and loosening this nut to ensure the bearings are centered and happy.
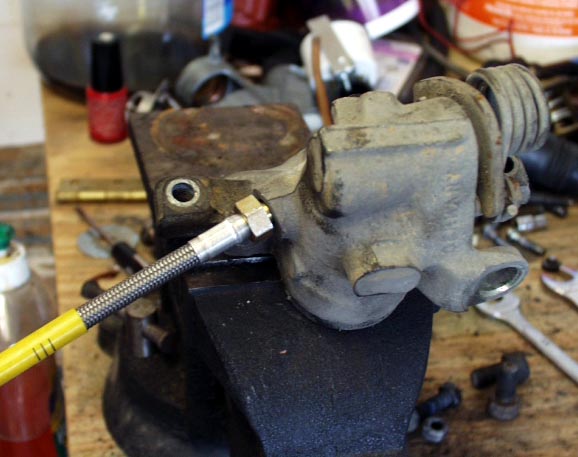
Brake hose into caliper
Attach the other end of the stainless brake line to the calipers. Install the pads into the carrier with included shims and clips (if any), then bolt the caliper onto the carrier.
Parking brake cable attachment
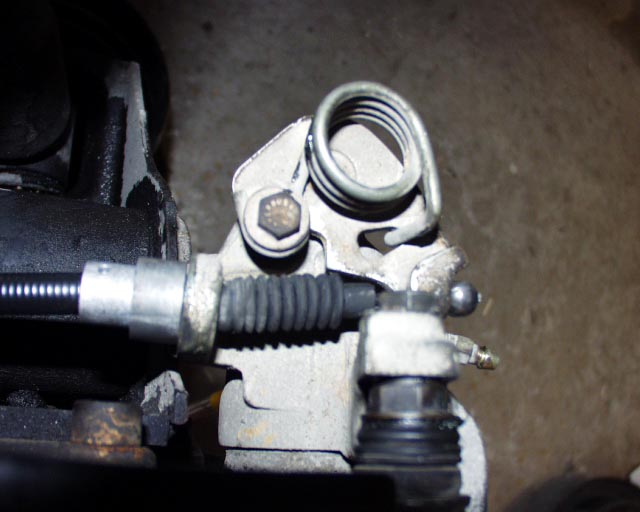
The parking brake cables run along the top side of the axle and slips through the mounting hole. Pull the rubber boot’s end back a bit. Push on the spring and slip the ball end into its final resting place. Run the lines through the body holes, and attach the other end to the parking brake lever inside the car.
Repeat all operations for other side of the car! (ha-ha! 😉 )
Get all of the air bubbles out of the brake system by bleeding it out. Use new fluid. The bleeding sequence is right-rear, left-rear, right-front, left-front.
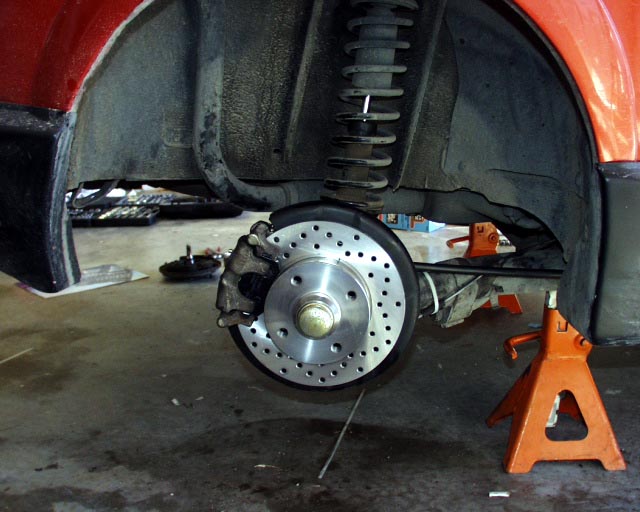
Here is the final product once you are done one side.
Completed disk brake conversion
If your calipers have the bleeder screw facing down, an important step with rear brake bleeding is to “gravity bleed” the rear calipers. With the brake line attached, the rear caliper should be removed from the carrier and suspended in such a way that the bleeder nipple points skyward so that it is the highest point of the caliper, then loosen the nipple and allow the air to escape and let the brake fluid fill the piston.
Initial brake bleeding with the caliper installed can leave an air bubble in the piston as the bleeder is not at the highest point. After the initial gravity bleed, future bleeding can be done as usual unless the rear brake line is removed from the caliper again.
The Bentley manual states, press the brakes 40 times after bleeding system to set the parking brake adjustment. I have found that the parking brake is still “soft”, I was advised by others that this is normal, and can take up to two weeks for it to adjust completely tight. This is pretty standard for any car with rear disc brakes and screw-in style pistons. Remember to park in first gear in the meantime! Also – those one-man pressure bleeders are well worth it. Get one!
This article is about how to polish the ridges off of the Mk2 Scirocco’s tailights to give them a smooth, glassy finish. It makes me want to eat some candy!
ATS Technotes + Timbo's Technotes. An archive of tech procedures for fixing early watercooled VWs from 1975-1992 with a focus on the VW Scirocco Mk1 and Mk2.




 This article is about how to polish the ridges off of the Mk2 Scirocco’s tailights to give them a smooth, glassy finish. It makes me want to eat some candy!
 This tech procedure is about cleaning the CIS airflow sensor for better running, and fewer starting and idle gremlins…


